WARN INDUSTRIES
PAGE 2
38083 Rev B1
INSTRUCTIONS:
STEP 1:
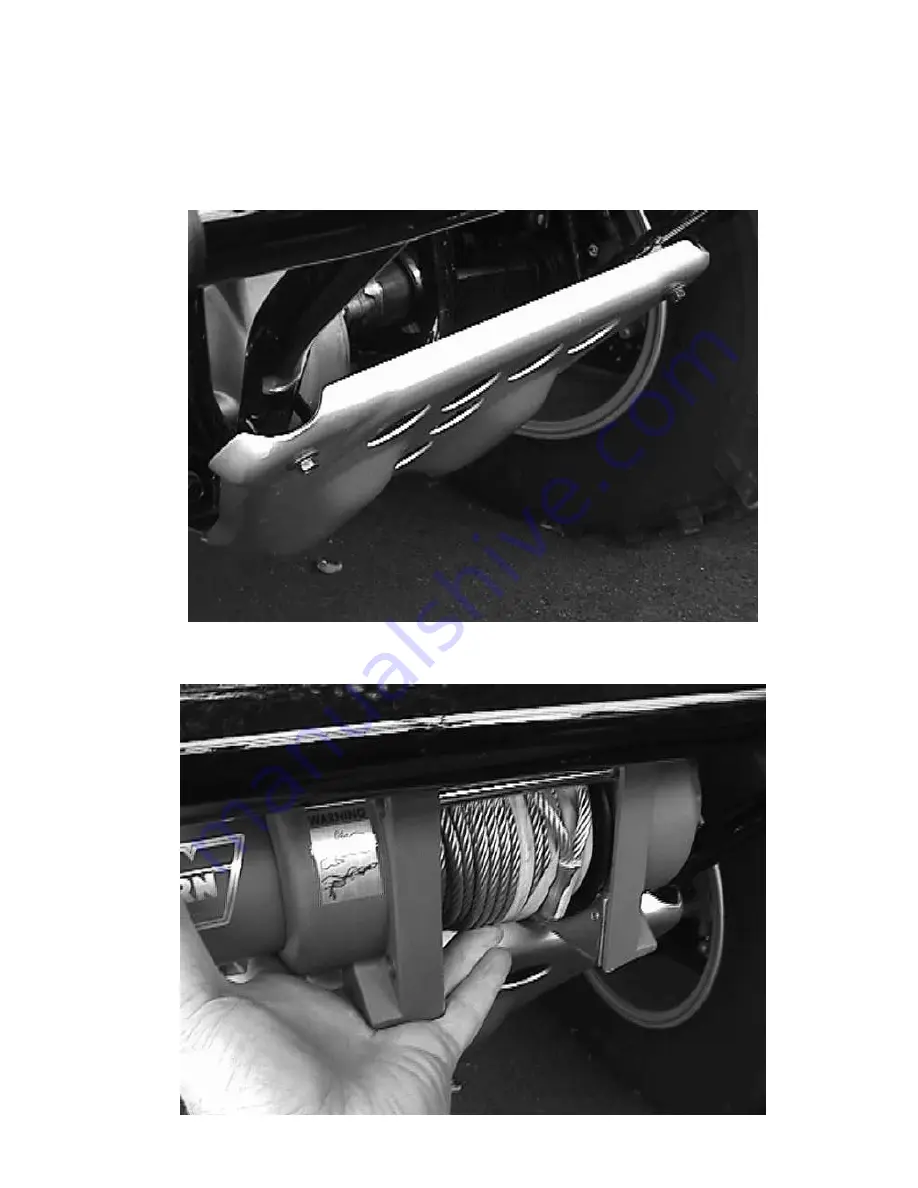
Remove the four bolts that attach the skid pan and remove the skidpan.
STEP 2:
Place winch up into the frame of the ATV, below and behind the front bumper.
Страница 1: ...ed with this product you must use your own good judgment CARELESS INSTALLATION AND OPERATION CAN RESULT IN SERIOUS INJURY OR EQUIPMENT DAMAGE READ AND UNDERSTAND ALL SAFETY PRECAUTIONS AND OPERATING INSTRUCTIONS BEFORE INSTALLING AND OPERATING THIS PRODUCT This guide identifies potential hazards and has important safety messages that help you and others avoid personal injury or death WARNING and C...
Страница 2: ...N INDUSTRIES PAGE 2 38083 Rev B1 INSTRUCTIONS STEP 1 Remove the four bolts that attach the skid pan and remove the skidpan STEP 2 Place winch up into the frame of the ATV below and behind the front bumper ...
Страница 3: ...ch up out of the way slip the mounting plate into position under the winch Do not bolt down the winch at this time STEP 4 Place the 20 u bolts into position around the frame and bumper tubes and into the mounting bracket Tighten with the 20 hex nuts and lock washers ...
Страница 4: ...ting plate Step 6 Attach the winch to the mounting plate with the four 5 16 18 hex cap screws and lock washers that came with the winch Make sure all fasteners are tightened securely at this time Make all electrical connections using the manual that came with the winch as a guide NOTE There is an alternate two hole winch mount configuration not shown in pictures on mounting plate When mounting a w...