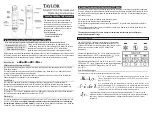
Display
Power Base
Screwdriver
Mounting Screws
Floor Sensor
The 6iE mini must be installed by a qualified
electrician. It requires a permanent 230 V AC
supply from a 30mA RCD or RCBO protected
circuit in accordance with the current edition
of the BS7671 Wiring Regulations.
Isolate the 6iE mini from the mains supply
throughout the installation process.
Ensure that wires are fully inserted into the
terminals and secured, free strands should
be trimmed, as they could cause a short-
circuit.
Install the 6iE mini in an area with good
ventilation. It should not be beside a
window/door, in direct sunlight or above
another heat generating device (e.g. radiator
or TV).
Ensure the distance from your router to the
6iE mini is not excessive. This will ensure the
wireless connection is not subject to range or
interference issues once installed.
For bathroom installations the 6iE mini MUST
be mounted outside of Zones 0, 1 and 2. If
this is not possible then it must be installed
in an adjacent room, controlling the rooms
using the floor sensor only.
The 6iE mini and its packaging are not toys;
do not allow children to play with them. Small
components and packaging present a risk of
choking or suffocation.
The 6iE mini is suitable for indoor use only. It
must not be exposed to moisture, vibrations,
mechanical loads or temperatures outside of
its rated values.
For safety and licensing reasons (CE/UKCA),
unauthorised change and/or modification of
the 6iE mini is not permitted.
Pack Contents
Safety Information
q
q
q
q
q
q
q
q
Step 1 - Getting Started
Isolate the thermostat and supply from
the mains supply.
Install a 50 mm deep electrical back box in
your preferred thermostat location. Pull wires
(heater, supply and floor sensor) through
back box and complete terminal wiring.
Unclip the display from the power base.
Release the display as shown.
2
1
1
2
3
4
230 V AC:
50Hz
Floor Sensor
Step 2 - Wiring Connections
Heaters. Max.
16A (3,680W)
This Quick Start Guide will guide you through
the installation and initial setup of your 6iE
mini thermostat. Always retain this manual
for future use. If you have any issues please
contact our technical helpline.
q
L1 & N4
Heater Live and Neutral
Max.
16A (3680W)
L2 & N3
Supply Live and Neutral
5 & 6
Floor Sensor (No Polarity)
ELECTRIC UNDERFLOOR HEATING
L1
Switched Live to Wiring Centre
L2 & N3
Supply Live and Neutral
N4
Not Used
N4
Not Used
5 & 6
Floor Sensor (No Polarity)
5 & 6
Not Used
HYDRONIC UNDERFLOOR HEATING
L1
Switched Live to Zone Valve/Boiler
L2 & N3
Supply Live and Neutral
CENTRAL HEATING
For extra low voltage or volt-free systems a contactor
must be used. Connecting the 6iE mini directly to
extra low voltage or volt-free boilers may cause
damage to the boiler circuit.
NOTE:
When using the sensor connected to
terminals
5 & 6
for air (or floor) temperature
control, a limit probe for the floor (or air) can
be connected to terminals
6 & 7 (EXT)
.
WiFi Thermostat
TM
6
iE
mini
The smartest, most efficient way to control
the world’s best selling floor heating.
Miniaturised.
WARNING!
The 6iE mini must be installed by a qualified electrician in accordance with the current edition of
the
BS7671 Wiring Regulations. Wire the thermostat using the diagram above and heater type wiring
information below.
NOTE:
For loads above 10 A, the conductor wire gage should be at least 2.5mm²


