INTRODUCTION
Your thermostat’s default screen is the Home Screen. This screen displays important information such as the
time, current loor and air temperature as well as the target set temperature. From this page you can either ac-
cess the “MENU” page (press “menu”) or override the current programmed temperature (press “ ” or “ ”).
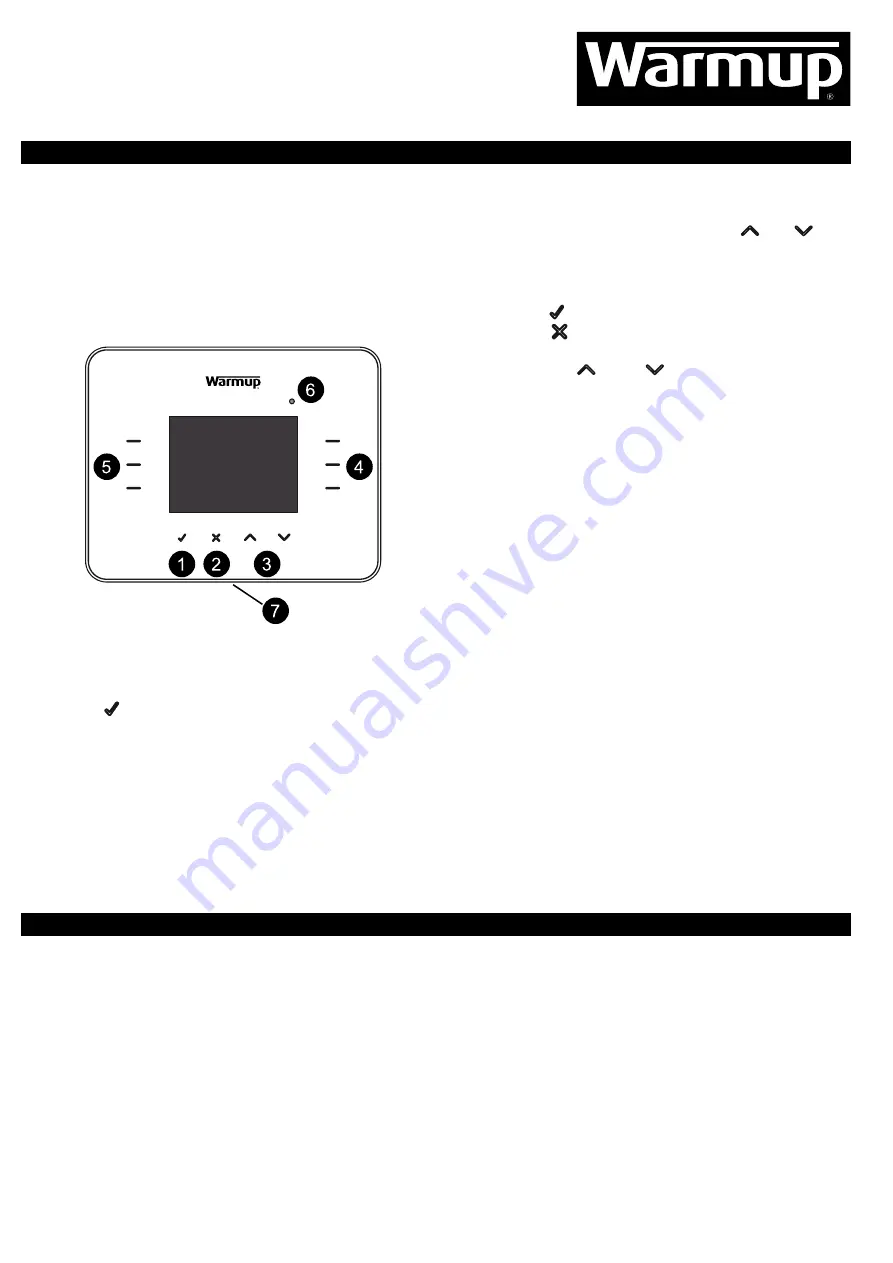
When using the 3IE thermostat there are some general rules to keep in mind:
(1) Pressing “ ” allows you to conirm your selection
(2) Pressing “ ” takes you back to a previous page in
the menu sequence
(3) Pressing the “ ” and “ ” buttons allow you to
change the setting which is highlighted
(4) Pressing an illuminated button in this group will al-
low you to highlight another setting to edit
(5) Pressing an illuminated button in this group will al-
low you to select another option in the menu
(6) When this light is illuminated it indicates that power
is being directed to the heaters
Hint:
You will often ind a “help” button on pages with
several options. Press the help button for more infor-
mation on the options available.
If you do not press any button on the thermostat for 1 minute, then it will go to standby mode. In standby mode
the screen will be dimmed but the thermostat will continue to function as normal. To exit standby mode press
“wake” ( ).
The button on bottom of the 3IE (button 7) is the power button. You can turn off your thermostat and Warmup
underloor heating system by holding down this button for 3 seconds. You can turn it on again by holding it
down for another 3 seconds.
This button can also be used if you get lost in the menus, press the power button on the bottom once to return
to the home screen.
GETTING STARTED
On initial power up the thermostat will guide you through set up procedure for the following:
Operating Guide:
for the Warmup 3iE Programmable Thermostat
3iE Operating Guide - 08/10 v1 © Warmup plc - 2010
• Language
• Time preference and Settings
• Date preference and settings
• Daylight savings
• Temperature Preference
• Theme
• Brightness
• Standby Brightness
• Heating LED
• Audio Feedback
• Floor type
• Set heating target
• Program schedule
• Set energy monitor (You may
skip this section and complete at
a later date )


