
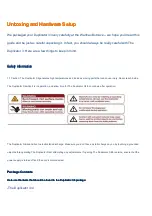

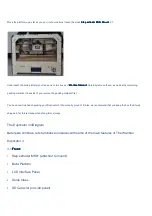


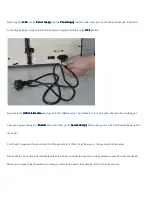

3.2
Back:
Back:
Back:
Back:
6.
Power switch
7.
Power input
8.
USB input
9.
Reset switch
10.
Right and left spool holders
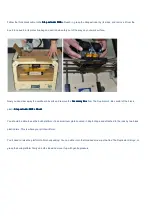
Initial Hardware Setup
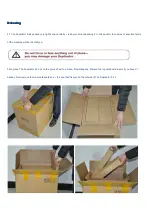
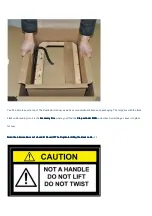
With the build platform raised, you have a clear view of the black cable that leads from the electronics cavity to the build platform.
Attached to the cable is a black
c
c
c
cable retainer clip
able retainer clip
able retainer clip
able retainer clip
. Now find the small round hole slightly to the left of center at the rear of the wooden
plate below the build platform. The clip should snap easily into place.
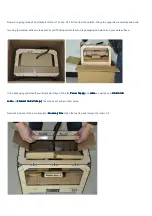
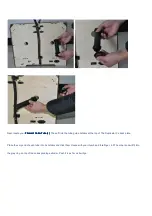
Now we’re going to bolt the
Step
Step
Step
Step extruder
extruder
extruder
extruder MK8+
MK8+
MK8+
MK8+
into place. Lower the build platform all the way by turning the threaded screw behind
the platform or by grasping the black plastic arms at the sides of the platform and pushing down with gentle but steady pressure.
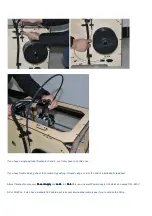
Now go back to the
Accessory Box
Accessory Box
Accessory Box
Accessory Box
and locate your
Bolts Kit
Bolts Kit
Bolts Kit
Bolts Kit
. Remove the two black bolts from the kit. Next, locate your
Hex Wrench
Hex Wrench
Hex Wrench
Hex Wrench
Kit
Kit
Kit
Kit
and find the hex wrench that fits the bolts.
Grasp your
Step ex
Step ex
Step ex
Step extruder
truder
truder
truder MK8+
MK8+
MK8+
MK8+
by the sides and take it out of its protective bag. Place it on the
Step
Step
Step
Step extruder
extruder
extruder
extruder MK8+
MK8+
MK8+
MK8+ Mount
Mount
Mount
Mount
so the
bolt holes line up and the fans face forward. Secure it with the bolts and wrench. 4.2