22
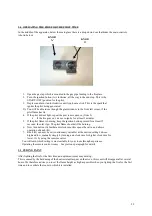
3. Remove the two screws of the flue adaptor and slide it out of the rails. (FIG. 3)
4. If the chimney is to be lined with a flexible liner, secure this to the flue adaptor using proprietary
heat proof sealant. Additional securing may be necessary.
5. Now place the fireplace in the recess and slide the flue adaptor piece back into place, screw the two
self tapping screws in place to retain it.
5A. The fireplace recess MUST be capable of withstanding the high temperatures generated by such an
appliance.
6. Now make the gas fitting according to the requirements (check ‘fitting the gas pipe’)
7. Make sure all gas fittings are gas proof.
8. Position the remote control receiver below the burner (see section 3.1 FIG.6)
9. Mount the decorative frame back onto the unit.
10. Put the logs (and vermiculite chips) in place, exactly as per instructions. This is critical to the
correct operation of the unit. Check (section 2.9)the chapter on the positioning of the log sets, as
these vary depending on whether it is L.P.G. or Natural Gas.
11. Put the glass window and frame back into place and secure with the two self tapping screws.
Remember not to touch the glass, because fingerprints cannot be removed after the fireplace has
been lit up without stripping it down.
2.4 Fitting the flue.
•
The gas fire is fitted with an open draw breaker and downdraught wind diverter.
•
The products of combustion must not be able to enter back into the property and therefore the fire must
be sealed into the chimney opening, complying with the standard in force at that time. A flexible flue
may need to be fitted.
•
For the connection between the apparatus and the chimney terminal / channel, use of corrosion free
material; that must comply with the latest standards in force at that time; must be used and adequately
sealed and attached at each end. The inner diameter of the pipe should be at least 100 mm.
•
The connection between the apparatus and the chimney channel should be sound and free of leakage
and must be one continuous length with no other joints.
2.5 Fitting the gas pipe.
•
An approved gas isolation tap should be fitted in the gas pipe that leads to the appliance, this tap should
be easily accessible.
•
A minimum, 15mm diameter gas supply pipe should be used to within 1 meter of the appliance.
•
The final connection to the appliance must be made in 8mm semi-rigid gas pipe. This must be less than
1 meter in length. The inlet valve has an 8mm nut and olive supplied.
•
Avoid tension on the gas block when fitting the gas pipe. Support the unit if necessary.
•
Check the entire unit for soundness after fitting the gas pipe.
2.6 Ventilation.
The fireplace is a so-called ‘open combustion apparatus’, which means that the air needed for the combustion
process is extracted from the room in which the fireplace is installed.
It is important to have enough ventilation in this room. Although the appliance is rated at less than 7kw input,
additional ventilation may be necessary in certain circumstances.
Содержание BORDEAUX
Страница 6: ...6 Fig 4a Fig 4b Fig 4c...
Страница 15: ...15 BRANDERSET BUITENMANTEL SCHUIFPLAAT GLASRAAM SIERLIJST VERBRANDINGSKAMER...
Страница 16: ...16...
Страница 17: ...17 INSTALLATION AND OPERATION INSTRUCTIONS FOR BORDEAUX GAS INSET STOVE...
Страница 25: ...25 FIG 4b FIG 4C LOG LAYOUT FOR NATURAL GAS FIG 4A FIG 4B FIG 4A...
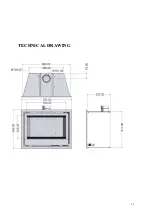
Страница 32: ...32 TECHNICAL DRAWING 14...


