


15.
Turn the rotor to check the ledger knife clearance for each
of the rotor knives.
Make sure that the rotor knives do not touch the ledger
knife.
16.
Close the upper rotor housing.
17.
Install the fastener that holds the upper rotor housing
closed. See
18.
Use a calibrated torque wrench to torque the fastener
to
80 lbf•ft (110 N•m)
.
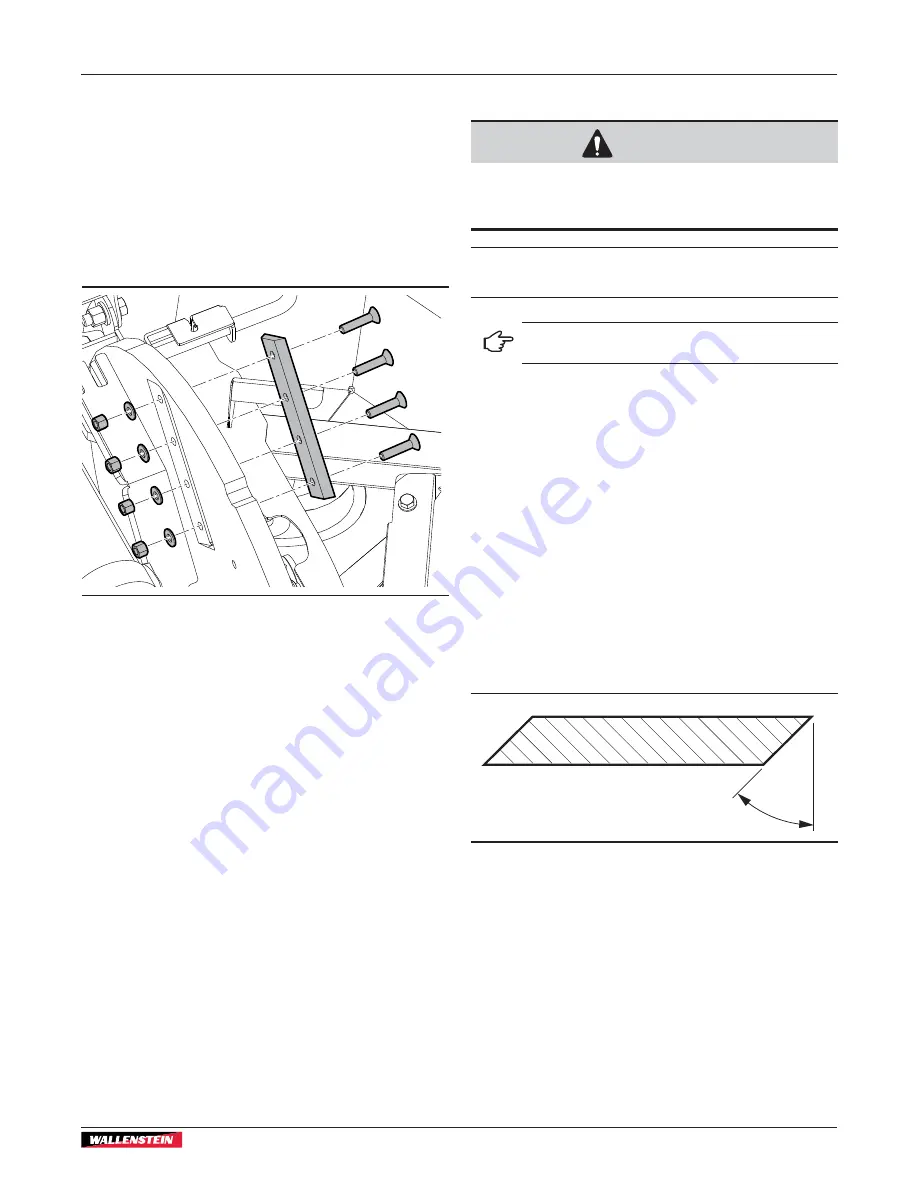
02266
Figure 44 –
Install a rotor knife
9.9.2 Sharpen a Rotor Knife
CAUTION!
Wear heavy gloves and handle the rotor knives
with care. The rotor knives are sharp.
W126
IMPORTANT! If the rotor knife gets hot during sharpening,
stop and wait for the rotor knife to cool.
Remove the same amount of material from all the
rotor knives.
1.
Remove the rotor knife from the machine.
For instructions, see
Replace a Rotor Knife on page 60.
2.
Clean the rotor knife.
3.
Examine the rotor knife for damage. If the rotor knife is
damaged, replace all the rotor knives.
4.
Put the rotor knife in a bench vice with the cutting edge
facing up.
Make sure that the rotor knife is clamped safely in the
bench vice.
5.
Use a grinder to sharpen the cutting edge of the rotor knife.
Sharpen the cutting edge to a 45-degree angle. See
6.
Do steps 4 and 5 again for the opposite cutting edge.
7.
Do steps 1 to 5 again for the remaining rotor knives.
45°
01097
Figure 45 –
Sharpen to a 45° angle
BXT72S
Wood Chipper
Service and Maintenance
61
Содержание BXT72S
Страница 35: ...02220 Figure 20 Set up the machine BXT72S Wood Chipper Operating Instructions 35...
Страница 41: ...02225 Figure 26 Transport position BXT72S Wood Chipper Transport 41...
Страница 45: ...02227 Figure 30 Storage position BXT72S Wood Chipper Storage 45...
Страница 75: ......
Страница 76: ...WallensteinEquipment com...


