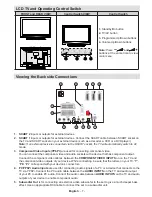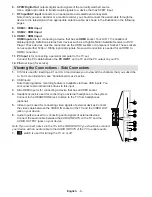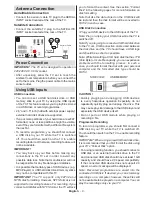
background image

English

   - 15 -

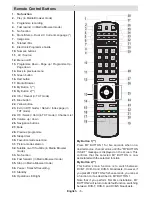
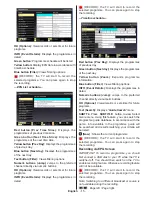
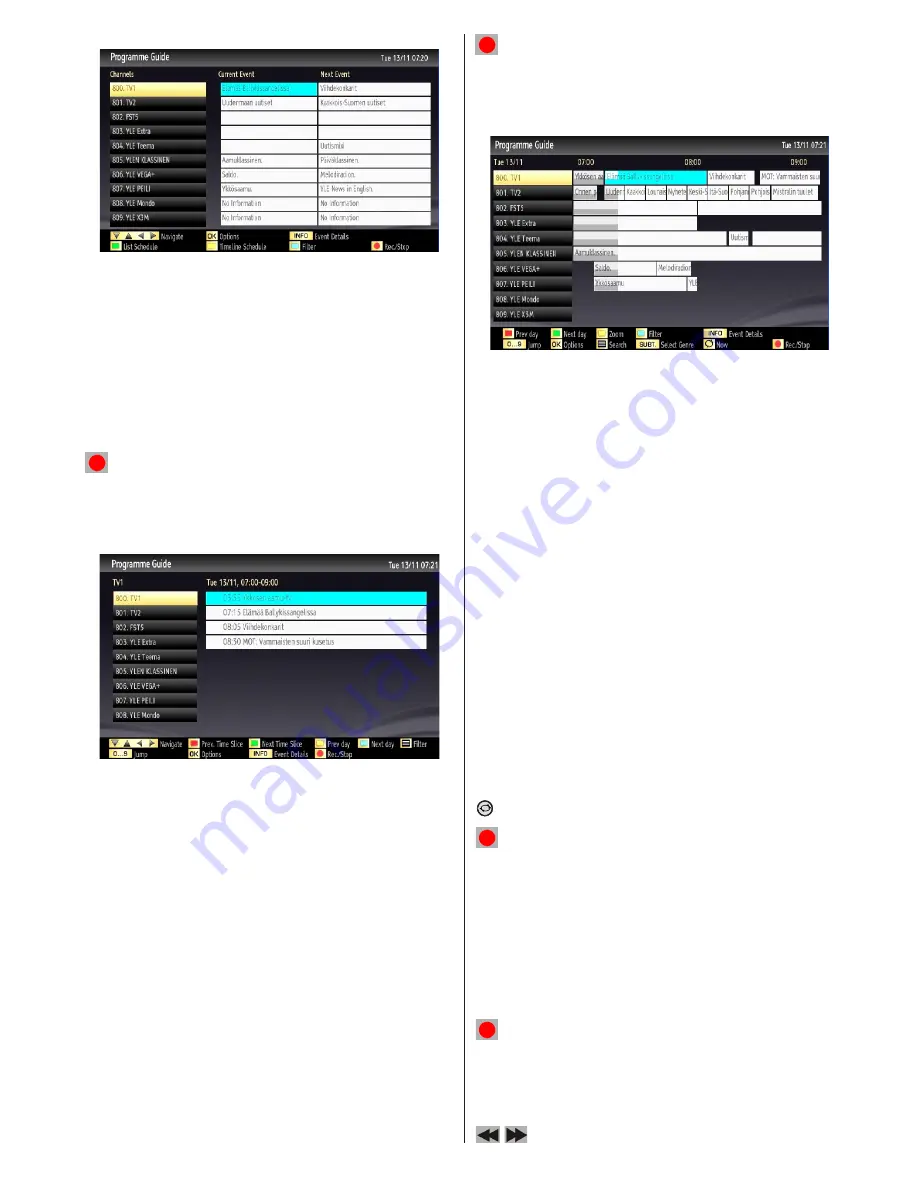
OK (Options):

 Views/records or sets timer for future 

programs.

INFO (Event Details): 

Displays the programmes in 

detail.

Green button: 

Programme schedule will be listed

Yellow button: 

Display EPG data in accordance with 

timeline schedule


Blue button (Filter): 

Views filtering options.

  (RECORD):  the  TV  will  start  to  record  the 

selected  progamme. You  can  press  again  to  stop 

the recording.

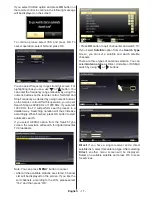
EPG List schedule

Red  button  (Prev  Time  Slice):

  Displays  the 

programmes of previous time slice.

Green  button  (Next  Time  Slice):

  Displays  the 

programmes of the next time slice.

Yellow button (Prev Day):

 Displays the programmes 

of previous day.

Blue button (Next day):

 Displays the programmes 

of the next day.

Text button (Filter): 

Views filtering options.

Numeric  buttons  (Jump)

:  Jumps  to  the  preferred 

channel directly via numeric buttons.

OK (Options):

 Views/records or sets timer for future 

programs.

INFO (Event Details): 

Displays the programmes in 

detail.

  (RECORD):  the  TV  will  start  to  record  the 

selected  progamme. You  can  press  again  to  stop 

the recording.

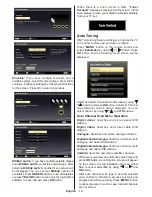
Timeline schedule

Red button (Prev Day):

 Displays the programmes 

of previous day.

Green button (Next day):

 Displays the programmes 

of the next day.

Yellow  button  (Zoom)

:  Expands  programme 

information.

Blue button (Filter): 

Views filtering options.

INFO (Event Details): 

Displays the programmes in 

detail.

Numeric  buttons  (Jump)

:  Jumps  to  the  preferred 

channel directly via numeric buttons.

OK (Options):

 Views/records or sets timer for future 

programs.

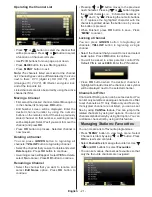
Text (Search):

 Displays “

Guide Search

” menu.

SUBTTL: 

Press  

SUBTITLE 

 button to view Select 

Genre menu. Using this feature, you can search the 

programme guide database in accordance with the 

genre.  Info  available  in  the  programme  guide  will 

be searched and results matching your criteria will 

be listed.

 (Now)

 : Shows the current programme.

  (RECORD):  the  TV  will  start  to  record  the 

selected  progamme. You  can  press  again  to  stop 

the recording.

Recording via EPG Screen

IMPORTANT:  To  record  a  programme,  you  should 

first connect a USB disk to your TV while the TV is 

switched  off. You  should  then  switch  on  the  TV  to 

enable recording feature. Otherwise, recording feature 

will not be available.

  (RECORD):  the  TV  will  start  to  record  the 

selected  progamme. You  can  press  again  to  stop 

the recording.

Note: Switching to a different broadcast or source is 

not available during the recording.

/

 : Page left / Page right.

Содержание WP3270LCD

Страница 1: ...COLOUR TELEVISION WITH REMOTE CONTROL OPERATING INSTRUCTIONS WP3270LCD BE WALKER WISE logon to www walker ie...

Страница 2: ...a Playback Using Media Browser 22 Viewing Videos via USB 23 Viewing Photos via USB 23 Slideshow Options 23 Playing Music via USB 23 Recordings Library 24 Media Browser Settings 25 Timeshift Recording...

Страница 3: ...you Notice especially the chapter SAFETY PRECAUTIONS Carefully keep the handbook as future reference When selling the device or giving it away absolutely give these directions for use Thank you for ch...

Страница 4: ...me sources such as lighted candles are placed on top of the TV Batteries should not be exposed to excessive heat such as sunshine fire or the like Lightning In case of storm and lightning or when goin...

Страница 5: ...ed through a device providing electrical isolation below a certain frequency range galvanic isolator see EN 60728 11 Electrical device not in the hands of children Never let children use electrical de...

Страница 6: ...f you set power save mode as Picture off a message will appear on the screen and backlight will be off within three seconds Press any button on the remote controller to activate the picture again When...

Страница 7: ...ward in Media Browser mode 34 Stop in Media Browser mode 35 Pause Timeshift recording 36 Standby 37 Operation LED light 38 1 2 ABC D 3 EF Source Menu Screen Lang www Presets Text FAV Sleep Back Exit S...

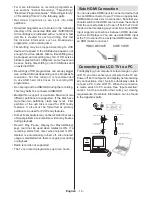
Страница 8: ...ed for connecting component video You can connect the component video and audio sockets with a device that has component output Connect the component video cables between the COMPONENT VIDEO INPUTS on...

Страница 9: ...n the PC INPUT on the TV and the PC output on your PC Ethernet input for service 12 Viewing the Connections Side Connectors CI Slot is used for inserting a CI card A CI card allows you to view all the...

Страница 10: ...the TV will ask you to format the content See the section Format Disk in the following pages for more information on disk formatting Note that ALL the data stored on the USB disk will be lost and then...

Страница 11: ...ogrammes are stored in the following directory of the connected USB disk DVR RECS All recordings are indicated with a number A text txt file is created for each recording This text file includes infor...

Страница 12: ...r SCART 2 Use a SCART cable as shown below Note These three methods of connection perform the same function but in different levels of quality It is not necessary to connect by all three methods HDMI...

Страница 13: ...ctor as illustrated below To access and play shared files you must Select Media Browser Press Menu button and select Media Browser by using Left or Right button Press OK to continue Select the desired...

Страница 14: ...ed so the TV will switch OFF To power down the TV completely unplug the power cord from the mains socket Note When the TV is switched to standby mode standby LCD can blink to indicate that features su...

Страница 15: ...ween AV modes Operation with the Remote Control The remote control of your TV is designed to control all the functions of the model you selected The functions will be described in accordance with the...

Страница 16: ...the programmes of previous day Green button Next day Displays the programmes of the next day Yellow button Zoom Expands programme information Blue button Filter Views filtering options INFO Event Det...

Страница 17: ...uture programmes To cancel an already set reminder highlight that programme and press the OK button Then select Delete Timer option The timer will be cancelled Note It is not possible to record or set...

Страница 18: ...y When finished press OK button to start automatic search If you select AERIAL option from the Search Type screen the television will search for digital terrestrial TV broadcasts Note You can press ME...

Страница 19: ...t Installation by using or button Press OK button and the following menu screen will be displayed Select Automatic Channel Scan Retune by using button and press OK button Automatic Channel Scan Retune...

Страница 20: ...e and network channel scan options After selecting search type as Digital Cable you can set the desired options and press OK button to search Satellite Manual Search In satellite manual scan you can e...

Страница 21: ...ress OK button to proceed Use or button to set Fine Tune When finished press OK button again First Time Installation If you want to delete all channels and settings please select First Time Installati...

Страница 22: ...inue Pressing or button moves to the previous next character Pressing or button toggles the current character i e b character becomes a by and c by Pressing the numeric buttons 0 9 replaces the highli...

Страница 23: ...Details of the station and current programme will be displayed on the information banner The information banner gives information on the channel selected and the programmes on it The name of the chan...

Страница 24: ...available image files will be filtered and listed on this screen Jump Numeric buttons Jump to selected file using the numeric buttons OK Views the selected picture in full screen Slideshow button Sta...

Страница 25: ...he playback with or OK button and activate symbols music or video file playback will continue randomly and the random playback will continue BLUE Switch between music photo video and all YELLOW Change...

Страница 26: ...backward on timeshift playback When the timeshift is reached timeshifting mode will be quitted and you will switch back to watching normal broadcast Press STOP button to quit timeshifting mode Similt...

Страница 27: ...a playback and return to return to Recordings Library Slow Forward If you press PAUSE button while watching recorded programmes slow forward feature will be available You can use button to slow forwa...

Страница 28: ...o exit Picture Settings Menu Items Mode For your viewing requirements you can set the related mode option Picture mode can be set to one of these options Cinema Game Dynamic and Natural Contrast Sets...

Страница 29: ...ture menu will be unavailable Instead VGA mode settings will be added to the Picture Settings while in PC mode PC Picture Settings For adjusting PC picture items do the following Press or button to se...

Страница 30: ...configured to suit your personal preferences Press MENU button and select Settings icon by using or button Press OK button to view Settings menu Operating Settings Menu Items Press or button to highli...

Страница 31: ...button and select the Settings icon by using or button Press OK button to view Settings menu Use or button to highlight Language and press OK to continue Use or button to set an item Settings are sto...

Страница 32: ...tal Settings Menu Operation Select an item by using or button Use or button to set an item Press OK button to view more options If you set Country option as UK in the first time installation Maturity...

Страница 33: ...to delete by pressing or button Press RED button Select YES by using or buttons to delete the timer Select NO to cancel Recording Configuration Select Recording Configuration item in the Settings men...

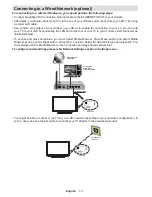
Страница 34: ...are automatically stored Configuring Network Settings optional Note Your TV s Network Settings include Wired and Wireless Connection options However if your TV does not have USB Wi Fi dongle sold sep...

Страница 35: ...med mb70_sdx sdx In addition to the uploading feature you will be able to download one of the satcodx files stored in USB device to the TV When download option is selected a list of satcodx files stor...

Страница 36: ...t this setting as On or Off If you change Standby Search to Off this function will be unavailable To use Standby Search please make sure that you select Standby Search as On Biss Key Biss is a satelli...

Страница 37: ...le and connection to the mains socket outlet Poor Picture Have you selected the correct TV system Is your TV set or house aerial located too close to a non earthed audio equipment or neon lights etc M...

Страница 38: ...anufacturer of the source equipment Appendix B PC Input Typical Display Modes The display has a maximum resolution of 1920 x 1080 The following table is an illustration of some of the typical video di...

Страница 39: ...rate etc Movie mpg mpeg MPEG1 2 MPEG1 Layer 1 2 3 MAX 1920x1080 30P 20Mbit sec dat MPEG1 MPEG1 Layer 1 2 vob MPEG1 2 AC 3 MPEG1 Layer 1 2 DVD LPCM mkv H 264 MPEG2 4 VC 1 MPEG1 Layer 1 2 3 AAC EAC 3 A...

Страница 40: ...led TV wakes up at 03 00 and searches broadcast channels for new software upgrade If new software is found and downloaded successfully with next power up TV opens with new software version Note on reb...

Страница 41: ...evel 4 1 MPEG 2 MP HL video decoder HD display multi format capable 1080i 720p 576p CVBS analogue output In HD channels this will not be available iii AUDIO MPEG 1 layer I II MPEG 2 layer II AAC HEAAC...

Страница 42: ...green or green and yellow The wire which is coloured blue or black must be connected to the terminal which is marked with the letter N or coloured Black The wire which is coloured brown or red must b...

Страница 43: ...50216345...
Отзывы: