background image

44

45

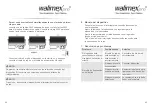
8.  Mantenimiento del dispositivo 

No permita que el dispositivo entre en contacto con la humedad o en agua.

Peligro de corte y astillas por la rotura y el estallido de los medios de 

iluminación LED.

Limpieza

Dispositivo

Limpieza

Carcasa

Eliminar la suciedad aparecida con un paño de 

microfibras seco.

9.  Eliminación de residuos y protección del medio ambiente

Deseche el dispositivo gratuitamente en su centro local de eliminación de 

residuos.

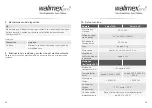
10.  Datos técnicos

Aparato

Sirius 160D

Sirius 160B

Alimentación 

eléctrica

DC 13-18V

Salida de poten-

cia de salida

AC 100-240V / 50/60Hz

Entrada de la 

tensión de red

DC 18V 4A

Peso

approx. 2 kg

Dimensions

approx. 25 cm x 35 cm x 7,5 cm

Longitud de 

cables de mando 

a distancia

approx. 3 m

Medios de  

iluminación LED

Medios de  

iluminación LED

160 parte á 0,4W

Temperatura de 

color

approx. 5500 K ± 200 K

approx. 3000 - 5600 K ± 

200 K

Potencia en 

lumen

> 6000 LM

> 5000 LM

Condiciones 

válidas  

de operación

-10 °C hasta + 40 °C

Condiciones de  

almacenamiento

Seco y libre de polvo en el embalaje original  

de -20 °C a +50 °C

Содержание Sirius 160B-LED

Страница 1: ...08 2020 WALSER GmbH Co KG Senefelderstrasse 23 86368 Gersthofen Germany info walser de www walser de Made in China Gebrauchsanleitung Instruction Manual Sirius 160B LED 160D LED...

Страница 2: ...13 8 Ger t instand halten 14 9 Entsorgung und Umweltschutz 14 10 Technische Daten 15 EN Contents 1 Understanding these instructions for use correctly 16 1 1 Markings on the device 16 1 2 Identificati...

Страница 3: ...soluci n de problemas 43 8 Mantenimiento del dispositivo 44 9 Eliminaci n de residuos y protecci n del medio ambiente 44 10 Datos t cnicos 45 FR Contenu 1 Pour bien comprendre la notice d utilisation...

Страница 4: ...r Verpackung weist auf diese Bestimmungen hin Mit der Wiederverwertung der stofflichen Verwertung oder anderen Formen der Verwertung von Altger ten Batterien leisten Sie einen wichtigen Beitrag zum Sc...

Страница 5: ...rsorgung indem Sie den Netz stecker ziehen ffnen Sie das Ger t nicht Reparieren Sie das Ger t niemals selbst Lassen Sie das Ger t ausschlie lich von einer Elektro fachkraft reparieren Halten Sie das G...

Страница 6: ...jedem Ger t kann die Farbtemperatur ver ndert werden Typ abh ngig 5 Ger t f r den Einsatz vorbereiten Ger t auf ein Stativ montieren Befestigen Sie die Videoleuchte mit der Stativaufnahme fest und si...

Страница 7: ...Ger t einschalten Ger t hat zu niedrige Leistung Erh hen Sie die Leistung mit dem Regler zum Dimmen typabh ngig Ger t ist defekt Reparatur darf nur von einer Elektrofachkraft durchgef hrt werden Bei V...

Страница 8: ...and halten 8 1 Ger t regelm ig pr fen und warten Alles Kabel und Stecker auf Besch digung pr fen WARNUNG Stromschlaggefahr und Brandgefahr durch Kurzschluss Lassen Sie das Ger t sofort durch eine Elek...

Страница 9: ...tails are regulated by national law The symbol on the product the instructions for use or the packaging refers to these provisions The recycling the material sensitive recycling or any other form of r...

Страница 10: ...d Don t open the device Never repair the device on your own The device should only be repaired by electricians Please follow this instruction manual for maintaining your device Please just use spare p...

Страница 11: ...trol with your device using the RJ45 socket When using several lamps at the same time Use the RJ45 cable to connect the individual lamps 4 Overview of components and control elements The illustration...

Страница 12: ...cal power supply by simply pulling out the mains plug 6 Operating the device Switch on the lamp on with the On Off switch on the device Adjust the desired light intensity with the brightness dimmer co...

Страница 13: ...nd dust free in the original packing at 20 C to 50 C 8 Maintaining the device WARNING Danger of electric shock and danger of fire due to short circuit Have the device repaired by an electrician immedi...

Страница 14: ...produit la notice d utilisation ou l emballage informe des dispositions applicables Avec le recyclage des mat riaux ou des anciens appareils et batteries vous contribuez de mani re significative la pr...

Страница 15: ...n en d branchant la prise secteur N ouvrez pas l appareil Ne r parez jamais l appareil vous m me Confiez sa r paration uniquement un lectricien sp cialis Entretenez l appareil comme indiqu dans la pr...

Страница 16: ...r ne peut pas tre modifi e su tous les appareils Selon le type 5 Pr paration des appareils avant utilisation Montage de l appareil sur un tr pied Fixez correctement l clairage vid o avec le support du...

Страница 17: ...l alimentation lectrique locale en d branchant le connecteur 6 Utilisation de l appareil Allumez l clairage l aide du bouton marche arr t sur l appareil R glez l intensit lumineuse de votre choix l a...

Страница 18: ...e et appropri e 10 Caract ristiques techniques Appareil Sirius 160D Sirius 160B Alimentation DC 13 18V Input de la tensi on d alimentation AC 100 240V 50 60Hz Output de la puis sance de sortie DC 18V...

Страница 19: ...dades de la jurisprudencia regional correspondiente Este s mbolo sobre el producto el manual de instrucciones o sobre el embalaje le avisa de dichas disposiciones Con el reciclaje la reutilizaci n de...

Страница 20: ...spositivo solo debe ser reparado por un electricista profesional Realice siempre el mantenimiento del dispositivo como se indica en este manual de instrucciones Para este dispositivo use piezas de rep...

Страница 21: ...dificarse la temperatura de color Depende del tipo 5 Preparaci n para el uso de los dispositivos Montaje del dispositivo en un tr pode Fije la luz de v deo con la toma del tr pode fijamente y de forma...

Страница 22: ...dispositivo Conecte las luces con el interruptor de conexi n desconexi n en el dispositivo Ajuste la fuerza de la luz deseada con regulador para la atenuaci n y la luminosidad Ajuste la temperatura d...

Страница 23: ...de eliminaci n de residuos 10 Datos t cnicos Aparato Sirius 160D Sirius 160B Alimentaci n el ctrica DC 13 18V Salida de poten cia de salida AC 100 240V 50 60Hz Entrada de la tensi n de red DC 18V 4A...

Страница 24: ...46 47...

Страница 25: ...48 49...

Отзывы: