37
Plast Coat HP 30
EN
9.4
REPLACE THE STATOR AND ROTOR
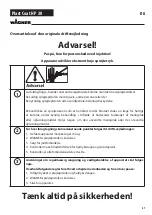
Machine must be depressurised.
If necessary, set the selector switch briefly
to “R” (reverse).
Watch the manometer ––> 0 bar.
Wear safety goggles.
Disassembly may only be carried out by
the person who controls the machine.
Never operate machine with an exposed
rotor.
Do not reach into the rotor when it is mov-
ing. Risk of crushing.
Caution if you have long hair. Only wear
close-fitting clothes at work.
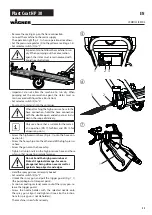
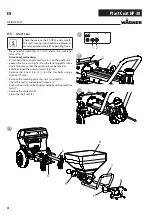
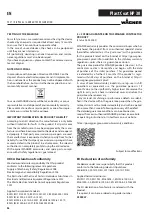
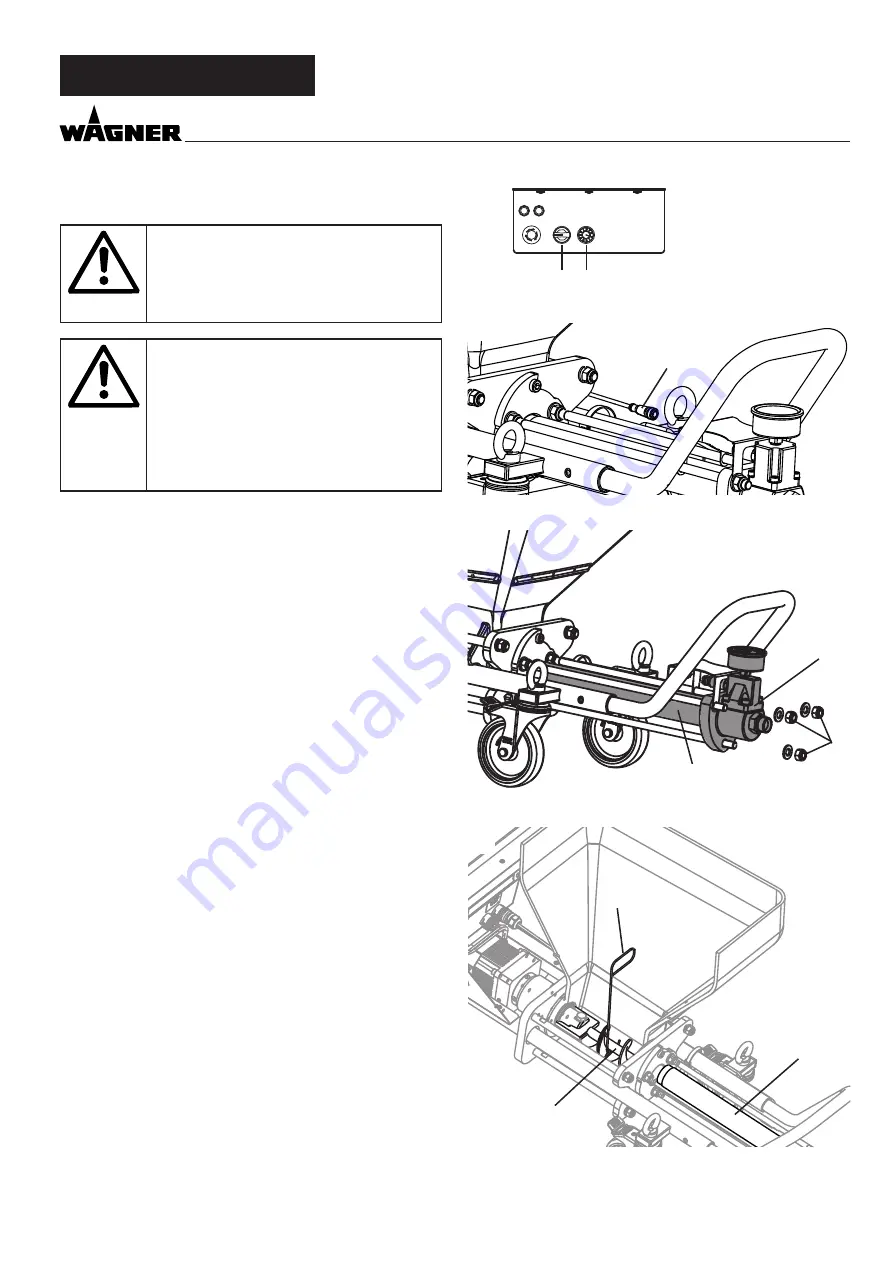
• Move selector switch (fig. 9, 1) to “0” and set pressure regula-
tor (2) to „0“.
•
Disconnect mains plug.
• Disconnect the control cable (Fig. 10, 1) on the pump unit.
• Loosen the 3 nuts (Fig. 11, 3) on the outlet unit (4) and sepa-
rate the outlet unit from the old stator (5).
• Lift the feed helix (Fig. 12, 6) with the hook tool (7) and sus-
pend the old rotor / stator combination (5).
• Lift the feed helix (Fig. 12, 6) with the hook tool (7), insert the
new rotor / stator combination (5) and suspend it in the feed
helix.
Ensure that the pins of the feed helix are pushed
into the rotor head.
• Reinsert the outlet unit and secure in place with the 3
screws.
• Connect the control cable.
MAINTENANCE
POWER
ERROR
PRESSURE
R
0
F
2
1
1
3
4
5
7
6
5
Содержание PLAST COAT HP 30
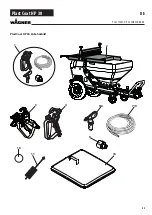
Страница 23: ...23 Plast Coat HP 30 DE PLASTCOAT HP 30 ZUBEH RBILD PlastCoat HP 30 Zubeh rbild 1 9 11 10 5 6 8 2 3 4 7 8 13...
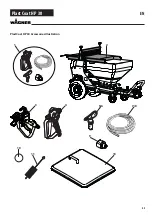
Страница 45: ...45 Plast Coat HP 30 EN PlastCoat HP 30 Accessories illustration 1 9 11 10 5 6 8 2 3 4 7 8 13...
Страница 67: ...67 Plast Coat HP 30 DA PlastCoat HP 30 Tilbeh rsbillede 1 9 11 10 5 6 8 2 3 4 7 8 13...
Страница 89: ...89 Plast Coat HP 30 SV 1 9 11 10 5 6 8 2 3 4 7 8 13 PlastCoat HP 30 Tillbeh rsbild...
Страница 91: ...91 Plast Coat HP 30 SV GARANTIEVERKLARING...

