


EN
Operation
CFX28 – CFX65DZ
14
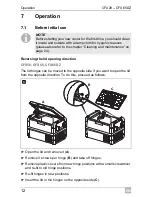
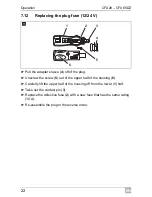
7.3
Connecting the cooler
Connecting to a battery
(Vehicle or boat)
The cooler can be operated with 12 V or 24 V
g
.
A
For safety reasons the cooler is equipped with an electronic system to
prevent the polarity reversal. This protects the cooler against short-circuiting
when connecting to a battery.
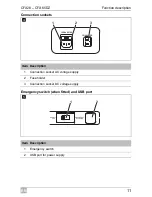
➤
Plug the 12/24 V connection cable (fig.
1
2, page 7) into the device
DC voltage socket and also into a 12 V or 24 V cigarette lighter socket.
Connecting to a 100–240 V AC mains
(E.g. in the home or office)
D
The coolers have an integrated multi-voltage power supply with priority circuit
for connecting to an AC voltage source of 100–240 V. The priority circuit
automatically switches the cooler to mains operation, if the device is
connected to a 100–240 V AC mains, even if the 12/24 V connection cable
is still attached.
➤
Plug the 100 – 240 V connection cable (fig.
1
3, page 7) into the device
AC voltage socket and connect it to the 100 – 240 V AC voltage mains.
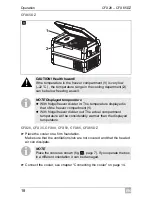
NOTICE! Danger of damage!
Disconnect the cooler and other consumer units from the battery
before you connect the battery to a quick charging device.
Overvoltage can damage the electronics of the device.
DANGER! Danger of electrocution!
Never handle plugs and switches with wet hands or if you are
standing on a wet surface.
If you are operating your cooler on board a boat from a mains
connection of 100–240 V
w
, you must install a residual current
circuit breaker between the 100–240 V
w
mains and the
cooler.
Seek advice from a trained technician.
Содержание CoolFreeze CFX28
Страница 2: ......