background image


C


USTOMIZING


I


NDEX


C


ONTENTS


I


NDEX


C


ONTENTS


6

6


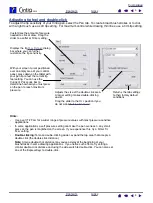
Calibrating the interactive pen display


You will need to calibrate the pen display tablet in order to align the screen cursor position with the position 
of the pen on the display screen.  This is required to adjust for parallax caused by the display screen cover 
glass and coating.  Set Cintiq in its working position, then follow the procedure below.

Important:

 When using a VGA connection with 

Cintiq, make sure the LCD monitor is properly 
adjusted before calibrating the tablet.

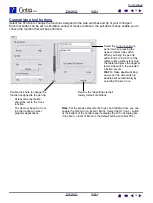
1.

In the Wacom Tablet control panel, select the 
Grip Pen from the T

OOL

 list and then select 

the C

ALIBRATE

 tab.

2.

If you are working with multiple monitors, 
select the M

ONITOR

 option corresponding to 

Cintiq.  (Only monitors that are set to one of 
the resolutions supported by Cintiq will 
appear in the list.)

3.

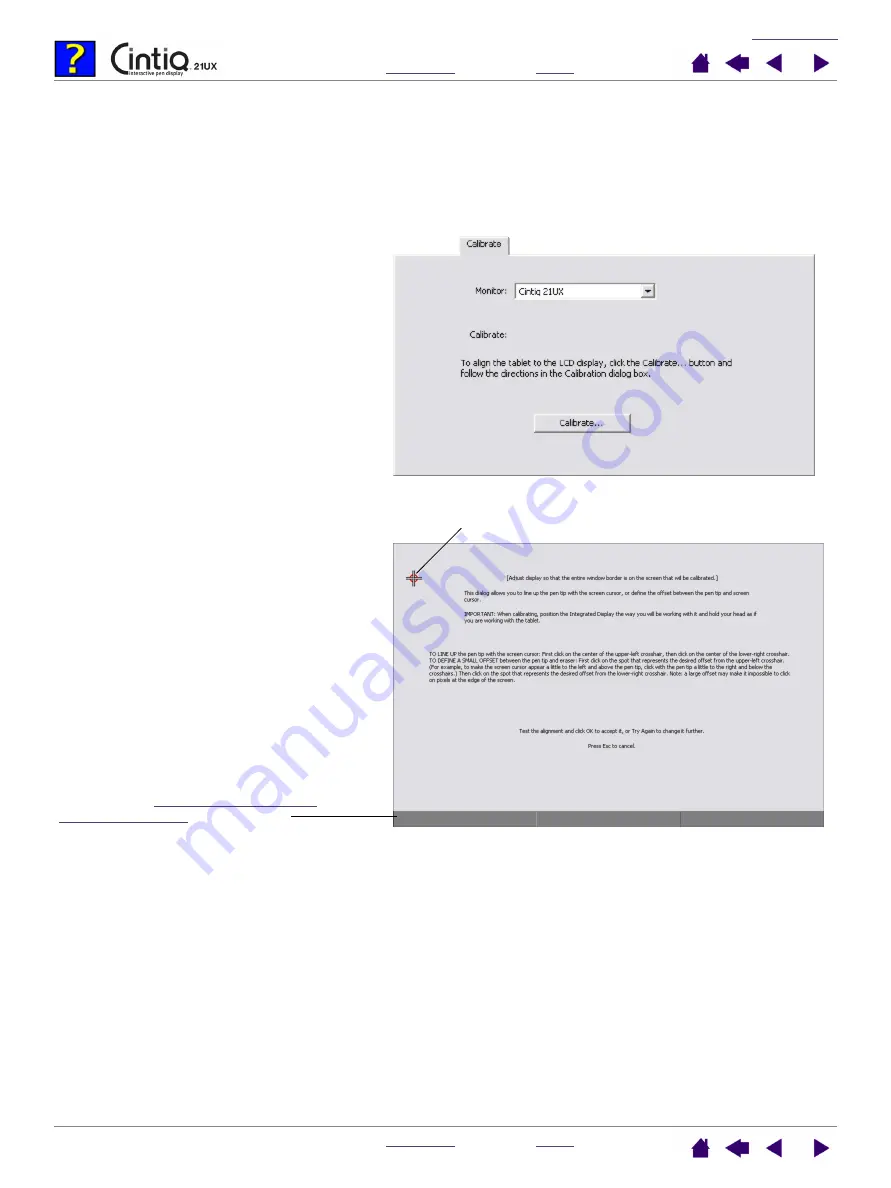
Click on the C

ALIBRATE

... button to activate 

the calibration screen.

4.

Holding the pen and positioning your head 
as you normally do when working with the 
tablet, use the pen tip to click on the center 
of the crosshairs in the upper-left corner.

5.

Then click on the center of the crosshairs 
that are displayed in the lower-right corner.

6.

Test the alignment and click OK to accept 
the calibration.  Click T

RY

 A

GAIN

 to 

recalibrate.

Be sure to read the directions in the 
calibration screen for detailed instructions 
and additional options.  The calibration 
setting applies to all applications.

Note:

 If more than one pen display tablet is 

installed on your system, be sure to select the 
Cintiq unit you are working with from the control 
panel’s T

ABLET

 list.

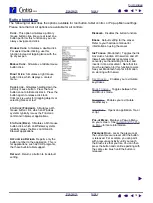
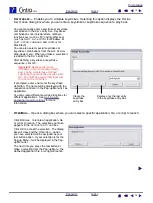
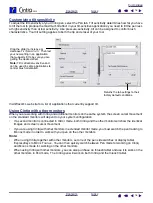
Crosshairs

Adjustment pattern for frequency and 
tracking.  See 

adjusting frequency and 

tracking (VGA only)

 for details.

Tip:

 If you prefer to see the screen cursor slightly offset from the actual position of the pen 

tip, calibrate by clicking on a spot showing that offset from the crosshairs.  For example, to 
have the screen cursor appear 1/10th of an inch above and to the left of the pen tip, calibrate 
by clicking on a spot 1/10th of an inch below and to the right of the crosshairs.

Содержание Cintiq 21UX

Страница 1: ...eraser pressure settings 11 Customizing tool buttons 12 Button functions 13 Customizing tilt sensitivity 16 Using Cintiq with other monitors 16 Customizing the tablet functions 17 Customizing ExpressK...

Страница 2: ...ollowing kinds of information are not included with this product information about your specific computer hardware or operating system or information about your application software Your best source f...

Страница 3: ...ngs Opening the control panel Control panel overview Control panel settings Opening the control panel To open the Wacom Tablet control panel use the Cintiq pen on the interactive pen display Windows C...

Страница 4: ...let it rest there in a few moments the Tool Tip will pop up Additionally your keyboard tab and arrow keys can be used to navigate the control panel Tabs display customizable settings for the selected...

Страница 5: ...control panel they provide detailed information about each tab and some of the more complex topics Many of the sections also contain useful customizing tips Calibrating the interactive pen display Adj...

Страница 6: ...g your head as you normally do when working with the tablet use the pen tip to click on the center of the crosshairs in the upper left corner 5 Then click on the center of the crosshairs that are disp...

Страница 7: ...he MONITOR menu 3 Click on the CALIBRATE button to activate the calibration screen 4 Press the Cintiq MENU button to view the On Screen Display OSD settings From the MAIN MENU select the IMAGE SCREEN...

Страница 8: ...om Tablet control panel TOOL list after touching the active area of the interactive pen display with the pen tip The control panel will automatically update to show the new tool and the options availa...

Страница 9: ...ize the tip sensitivity Hints Use a soft TIP FEEL for a wider range of pressure values with most pressure sensitive applications In some applications a soft pressure setting can make the pen overreact...

Страница 10: ...eraser Returns the tab settings to their factory default conditions Customizes the amount of pressure needed to erase Drag the slider to a softer or firmer setting Displays the eraser FEEL DETAILS di...

Страница 11: ...lider overrides the detail pressure settings If you customize the detail settings then drag the slider your detail settings will be removed Drag the slider to adjust the click threshold level This set...

Страница 12: ...and press the upper or lower side switch the selected function occurs Hint To make double clicking easier set the side switch to double click automatically by selecting DOUBLE CLICK Double click here...

Страница 13: ...ypically issues the BACK command in browser applications APPLICATION DEFINED Reports only the button number to the application This is for applications such as CAD programs that have built in tablet s...

Страница 14: ...Windows and RETURN Macintosh keys can be selected as a defined keystroke they cannot be used to select OK You must use your Cintiq input tool to click on the OK button If prompted enter a name for th...

Страница 15: ...more modifier key functions After choosing the modifier function s click OK Sets the screen cursor acceleration when in MOUSE mode Sets the screen cursor tracking speed when in MOUSE mode Tip If you...

Страница 16: ...oth Cintiq and the other monitor will show the identical images and screen cursor movement If you are using Cintiq with other monitors in extended monitor mode you must switch the pen tracking to MOUS...

Страница 17: ...display as it is to customize the Cintiq pen Simply open the Wacom Tablet control panel and select the FUNCTIONS icon in the TOOL list Select a tab to customize and change settings using the available...

Страница 18: ...item from the corresponding pull down menu Note ExpressKeys functions can be defined for use with specific applications and any changes you make on this tab apply to the currently selected item in the...

Страница 19: ...el s APPLICATION list To customize a Touch Strip choose a Touch Strip FUNCTION to perform when the Touch Strip is in use AUTO SCROLL ZOOM is the default setting for each Touch Strip When selected the...

Страница 20: ...oom events or may ignore scrolling completely When you select SCROLL from a Touch Strip s FUNCTION pull down menu the tab displays the custom scroll options for that Touch Strip Choose a Touch Strip s...

Страница 21: ...d by a particular application review the documentation that came with the application When you select ZOOM from a Touch Strip s FUNCTION pull down menu the tab refreshes to indicate that ZOOM has been...

Страница 22: ...TOUCH STRIP SETTINGS dialog box is displayed The settings within this dialog box are global and apply to all applications If you prefer not to use the continuous and single step operations of the Touc...

Страница 23: ...of functions that have been added to the Pop up Menu To change the order of an item drag it to a new location Double click on an item to make edits The font settings enable you to change the appearan...

Страница 24: ...e selected tool is removed from the list along with any custom settings you may have created for it A removed tool can be added back to the TOOL list by placing it back onto the tablet Note The FUNCTI...

Страница 25: ...LICATION list the ALL icon changes to ALL OTHERS and an application icon is displayed for the newly added application s In the following example application specific settings have been added for the p...

Страница 26: ...pecific settings applications that have not been customized in this manner will use the tool settings for ALL OTHERS Tip First customize settings for one application When you feel comfortable with the...

Страница 27: ...ication specific setting Then in the APPLICATION list select the application you want to remove from the list 2 Click on the APPLICATION list s button In the dialog box that appears click DELETE to co...

Страница 28: ...For USB tablets the system searches the USB ports When the new tablet is found it is automatically initialized If multiple tablets are installed the tablet used to open the Wacom Tablet control panel...

Страница 29: ...a double click Increasing the double click distance makes double clicking easier but may cause a delay in brush strokes in some graphics applications Eraser aware application A software application t...

Страница 30: ...ation Any application that supports pressure sensitive input Proximity The height above the pen display tablet active area where the Cintiq input tools are detected Screen cursor The pointer on the di...

Страница 31: ...e click customizing 9 Eraser feel customizing 10 advanced 11 Features control panel 4 Frequency and tracking adjusting 7 Functions button 13 Installing multiple tablets 28 Manual about 2 Monitors usin...

Страница 32: ...toshop are either registered trademarks or trademarks of Adobe Systems Incorporated in the United States and or other countries Microsoft and Windows are either registered trademarks or trademarks of...

Отзывы: