


Installation
8
Caution:
Ensure that COM1, COM2, COM3, VGA, and DVI Ports are adequately fastened with
the screws provided with the cables.
Connecting to the Server
The Thin Client can be physically connected to the server/network in three ways:
LAN connection through TCP/IP.
Direct connection through RS232.
Dial-in remote connection through a modem.
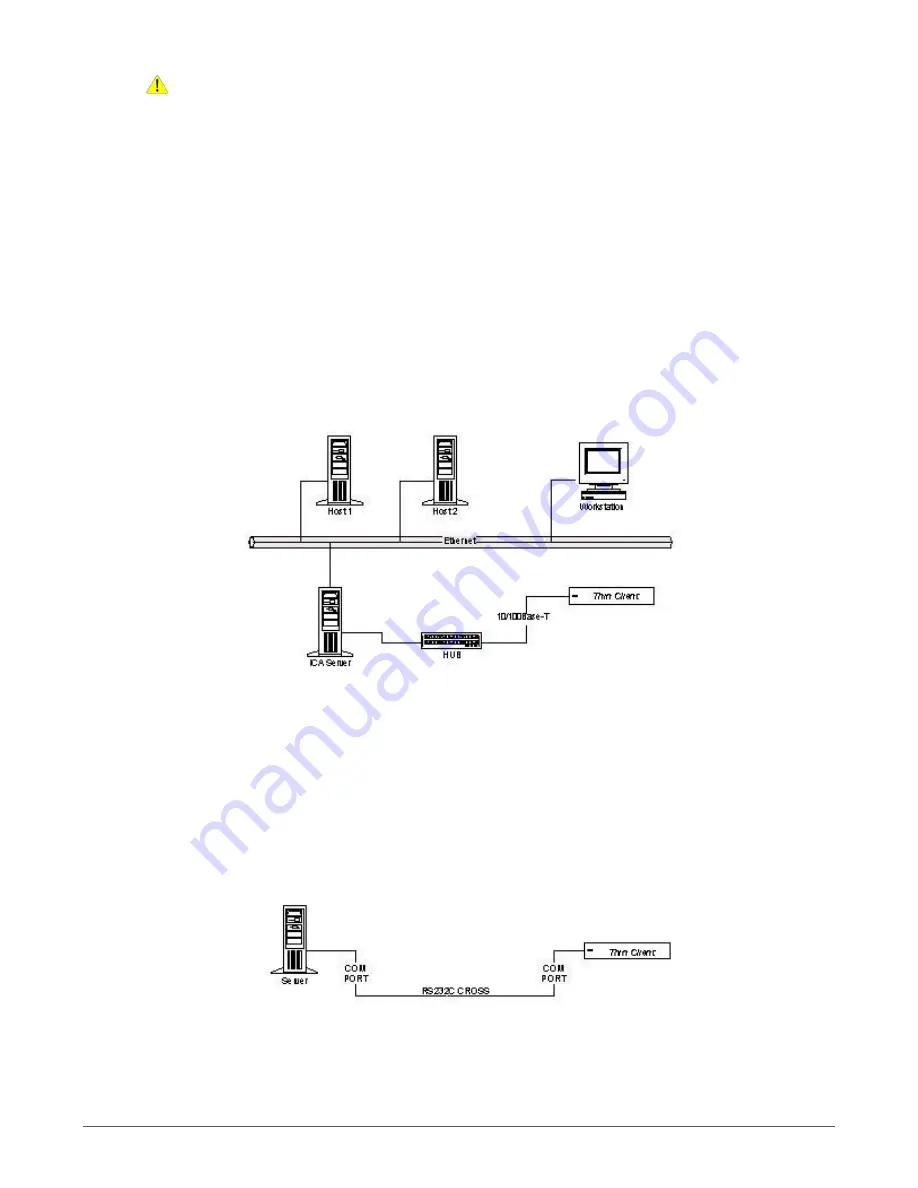
LAN Connection through TCP/IP
To connect client to LAN through TCP/IP:
1. Connect one end of a 10/100/1000 cable to the LAN port of the client.
2. Connect the other end to a LAN hub as shown in Figure 3.
Figure 3: LAN Connection through TCP/IP
3. Press the power button to turn on the Itona F series. The front panel LED lights up and the client
boots up with a beep sound. The Connection Manager screen appears.
Direct Connection using RS232 cable
To connect client directly using RS232 cable:
1. Connect one end of an RS232 cross cable to a serial port of the client.
2. Connect the other end to a serial port of the server as shown in Figure 4.
Figure 4: Direct Connection through RS232
3. Press the power button to turn on the Itona F series. The front panel LED lights up and the client
boots up with a beep sound. The Connection Manager screen appears.


