19
2. Tool Hanger Assembly:
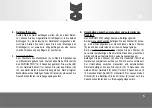
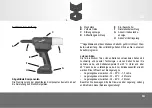
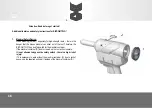
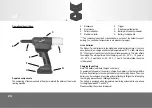
If you want to hang the rivet tool for example on a balancer, use the supplied
hanger assembly (J) into the two holes (K), which are provided on both sides
of the tool head. Make sure that you bend the hanger (J) only to the extent
necessary, in order to keep sufficient pretension of the wire hanger (J).
3. Service Function:
To replace the nose piece (A), the jaws should be separated from
the nose piece. To do this, press and hold the trigger (E) of the
RIVDOM TWO² for 5 seconds. The white LED (F) on the tool
base is flashing (1/s). Release the trigger (E) and the tool will
remain in the back position. After the nose piece has been
changed, press the trigger briefly (E) once again and the jaws will return to
the initial position.
4. Switching between manual and Automatic Return
Function:
The RIVDOM TWO² has two operation modes:
In manual mode, press the trigger (E) until the rivet mandrel
breaks. Then release the trigger (E) and the jaws will return to the initial
position.
In automatic mode, you must press the trigger (E) only once briefly. The
jaws will pull the rivet and recognizes the mandrel break and the jaws will
return to the initial position automatically. If you press trigger (E) without any
rivet (idle stroke) the tool runs a complete stroke of 30mm before it reverses
automatically.
To switch between manual and automatic return press the trigger (E) for 10
seconds. The white LED on the tool base (F) flashes (1/s) after 5 seconds,
then after 10 seconds the LED flashes (F) faster (0.5/s). Release the trigger
(E) and press it again briefly, so that the clamping jaws return to their initial
position.
GB
Содержание Rivdom TWO2
Страница 1: ...1 ORIGINALBETRIEBSANLEITUNG F Notice originale GB Original instructions ...
Страница 2: ......
Страница 6: ...6 I II III IV V VI 1 1 2 3 4 5 D ...
Страница 17: ...17 D ...
Страница 27: ...27 GB ...

