•
Camera function operation
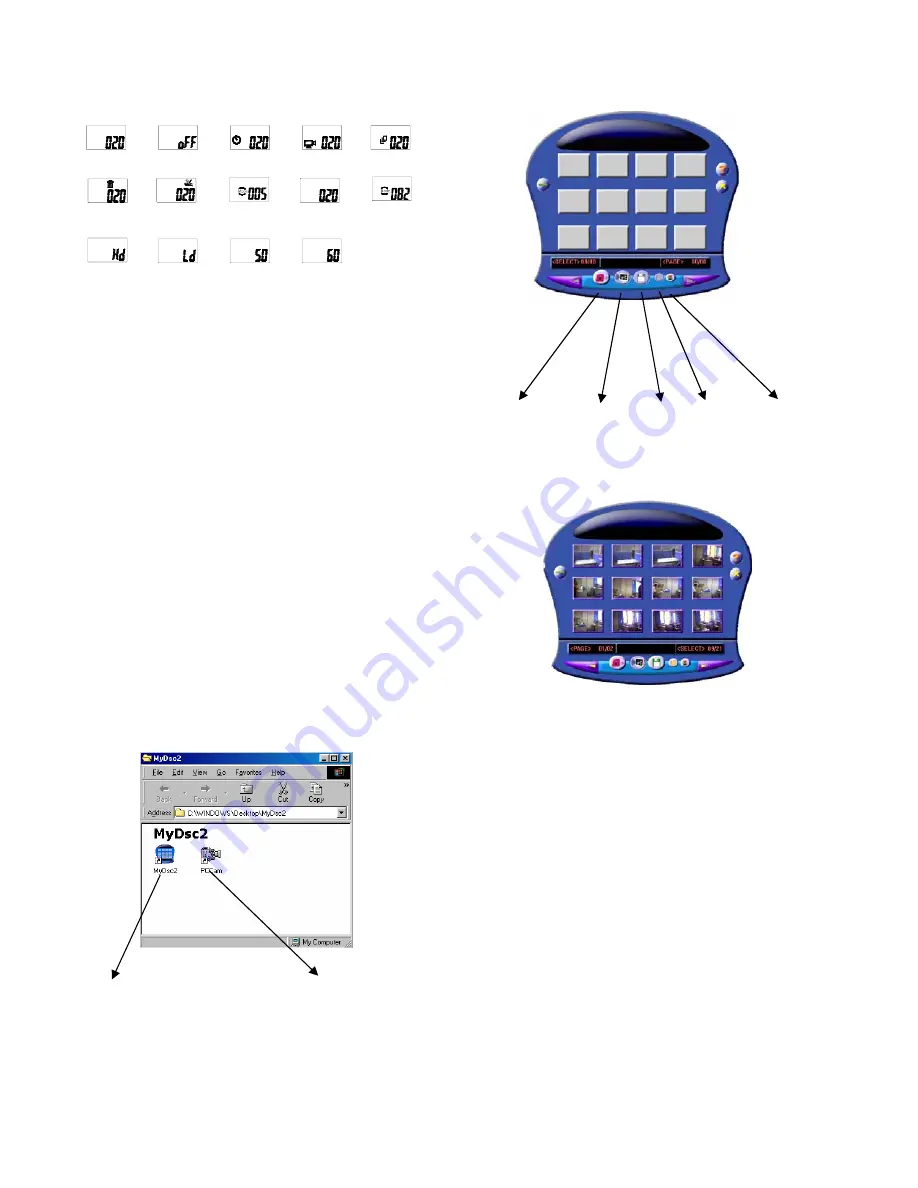
If the MODE button is pressed consecutively, the camera LCD
display will show the following symbols:
Lo
Change the
frequency to 50Hz
Del the last
picture
Change to non-
compression mode
Change to
compression mode
Change the
frequency to 60Hz
Ready to take
Low-
Resolution pictures
Turn into standby
mode
Ready to take
Hi-
Resolution pictures
Hi
Del all pictures
Self timer
Continuous
capture
Capture 3 photos
Lo
Change to Low-
Resolution mode
Change to Hi-
Resolution mode
Hi
•
Take pictures
1.
Press “mode” button to turn on the camera, the camera is set
to take high-resolution pictures. The number of images that
have been taken will be shown on the LCD screen.
2.
Look through the viewfinder to find the subject you would
like to take.
3.
Press the “Shutter” button to take a picture and a beeping
sound will occur. At the same time, the number on the LCD
display will be increased by one.
4.
When choosing “CS” mode, you can capture 3 photos
continuously.
ATTENTION:
When the lighting is not bright enough when taking a photo,
the Auto exposure and Gain control need more time to
settle. You have to hold the camera steadily and wait a
little longer for the “beep” sound to occur. If the
environment is too dark to take a picture, you will hear
“beep” “beep” sound indicating shooting failure.
•
Download Picture
1.
Connect the camera to the computer with an USB cable. The
computer will automatically update new information to
confirm the connection.
Download pictures PC Camera
2.
Open the folder “My DSC2” on desktop and then double
click “My DSC” icon. The download interface will be ejected
out from the screen.
Download Transfer Save Select all Edit image
3.
Click the download button; the pictures thumbnail you’ve
taken will be consecutively displayed on the interface.
4.
Click any thumbnail with the right button on the mouse to
zoom in on it. Click a thumbnail to select it or click the
“select all” button to select all thumbnails.
5.
After selecting the pictures you want to save, a red frame
will appear around the photo. Click on the “save photo”
button, select the path and name to save.
6.
After saving all the pictures you want, you can clear the
memory of the camera and start taking pictures again.
•
PC Camera
1.
Double click the PC Cam icon; you will open a PC-camera
frame.
2.
If no image is shown, you may click “Preview” in the
“options” menu to activate the driver.
3.
You can click the “video capture pin” in the “options” menu
to select the resolution; the default is QVGA (320x240).
VPS05-0908 DC-ST15 Series_ENG


