44
6. Tap Axles. A message box is displayed saying ‘Settings have changed - Send to Jbox (Yes) -
Dicard changes (No)’.
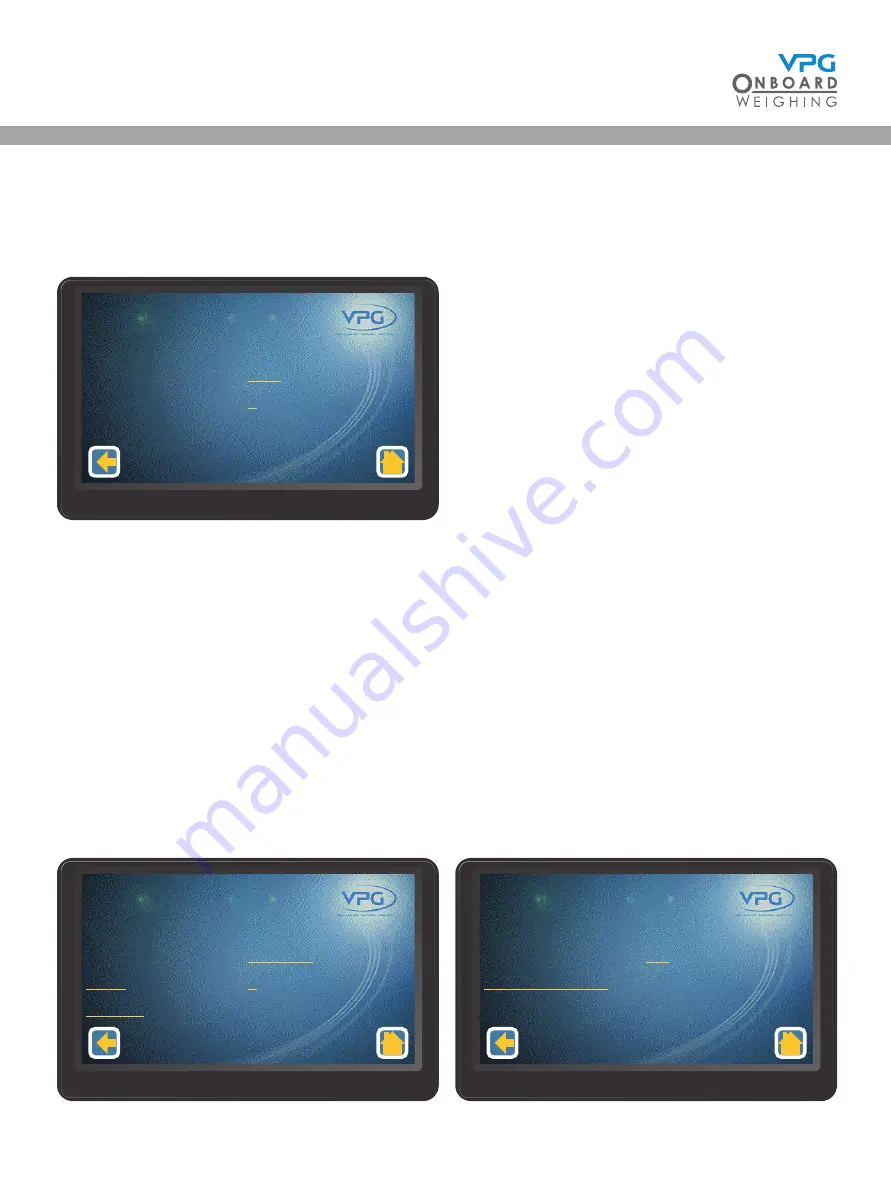
7. Tap Yes to update. The axle set up menu is displayed:
8.
Swipe left or right to select an axle to configure. 1-2 is the Front Axle and 2-2 is the rear axle.
9.
Tap to set the type of axle configuration and the sensor count that is appropriate for that axle.
Select Axle. This is used to indicate that axle transducers are located on a single leaf spring
axle. This type of configuration will usually have 2 sensors on each axle, one for each side of
the vehicle.
10.
Repeat steps 8 and 9 to configure each axle for the junction box.
11. Tap the back icon. A message box appears saying ‘Send Axle Map to Jbox?’
12. Tap yes to update.
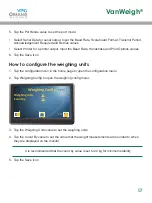
13. Tap the back icon to return to junction box setup page:
Axle Number
Type
Sensor Count
1 - 2
Axle
4
Axle Set Up
1/1
Junction Box
Orientation
Axles
Sensors
1 - 1
Disabled
2
3
Junction Box Set Up
1/2
Junction Box
Jitter Filter
Restore Defaults
1 - 1
Off
Junction Box Set Up
2/2
VanWeigh
®
Содержание VanWeigh
Страница 1: ...vpgonboard com VanWeigh Installation Setup and Calibration Manual ...
Страница 2: ...2 VanWeigh ...
Страница 5: ...5 VanWeigh ...
Страница 8: ...8 VanWeigh ...
Страница 9: ...9 Installation VanWeigh ...
Страница 33: ...33 System Overview VanWeigh ...
Страница 39: ...39 Configuration 2240 VanWeigh ...
Страница 59: ...59 System info and Diagnostics VanWeigh ...
Страница 67: ...67 Appendix A VanWeigh ...
Страница 70: ...70 VanWeigh ...
Страница 71: ...71 Appendix B VanWeigh ...
Страница 73: ...73 Appendix C VanWeigh ...
Страница 76: ...76 VanWeigh ...
Страница 77: ...77 Appendix D VanWeigh ...


