background image

English

Français

Deutsch

Español

En-

9

Selecting and Playing Sounds  

3. Using controllers

5

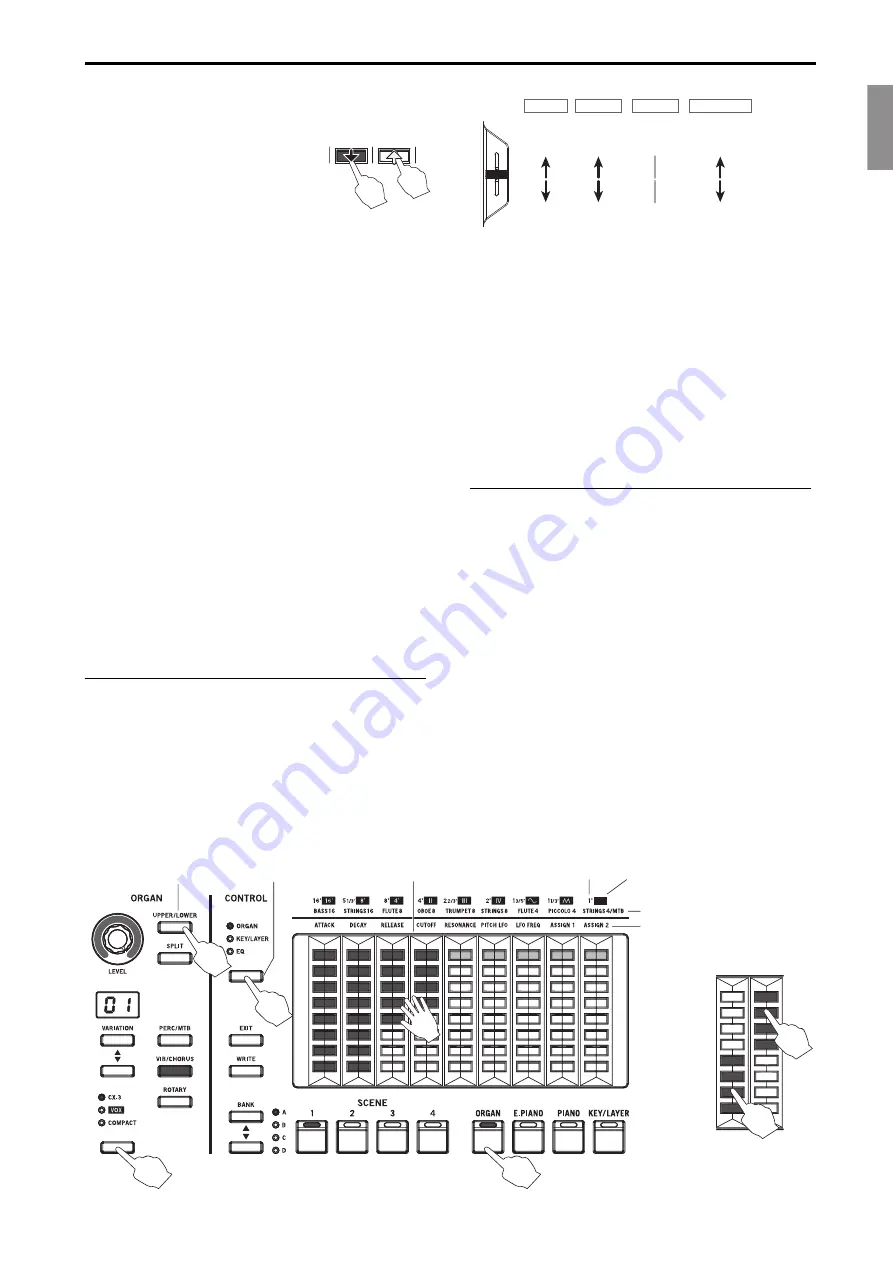
Operate the drawbars by touching the touch sensors with 
your fingers. You can control more than one drawbar at the 
same time.

Tip: 

Sliding your finger up and down 

the LEDs will make it easier to turn 
them on/off. 

Tip: 

The sensors operate as on/off 

switches for each tone when the organ 
type is set to COMPACT. Touch the bottom half of each bar 
to switch the tones on, and touch the top half to switch the 
tones off. (See the right side of the diagram shown below.)

Note: 

When switching to a different type or variation of the 

same part, the touch sensor settings you have changed will be 
switched to the settings for each variation. Also, when the 
power is turned off, the touch sensor settings will be erased.

Note: 

To save the touch sensor settings that you have adjusted 

for each sound, save the scene. (See page 11)

Note: 

The settings cannot be saved to the variations 

themselves.

Adjusting the KEY/LAYER filter, EG and LFO

1

Turn the KEY/LAYER part select button on.

2

Select the type using the KEY/LAYER type button.
Press the VARIATION 

 buttons to select the variation 

to adjust.

3

Select KEY/LAYER using the CONTROL button.

4

Adjust the settings by touching the touch sensors with 
your fingers.
You can touch more than one sensor at the same time.

Tip: 

The function names (such as ATTACK, DECAY and so on) 

are shown above each touch sensor. The functions controlled 
by USER 1 and USER 2 will differ for each variation.

Note: 

To save the touch sensor settings that you have adjusted 

for each sound, save the scene. (See page 11)

Bend lever

You can make changes to the sound by pushing the bend lever 
up or down. The lever will move back to center position when 
released.
The functions that are changed by the bend lever will differ, 
depending on which part is on.

ORGAN part

: Switches the rotary speaker simulation between 

slow (stop) and fast. 
Switch the ROTARY button on (the button will light) to turn 
the rotary speaker simulation on.

E. PIANO part

: This switches the tremolo effect on/off.

PIANO part

: Disabled.

KEY/LAYER part

: Bends the pitch up/down.

Note: 

When more than one part is on (layered mode), the 

functions are given priority as shown below.

1.

 ORGAN, 

2.

 E. PIANO, 

3.

 PIANO, 

4. 

KEY/LAYER

When the PIANO part and KEY/LAYER part are layered, the 
bend lever will be disabled.

Keyboard

The keyboard of the VOX Continental is velocity sensitive, but 
aftertouch is not supported. This keyboard features waterfall 
keys (the keys are slightly sloped towards the player, and 
feature smooth edges).
When playing sounds other than organ type sounds, your 
playing strength (velocity) can affect aspects of the sound such 
as the volume and the EG speed, allowing you to vary the 
character of the attack.
You can also use the DYNAMICS knob to instantly adjust how 
the volume and tone will be changed in response to how hard 
the keys are played (velocity) (See page 12).
For organ type sounds, you can set whether the tone will 
sound at the shallower part of the keyboard or at the deeper 
part of the keyboard. You can play glissandos, trills and so on 
like with a vintage tonewheel organ (See page 21). You can 
also split the keyboard into UPPER (upper part of the 
keyboard) and LOWER (lower part of the keyboard), or play in 

CONTROL button

UPPER/LOWER

button

Adjusting the organ drawbars

Part select buttons

ORGAN type buttons

Touch sensor 

CX-3

COMPACT

For “COMPACT”

(KEY/LAYER)

ORGAN

VOX

5

1

2

3

4

OFF

ON

Priority
when layered

Fast

Rotary

speed

ORGAN

Slow

(stop)

1

On

Tremolo

E.PIANO

Off

2

Disabled

PIANO

3

Up

Pitch bend

KEY/LAYER

Down

4

Содержание CONTINENTAL-61

Страница 1: ...a Scene 11 Saving a scene to the SCENE 1 4 buttons 11 Listening to the demo songs 11 Playing back the demo songs 11 Detailed Functions 12 1 Master control 12 2 Part select 12 3 ORGAN part 13 4 E PIAN...

Страница 2: ...Model VOX CONTINENTAL 61 VOX CONTINENTAL 73 This device complies with Part 15 of FCC Rules Operation is subject to the following two conditions 1 This device may not cause harmful interference and 2 t...

Страница 3: ...unction About the Owner s Manual The VOX Continental Owner s Manual is organized as follows VOX Continental Owner s Manual printed this document VOX Continental MIDI Setting Guide PDF VOX Continental...

Страница 4: ...in full stereo sound across the keyboard for both delicate and powerful richly expressive sound See page 14 6 KEY LAYER part Selects various types of sound variations such as clavinet brass strings s...

Страница 5: ...rt of the keyboard 3 Lower part MIDI channel see page 20 MIDI IN OUT connectors 5 USB USB A port Connect an USB storage device such as a USB flash drive commercially available to save and load scene d...

Страница 6: ...he DAMPER jack When you press the pedal the notes you ve pressed will be sustained so that they will continue even after you take your hands off the keyboard Tip With the Korg DS 1H damper you ll be a...

Страница 7: ...will light and the keyboard will be ready to play once a number is shown in the VARIATION display 3 Turn on the power of the external output devices that are connected to the OUTPUT jacks of the VOX...

Страница 8: ...2 Press a button from SCENE 1 4 to select a scene from 1 to 4 The saved scene will be recalled allowing you to play the sound Note If you change the part variation effect octave and other settings the...

Страница 9: ...he lever will move back to center position when released The functions that are changed by the bend lever will differ depending on which part is on ORGAN part Switches the rotary speaker simulation be...

Страница 10: ...REVERB button 2 Select the effect type Press the type button to select the effect type Note When you switch to a different effect the factory default settings for that effect will be applied To set th...

Страница 11: ...ble See page 23 Listening to the demo songs Playing back the demo songs The VOX Continental comes with 16 demo songs that are appropriate for each sound on the keyboard Organ sounds 4 electric piano s...

Страница 12: ...dynamics effect of the DYNAMICS knob on or off Note The DYNAMICS settings are not saved in scenes This will always be off when the power is turned on Turning this button on will cause the dynamics to...

Страница 13: ...aying the VOX Continental with UPPER and playing an external MIDI keyboard with LOWER Turn the UPPER LOWER button off and set the VOX Continental and the drawbars to UPPER To control the drawbars of a...

Страница 14: ...ON display Select the variation for the acoustic piano you selected with the PIANO type button The variation number is shown in the VARIATION display Note When the PIANO part is off the VARIATION disp...

Страница 15: ...CX 3 Each drawbar can be used to add overtones to the basic sounds The drawbar pitches are listed below 16 5 1 3 8 4 2 2 3 2 1 3 5 1 1 3 1 UPPER the upper part of the keyboard and LOWER the lower par...

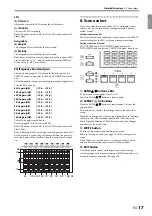
Страница 16: ...to use the touch sensors Note The settings shown here are saved when a scene is saved Amp EG Adjusts the amp EG of the variation This sets how the volume will change over time 1 ATTACK Sets whether t...

Страница 17: ...ed when the power is turned off and will be recalled when the instrument is turned on 8 Scene select Up to 16 sounds that are set on the VOX Continental can be saved and you can recall those settings...

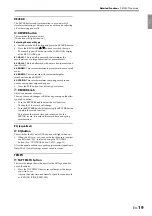
Страница 18: ...fault settings for that effect will be applied 3 EFFECT knob Adjusts the effect that you select using the EFFECT type button The way the sound changes will differ depending on the effect type and vari...

Страница 19: ...sed in some guitar amps and organs Press the EXIT button to exit from type selection 7 REVERB knob Adjust the amount of reverb The way the sound changes will differ depending on the effect type and va...

Страница 20: ...ION buttons For minus values a dot appears beside the number on the right side of the cent value in the VARIATION display Press the VARIATION and buttons at the same time to reset the value to 0 3 Pus...

Страница 21: ...N buttons 1 2 3 These curves produce an effect when you play strongly 4 This is the typical curve 5 6 These curves let you produce dynamic change without having to play very hard 7 This curve provides...

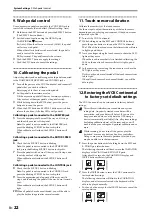
Страница 22: ...hen bring the pedal all the way down towards you When calibration is finished the SCENE 3 button will light 10 When all pedals have been calibrated you will be able to play the keyboard again after se...

Страница 23: ...sage Err will be shown in the VARIATION displays of the PIANO and KEY LAYER parts Press the EXIT button to escape and format the storage media on your computer If there is very little free space remai...

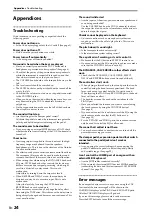
Страница 24: ...ause the delay time is being abruptly changed and becomes non continuous This is not a malfunction The sound is distorted Are the inputs of the mixer powered monitor speakers and so on being overloade...

Страница 25: ...CHORUS PHASER FLANGER COMP DRIVE WAH controllable via pedal Master effects DELAY 1 DELAY 2 CROSS 3 TAPE 4 MOD DLY REVERB 1 HALL1 2 HALL2 3 ROOM1 4 ROOM2 5 SPRING EQ 9 band stereo input output VALVE DR...

Страница 26: ...ifications Error messages Accessories All product and company names are the registered trademarks of their respective companies Damper pedal KORG DS 1H Pedal switch KORG PS 1 PS 3 Keyboard stand ST Co...

Страница 27: ...2017 VOX AMPLIFICATION LTD 3 E...

Отзывы: