46
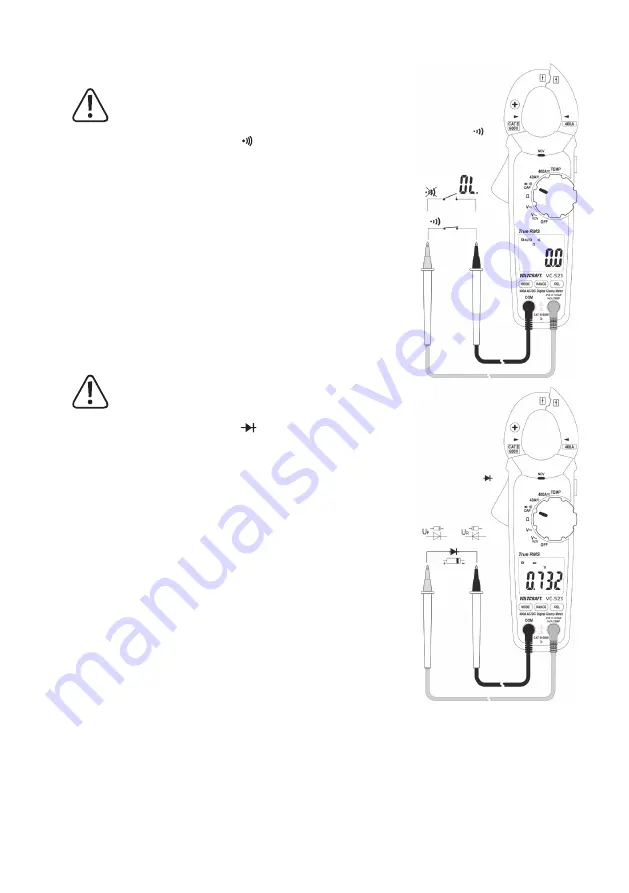
g) Conducting a continuity test
Make sure that all objects that you wish to measure (includ-
ing circuit components, circuits and component parts) are
disconnected and discharged.
• Switch on the DMM and select the mode. The continuity test symbol
and the Ω symbol will appear on the display. Press the button again to
switch to the next measuring mode.
• Plug the red lead into the V terminal (K) and the black lead into the COM
terminal (I).
• An approximate value of <50 Ohm is recognized and you will hear a beep.
The continuity test measures resistances of up to 400 Ohm.
• “OL” (overload) indicates that the measuring range has been exceeded or
that the circuit is broken.
• After taking a measurement, remove the leads from the measured object
and switch off the DMM.
h) Diode test
Make sure that all objects that you wish to measure (includ-
ing circuit components, circuits and component parts) are
disconnected and discharged.
• Switch on the DMM and select the
mode. Press the “MODE” button
to switch measurement modes. The diode test symbol and the V unit will
appear on the display. Press the button again to switch to the next measur-
ing mode.
• Plug the red lead into the V terminal (K) and the black lead into the COM
terminal (I).
• Check the measuring leads for continuity by connecting both measuring
probes to one another. A value of approx. 0.000 V should be shown.
• Connect the measuring probes to the object that you want to measure
(diode).
• The continuity voltage (“UF”) will be shown in Volts (V). “OL” indicates that
the diode is reverse-biased or defective. Try taking the measurement again
in the opposite polarity.
• After taking a measurement, remove the leads from the measured object
and switch off the DMM.
Содержание 1693351
Страница 114: ...114 ...
Страница 115: ...115 ...


