


9
Getting connected cont
Connecting to a TV with Component Video
Using 3 appropriate Component Video cables (usually color coded red, blue and green), connect a set of
plugs to the COMPONENT VIDEO OUT jacks (Y/Cb/Cr) on the DVG-555K and plug the other set of plugs to
the COMPONENT VIDEO IN jacks (Y-U/Cb-V/Cr) on your television.
On some TVs, the component video input jacks may be labeled differently (i.e. Pr/Pb/Y or Cr/Cb/Y or R-Y/
B-Y/Y etc.). You will need to press the MODE button on the remote control to toggle between non-interlaced
(HDTV) and interlaced (STANDARD) video output. You can only use the MODE button when there is no disc
inserted in the disc tray.
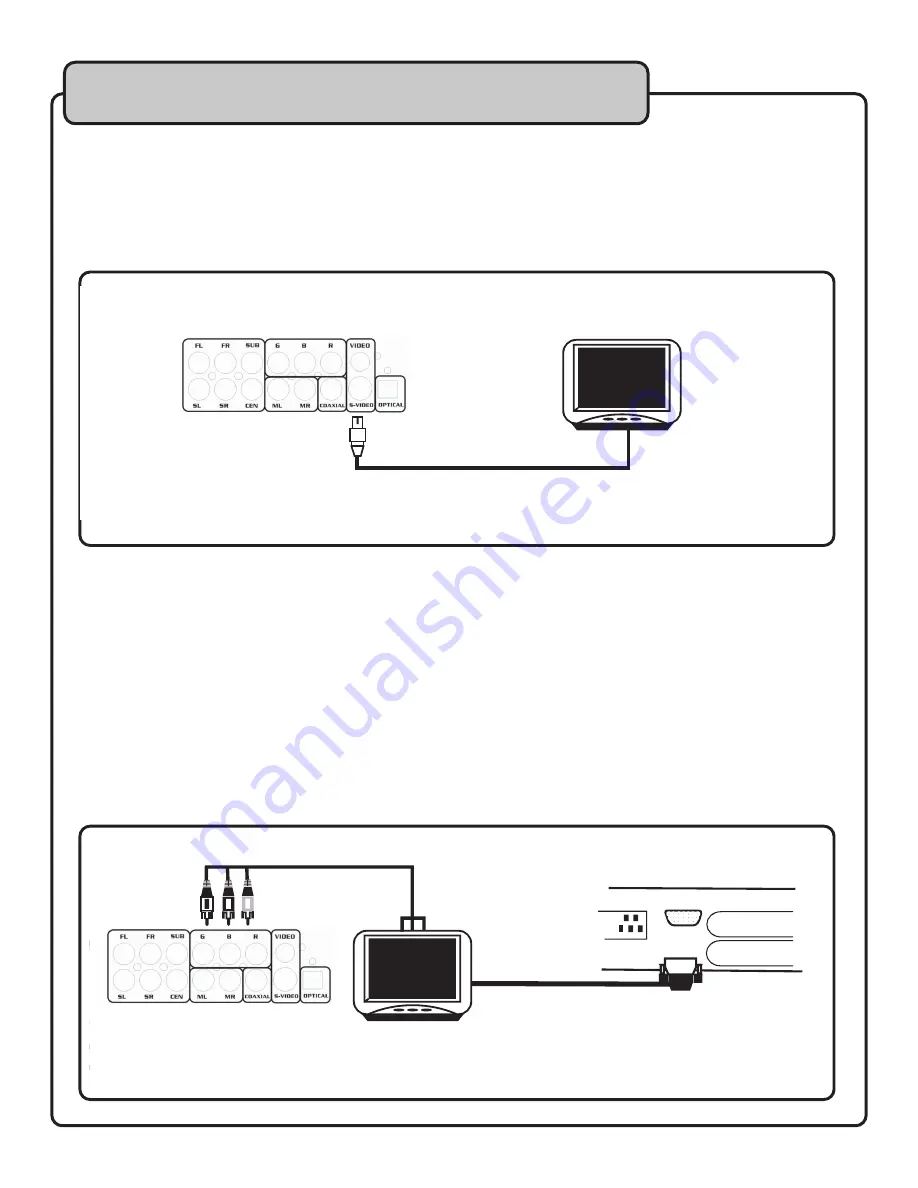
Connecting to a Monitor using VGA
Using a VGA cable, connect one end to the DVG-555K’s VGA output jack and connect the other end to the
VGA IN jack on your HDTV/VIDEO monitor
.
VIDEO CONNECTIONS
Connecting to a TV with S-video
Using an S-Video cable, connect one end to the DVG-555K’s S-VIDEO OUTPUT jack and connect the other
end to the S-VIDEO IN jack on your television.
Connecting to a Dolby Pro Logic Amplifier
Connecting to an TV with S-Video
Television
Connecting to an TV with Component Video
Connecting to Monitor using VGA
VGA
Serial No.
Manufactured under License from Dolby Laboratories
Manufactured under License from Dolby Laboratories
DOLBY PRO LOGIC and the double-D symbol are
DOLBY PRO LOGIC and the double-D symbol are
trademarks of Dolby Laboratories. Confidential
trademarks of Dolby Laboratories. Confidential
Television/Monitor


