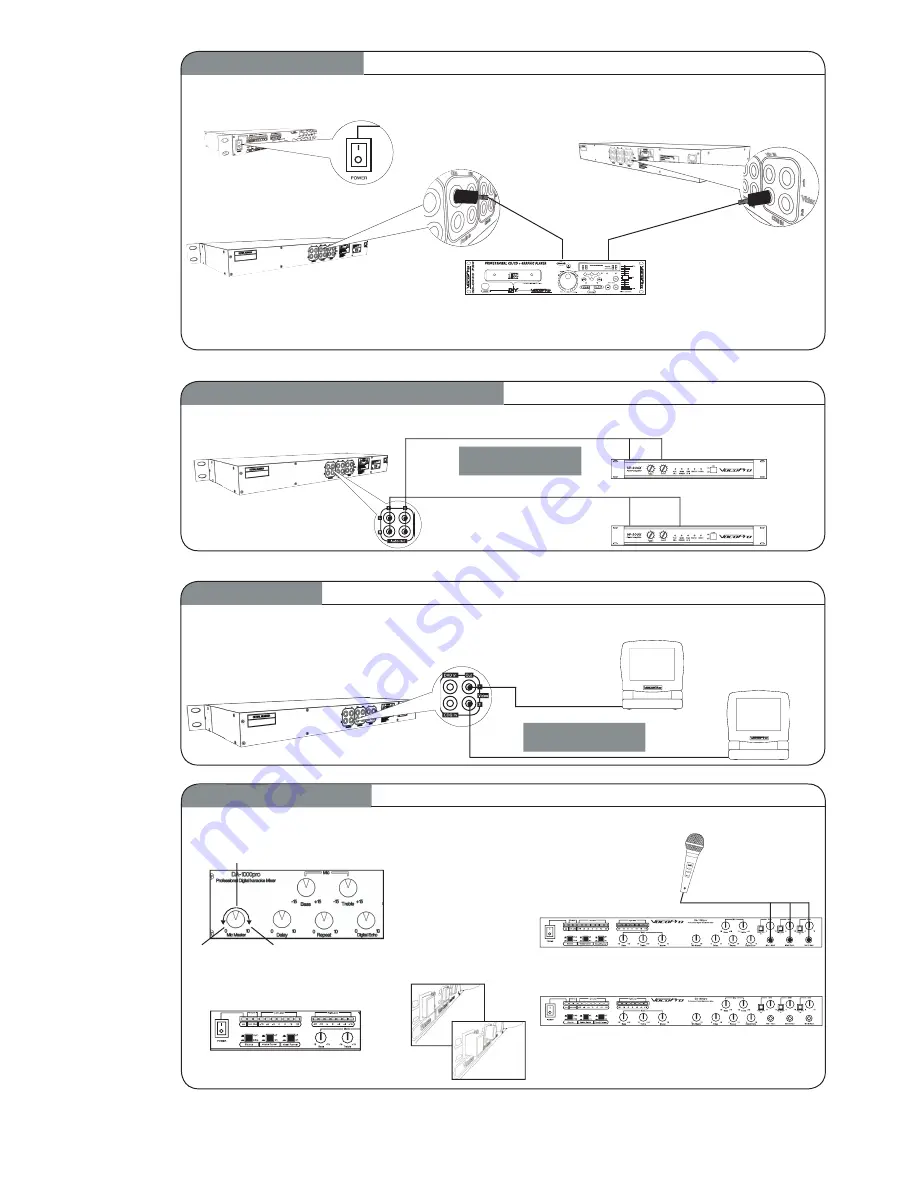
Performing a Sound Check
Connect Power Amplifier(s) or Other Device(s)
13.
Connect RCA cables from audio input jacks on an
amplifier or other device to the audio output
jacks (1) on the DA-1000 Pro.
STEP: 6
Connect Monitor(s)
15.
Connect RCA cable video input jack on
monitor device 1 to video output jack (1)
on the DA-1000 Pro.
STEP: 7
17.
Make sure master music and microphone volume
levels are not over 50%. (This applies to the
source and amplifier levels as well).
STEP: 8
14.
(Repeat steps for a second amplifier or other device,
using the audio output jacks (2) on the DA-1000 Pro).
16.
(Repeat steps for a second monitor device,
using the video output jack (2) on the DA-1000 Pro)
18.
Plug microphone(s) to desired channels.
19.
Set SOURCE button to the player you
want as the current music source.
20.
Play music from source and balance
microphone and music levels to your choice.
YOU ARE NOW READY TO PERFORM LIKE A PRO!
Connecting A/V Device(s)
STEP: 5
9.
Make sure or if necessary turn power
off to all equipment before starting.
11.
Connect RCA cables from audio output
jacks on A/V device 1 to audio input jacks
labeled CD+G on the DA-1000 Pro.
12.
Repeat steps for A/V device 2, using the A/V
input jacks labeled DVD on the DA-1000 Pro
10.
Connect RCA cables from Video output
jacks on A/V device 1 to Video input
jacks labeled CD+G on the DA-1000 Pro.
Video out
Video in
Audio out
Audio In
Audio out
CH. A
CH. B
CH. A
CH. B
Audio out
Optional connection for
second amplifier
Video out
Video in
Optional connection for
second monitor
50%
100%
0%
FIG. 1
FIG. 2
Figure 1
shows button pushed down for CDG player
Figure 2
shows button poped up for DVD palyer


