17
SECTION 2.2
TITLEBAR & DASHBOARD
Viz 2110 IO’s
Titlebar
and
Dashboard
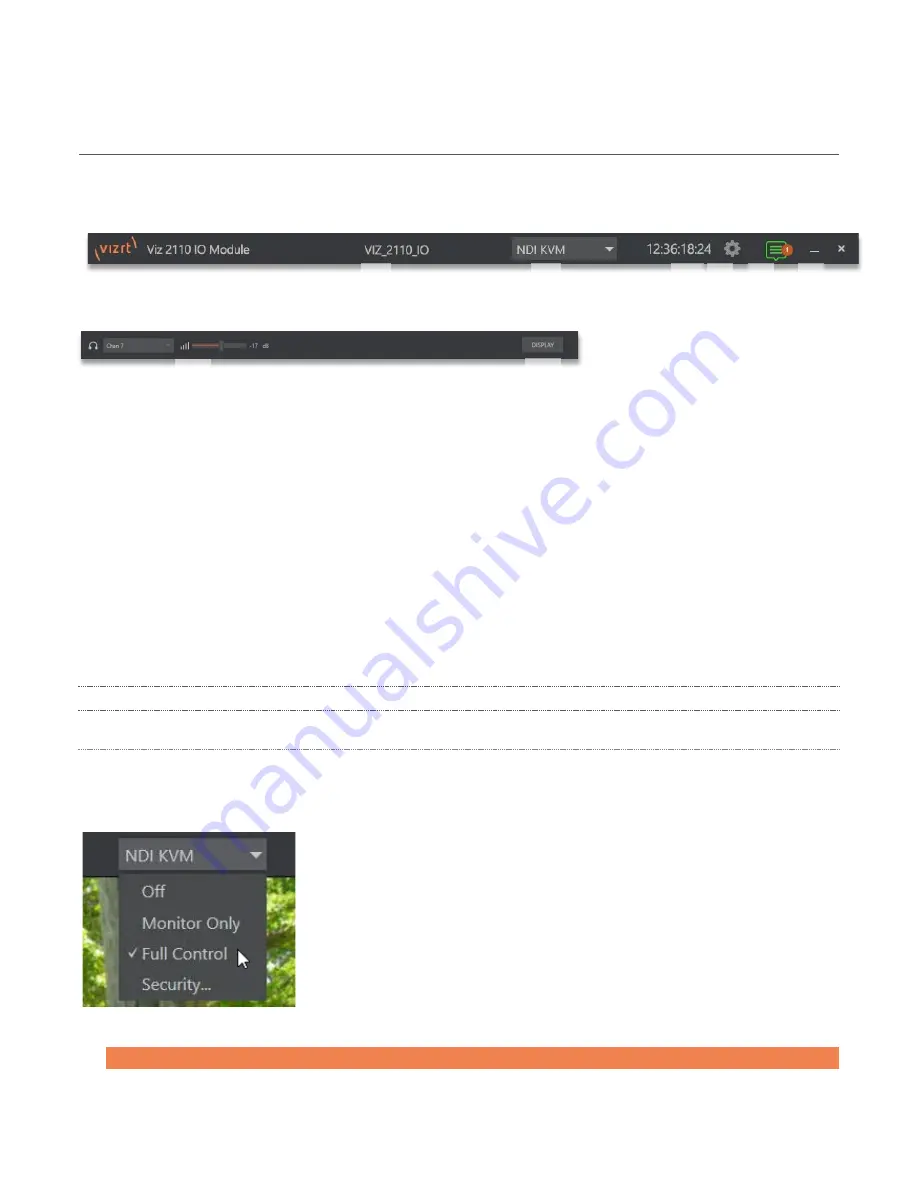
are home to a number of important displays, tools and controls.
Prominently located at the top and bottom of the
Desktop
, the
Dashboard
occupies the full width of the screen.
The various elements presented in these two bars are listed below (starting from the left):
1.
Machine name
(the system network name supplies the prefix identifying
NDI output channels)
2.
NDI KVM menu –
Options to control Viz 2110 IO remotely via NDI connection
3.
Time Display
4.
Configuration
(see Section 2.2.1)
5.
Notifications Panel
6.
Minimize and Exit
7.
Headphones Source and Volume
(see Section 2.2.3)
8.
Display
(see section 2.2.3)
Of these items, some are so important that they rate their own chapters. Others are detailed in various
sections of this guide (cross references to the relevant sections of the manual are provided above).
2.2.1
TITLEBAR TOOLS
NDI
KVM
Thanks to NDI
®
, it is no longer necessary to configure complicated hardware KVM installations to enjoy
remote control over your Viz 2110 IO system. The free NDI Studio Monitor application for brings network
KVM connectivity to any Windows
®
system on the same network.
To enable NDI KVM, use the titlebar
NDI KVM
menu to select an operating
mode, choosing between
Monitor Only
or
Full Control
(which passes mouse
and keyboard operations to the remote system). The
Security
option lets
you apply
NDI Group
control to limit who can view the
NDI KVM
output from
the host system.
To view the output from the remote system and control it, select your Viz
2110 IO IP system’s Device Name]>
User Interface
in the
Studio Monitor
application supplied with the free NDI Tool pack, and enable the KVM
button overlaid at upper-left when you move the mouse over the screen.
Hint: Note that Studio Monitor’s KVM toggle button can be relocated to a more convenient spot by dragging.
2
3 4
7
8
5 6
1
FIGURE 22


