background image

VIZIO VA26L HDTV10T User Manual 

Version 4/23/2010 

21 


www.VIZIO.com


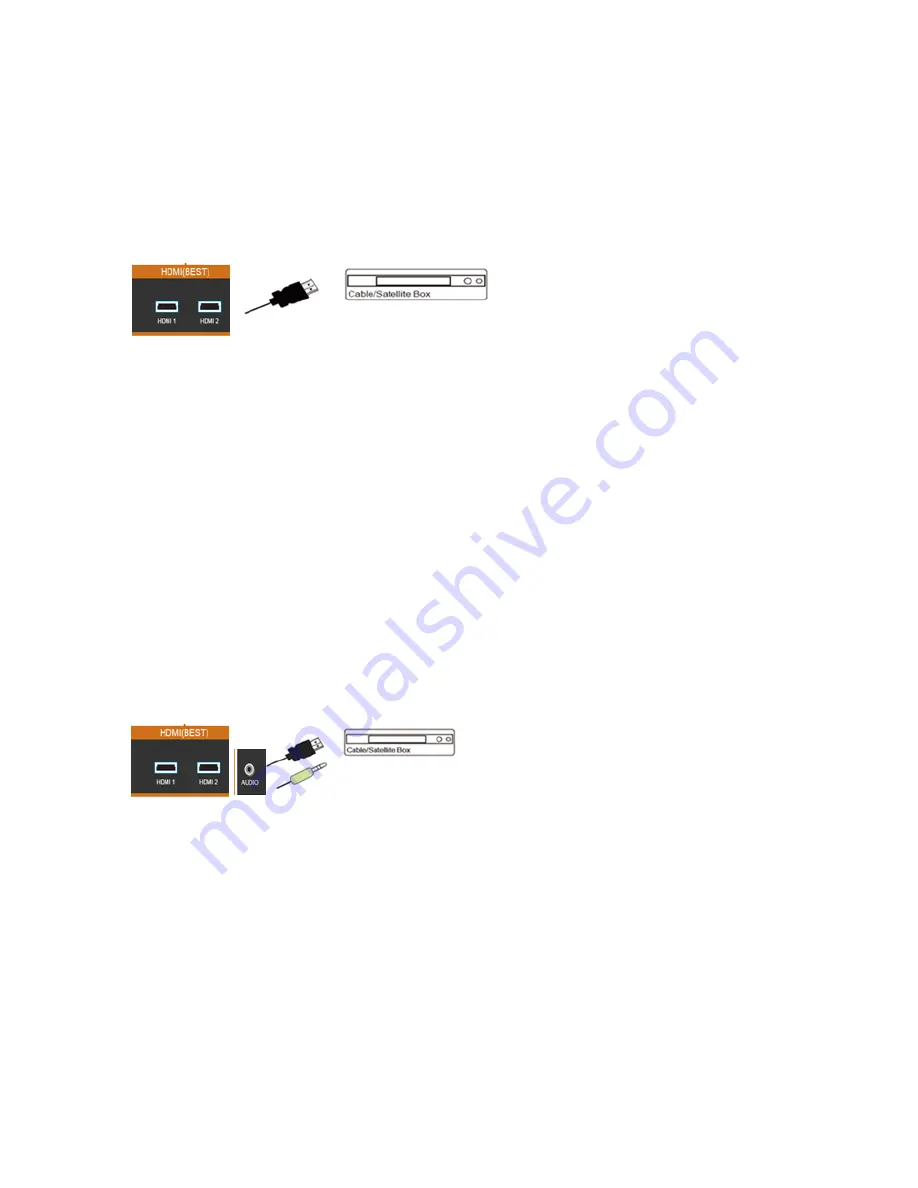
Connecting Your DVD Player  


Using HDMI (Best) 

DVD players that have a HDMI digital interface should be connected using HDMI for optimal results. To 
maintain image quality, use a VIZIO certified HDMI cable. This cable is available in 6, 15, and 30 foot 
lengths. See www.VIZIO.com or call 

877-MYVIZIO 

(877-698-4946) for details. 


1.  Turn off your HDTV and DVD player.  
2.  Connect a HDMI cable to the HDMI output of your DVD player and the other end to either 

HDMI 1


or 

HDMI 2 

inputs on your HDTV. 

3.  Turn on the power to your HDTV and your DVD player.  
4. Select 

HDMI 1

 or 

HDMI 2 

using the 

INPUT

 button on the remote control, or directly by pressing 

the 

HDMI

 button on the remote control. 

 
Note: 

  The HDMI input on your HDTV supports High-bandwidth Digital Content Protection (HDCP).  

HDCP encrypts the transmission between the video source and the digital display for added 
security and protection. 

  Refer to your DVD player user manual for more information about the video output requirements. 


HDMI Connections for DVD Player with DVI 


1.  Turn off your HDTV and DVD player. 
2.  Using a HDMI-DVI cable, connect the DVI end to your DVD player and the HDMI end to either 

HDMI 1

 or 

HDMI 2

 Input on your HDTV. 

3.  Connect the audio cables (white and red) from the DVI audio output jacks on the DVD player to 

the 1/8” audio input jack on your HDTV. You may need to use a 1/8” Y stereo adapter. 

4.  Turn on the power to your HDTV and your DVD player. 
5. Select 

HDMI 1

 or 

HDMI 2

 using the 

INPUT

 button on the remote control, or directly by pressing 

the 

HDMI 

button on the remote control. 


Содержание VA26L HDTV10T

Страница 1: ...ng the standard warranty period Visit our website or call us to purchase a plan Write down the serial number located on the back of your HDTV for easy reference when obtaining warranty support Serial _____________________ Purchase Date _____________________ VIZIO is a registered trademark of VIZIO Inc dba V Inc HDMI logo and High Definition Multimedia Interface are registered trademarks of HDMI Li...

Страница 2: ...V close to smoke or moisture may cause fire or electric shock Slots and openings in the back and bottom of the cabinet are provided for ventilation To ensure reliable operation of your HDTV and to protect it from overheating be sure these openings are not blocked or covered Do not place your HDTV in a bookcase or cabinet unless proper ventilation is provided Never push any object into the slots an...

Страница 3: ...rmality occurs If any smoke or odor becomes apparent unplug the power cord and contact your dealer immediately Do not try to repair your HDTV yourself Avoid using dropped or damaged appliances If your HDTV is dropped and the housing is damaged the internal components may function abnormally Unplug the power cord immediately and contact your dealer for repair Continued use of your HDTV may cause fi...

Страница 4: ...e coaxial cable is intended to be connected to earth in the building installation FCC Bulletin for New TV Owners The nationwide switch to digital television broadcasting will be complete on June 12 2009 but your local television stations may switch sooner After the switch analog only television sets that receive TV programming through an antenna will need a converter box to continue to receive ove...

Страница 5: ...Remote Control Buttons 13 CHAPTER 4 GETTING STARTED 14 CHAPTER 5 USING YOUR HDTV FOR THE FIRST TIME 15 Select Input Source 15 Watching a TV Program 15 Viewing Digital TV Program Information 16 INFO Button 16 CHAPTER 6 CONNECTING EQUIPMENT 17 Which Video Connection Should I Use 17 Connecting Your DVD Player 21 Using HDMI Best 21 Connecting Coaxial RF 23 Using Your Antenna or Digital Cable for Stand...

Страница 6: ...Parental Menu 35 Help Menu 37 System Info 37 CC Closed Caption Menu 37 CHAPTER 9 MAINTENANCE AND TROUBLESHOOTING 38 Cleaning the TV and Remote Control 38 Troubleshooting Guide 38 Telephone Technical Support 41 Compliance 41 FCC Class B Radio Interference Statement 42 CHAPTER 10 SPECIFICATIONS 43 Preset PC Resolutions 44 CHAPTER 11 WARRANTY 45 Index 47 ...

Страница 7: ...g Package Contents VIZIO VA26L VIZIO remote control VR10 2 AA batteries for the remote control Cleaning cloth Quick Setup Guide Registration Card Caution Do not apply pressure or throw objects at your HDTV This may compromise the integrity of the display The manufacturer s warranty does not cover user abuse or improper installations HDTV Accessories and Services Additional certified accessories fo...

Страница 8: ...ientation with the VIZIO logo at the bottom to prevent poor ventilation and excessive component damage If you want to mount your HDTV on the wall see below for additional information Read this user manual carefully before installing your HDTV VIZIO offers professional installation Contact VIZIO for more information on these services at 877 MYVIZIO 877 698 4946 or www VIZIO com Attaching the TV Sta...

Страница 9: ...n remove the base d Remove the neck cover e Remove the four 4 screws holding the neck to your HDTV 2 Mount your HDTV on the wall a Attach your HDTV to a wall mount sold separately using the mounting holes in the back panel of your HDTV b Read the instructions that came with your specific wall mount to properly hang your HDTV Wall Mounting Specifications Screw Size M4 Screw Length 8mm Screw Pitch 0...

Страница 10: ...nsor Activate it through the OSD menu if you would like the TV to automatically adjust to the ambient lighting of the room Side Control Panel POWER Turn your HDTV on by pressing the button once Press the button again to turn your HDTV off MENU Press to launch the on screen menu If a sub menu is active this button will proceed to the next level CH Press to change the channels up or down While the m...

Страница 11: ...l TV is selected for viewing the audio associated with the programming will be available on the SPDIF Optical connector for connection to a VIZIO Sound Bar or your Home Theater system 3 RGB PC Connect the video and audio from a computer here Connect a 1 8 mini plug stereo connector from the computer to the TV if you want the sound to come from the HDTV speakers 4 COMPONENT Y Pb Cb Pr Cr Connect co...

Страница 12: ...ge Point the remote control directly at this sensor for the best response to the remote signal Do not place any obstacles between the remote control and the remote control sensor The effective range of the remote control is approximately 26 feet 8 meters from the front of the remote control sensor and 13 feet 4meters when 30 to the left and right 15 up and down VIZIO Remote Control Precautions The...

Страница 13: ...ress MENU SELECT to select your chosen option VOL or Press to increase or decrease the speaker volume CH or Press to step up or down through the TV channels MUTE Press to turn the sound on and off LAST Press to recall the previously viewed channel NUMBER PAD Press to select a channel or enter a password INPUT Press repeatedly to cycle through the video inputs Dash In DTV mode antenna use this butt...

Страница 14: ...ord into an AC wall socket 3 Connect your devices to your HDTV see Chapter 6 for detailed steps 4 Turn on your TV The Setup Wizard will automatically play and guide your thru the initial setup of your HDTV Use the Arrow and MENU OK buttons to navigate through the setup App During the setup process you will Choose your Menu language Select the TV to Home Mode for the best picture and most efficient...

Страница 15: ...r details Watching a TV Program Before you start watching TV please make sure that any cable satellite or off air antenna connections are secure Also verify that the AC power cord is plugged into a correctly grounded electrical outlet or surge protector 1 Press the power button on the remote control 2 Select the input to which your device is connected that provides TV programming e g TV HDMI COMP ...

Страница 16: ...on INFO Button When you press the INFO button an information header is shown over the picture for a few seconds Each press of the INFO button will display more information about the program Press a second time you will see the following display Press a third time and the display should be as shown below ...

Страница 17: ...nput When digital content is being received this input delivers the best image quality Best analog The RGB VGA port allows you to connect your computer so you can use the TV as your monitor Better analog Component consists of three cables for transmitting video and two cables for transmitting audio one red and one white Component video provides a sharper image than Composite video and should be us...

Страница 18: ...the remote control Note The HDMI input on your HDTV supports High bandwidth Digital Content Protection HDCP HDCP encrypts the transmission between the video source and the digital display for added security and protection Refer to your Cable Satellite Set Top Box user manual for more information about the video output requirements of the product or consult your cable or satellite operator Cable an...

Страница 19: ...connector associated with the HDMI input on your HDTV 4 Turn on the power to your HDTV and your Cable Satellite Box 5 Select HDMI 1 or HDMI 2 using the INPUT button on the remote control or directly by pressing the HDMI button on the remote control Using Component Video Better 1 Turn off your HDTV and Cable Satellite Box 2 Connect the component cables green blue and red from your Cable Satellite B...

Страница 20: ...your HDTV and Cable Satellite Box 5 Select AV using the INPUT button on the remote control or directly by pressing the AV button on the remote control Using Coaxial Antenna Compatible 1 Turn off the power to your HDTV 2 Connect the coaxial RF connector from your Cable Set Top Box or Satellite Set Top Box to the DTV TV connector on your HDTV 3 Turn on the power to your HDTV 4 Select TV using the IN...

Страница 21: ... HDMI button on the remote control Note The HDMI input on your HDTV supports High bandwidth Digital Content Protection HDCP HDCP encrypts the transmission between the video source and the digital display for added security and protection Refer to your DVD player user manual for more information about the video output requirements HDMI Connections for DVD Player with DVI 1 Turn off your HDTV and DV...

Страница 22: ...to your HDTV and DVD player 5 Select Component using the INPUT button on the remote control or directly by pressing the COMP button on the remote control Using Composite AV Video Compatible 1 Turn off the power to your HDTV and DVD player 2 Connect the video cable yellow from your DVD player to the AV jack on your HDTV 3 Connect the audio cables white and red on your DVD player to the L and R AUDI...

Страница 23: ... Perform an Auto Channel scan See Adjusting Your HDTV TV Settings for more information Connecting Your VCR or Video Camera Using AV 1 Turn off the power to your HDTV and VCR or Video Camera 2 Connect the yellow AV cable from your VCR or video camera to the AV jack on your HDTV 3 Connect the audio cables on your VCR or video camera to the corresponding L and R AUDIO jacks on your HDTV 4 Turn on the...

Страница 24: ...ge the input on your Home Theater to optical See your Home Theater user manual for more information Connecting a Computer 1 Set computer to a resolution supported by your HDTV See Preset PC Resolutions 2 Turn off the power to your HDTV and Computer 3 Connect the VGA cable from your computer to the RGB PC jack on your HDTV 4 Connect the 1 8 inch audio cable from your computer to the RGB PC Audio ja...

Страница 25: ...s arrow Up or Down Navigation buttons to select one of the items to adjust 5 Press MENU SELECT to select and then press Up Down Left or Right Navigation buttons to adjust the selection 6 Press LAST once to return to the previous screen or repeatedly to exit the On Screen Menu completely when finished making adjustments 7 Press EXIT to close the HDTV Settings Menu TV Menu When first selected the OS...

Страница 26: ...et Picture Mode If changes beyond these options are required Picture Mode needs to be selected as Custom Parental Menu This menu provides the user with the options to restrict the viewing of programs or content according to preset values and ratings provided by the signal being watched If a Set Top box is being used these options could be part of the box settings Please refer to your cable satelli...

Страница 27: ... TV channels using the Initial Setup screens If you did not do this or if your setup has changed you can do this from the TV menu Input 1 Input Source Select the Input Source for your HDTV Choose from DTV TV AV COMPONENT HDMI 1 HDMI 2 RGB and PHOTO 2 Input Naming Use this option to rename the input being watched to your preferred name i e DTV TV could be called Cable or Antenna Channels 1 Signal S...

Страница 28: ...ensure that the correct time is shown when the INFO button on the remote control is pressed The time zones are as follows Newfoundland Atlantic Eastern Central Mountain Pacific Alaska Hawaii Indiana and Arizona 2 Daylight Saving When enabled this option will automatically display the correct time in the zones in which Daylight Saving time applies 3 Auto Update If you decide to manually change the ...

Страница 29: ...32 Have a write speed higher than 10Mb sec USB1 1 or higher Contain no other files Sort Select to change the order of viewing the photos in the desired folder 1 Date Select it to organize your photos according to the date they were taken 2 Name Using this option will organize your photos according the file name in alphabetical order File Select this option to organize your folders and photos 1 Lis...

Страница 30: ...anual Version 4 23 2010 30 www VIZIO com Wide Menu The following table shows the different screen modes and display sizes according to the content being sent to the HDTV Note The red lines show the video signal being overscanned ...

Страница 31: ...l be black bars at the top and bottom of the screen Zoom Mode When watching a widescreen 1 78 1 1 85 1 or 2 35 1 source program or movie the display image is zoomed proportionally to fill the width of the screen The top and bottom are cut off to remove most of the source material s black bars This mode is good for programs or movies with sub titles Panoramic Mode When watching a standard broadcast...

Страница 32: ...Jazz Pop and Rock Bass Treble These options allow setting the values of the low and high tones to your preference Keep in mind that they are adjustable as long as the SRS feature is Off Balance Using balance allows you to distribute the level of the sound evenly or either to the left or right audio channels Speakers Selecting this option will allow to set the internal speakers either Off or On esp...

Страница 33: ...e this option to adjust the white levels If the contrast is too low the picture will look washed out and if the contrast is too high you will not be able to see any detail in the bright parts of a picture 3 Color Use this option to adjust the saturation of colors in the image or picture 4 Tint Use this option to adjust the skin or flesh tone for a realistic appearance If people s faces look too or...

Страница 34: ...tio Use this option to improve the black level performance and increase contrast ratio Noise Reduction This feature diminishes picture artifacts caused by the digitizing of image motion content that may be present in the picture Choose from Off Low Medium or High Fast Response This feature is mainly used when the signal originates from a game or computer device Ambient Light Sensor Choose On or Of...

Страница 35: ...dian English or Canadian French Ratings Channel Locks Block individual channels from being displayed USA TV Press MENU SELECT to block locked or allow unlocked channels by the following US TV ratings TV Y All children TV Y7 Older children TV G General audience TV PG Guidance suggested TV 14 Strongly cautioned TV MA Mature audience You can also customize the TV ratings for the following content A A...

Страница 36: ...16 ans Not suitable for under 16 years of age 18 ans Adults only Alt Rating Region This option applies to locations with rating systems different from ratings in standard regions Block Unrated Shows This option allows blocking programming that does not have a rating User Control Lock Use this option to restrict the use of the HDTV by locking the mechanical control buttons on the side of the TV Cha...

Страница 37: ...l be displayed showing the following CC settings Analog Closed Caption The CC feature is available when watching regular analog NTSC TV Select from CC1 CC2 CC3 CC4 or Off Closed Caption for regular TV is usually CC1 or CC2 Digital Closed Caption The CC feature is available when watching digital TV Select from CS1 CS2 CS3 CS4 CS5 CS6 or Off Digital CC Style The Digital CC Style feature is available...

Страница 38: ...ZIO for assistance by calling 1 877 MYVIZIO 698 4946 or e mail us at techsupport VIZIO com General TV Problems Solution Receive the error message No Signal Press the INPUT button on the remote control to select a different input source If you are using cable connected directly to the TV or an antenna scan for channels from the Tuner menu in the on screen menu No power Make sure the power button is...

Страница 39: ...s be noticeably inferior to HD because your digital flat panel TV has video that is many times better than old TV so you will see interference and deficiencies you did not know you had You cannot see a picture Make sure the power button is ON Make sure AC power cord is firmly connected to a live outlet Press the INPUT button on the remote control to select a different input source Check the connec...

Страница 40: ...use You switch to a different input and the volume changes The TV remembers the volume level from the last time you adjusted it If the sound level is higher or lower from another source then the volume will change You switch to a different input and the screen size changes The TV remembers the viewing mode from the last time you used a particular input AV Component HDMI and TV Tips for High Defini...

Страница 41: ...e integral parts of VIZIO s commitment to service excellence For technical assistance contact our VIZIO Technical Support Department via email or phone Email techsupport VIZIO com 877 698 4946 Fax 949 585 9563 Hours of operation Monday Friday 6 am to 9 pm Saturday Sunday 8 am to 4 pm Please have your VIZIO model number serial number and date of purchase available before you call VIZIO Address 39 T...

Страница 42: ...sion reception which can be determined by turning the equipment off and on the user is encouraged to try to correct the interference by one or more of the following measures 1 Reorient or relocate the receiving antenna 2 Increase the separation between the equipment and receiver 3 Connect the equipment into an outlet on a circuit different from that to which the receiver is connected 4 Consult the...

Страница 43: ...ital images JPEG photo files Supports 640x480 800x600 1024x768 1360x768 via RGB 3 D comb filter 3 2 or 2 2 reverse pull down ATSC with 8VSB QAM demodulation ATSC with MPEG 2 decoding NTSC video decoding via Video AV or Component Progressive Scan Video via HDMI Component or RGB Built in speakers x 2 Dolby Digital Decoding SRS TruSurround HD and SRS TruVolume sound enhancement Energy Star 4 0 Speake...

Страница 44: ...uide for questions on how to set this timing mode See the table below for the factory preset resolutions Refresh Hz Resolution H Freq kHz H Sync V Freq Hz V Sync Pixel Freq MHz 60 640 x 480 31 469 N 59 94 N 25 175 75 640 x 480 37 5 N 75 N 31 5 70 720 x 400 31 46 N 70 08 P 28 32 60 800 x 600 37 897 P 60 317 P 40 75 800 x 600 46 875 P 75 P 49 5 60 1024 x 768 48 363 N 60 004 N 65 75 1024 x 768 56 476...

Страница 45: ...Units 30 or larger will usually be serviced in home In home service requires complete and easy access to the unit and does not include de installation or re installation of the product However in some cases it may be necessary to send the unit to a VIZIO service center VIZIO will cover the transportation charges to and from the same customer location Units less than 30 must be sent to a VIZIO serv...

Страница 46: ...ARY FROM STATE TO STATE THIS WARRANTY IS SUBJECT TO CHANGE WITHOUT NOTICE CHECK www VIZIO com FOR THE MOST CURRENT VERSION Personal Data If your VIZIO product is capable of storing personal data and other information ALL CONTENTS AND INFORMATION WILL BE DELETED IN THE COURSE OF SOME IN HOME AND ALL SHIP IN WARANTY SERVICE If this occurs your product will be restored to you configured as originally...

Страница 47: ... 10 DVD Player Connecting 22 DVI Cable Box 20 DVD Player 22 Satellite Box 20 Getting Started 15 Grounding 4 HDMI 18 Help Menu System Info 38 Home Theater Connecting 25 INFO Button 17 Input Source Choosing 16 Inputs Antenna 4 Connectors 18 Maintenance of TV 39 Parental Controls Rating Enable 37 Photo Menu 26 30 Remote Control 13 Batteries 13 Precautions 13 Range 13 RGB 18 Safety Instructions 2 Sate...

Отзывы: