


EN - 5
English
D
rill
ho
le
D
ril
l h
ol
e
Drill
ho
le
Dr
ill
ho
le
Drill
ho
le
Dr
ill
ho
le
Ceiling or Wall Mount
1
2
3
4
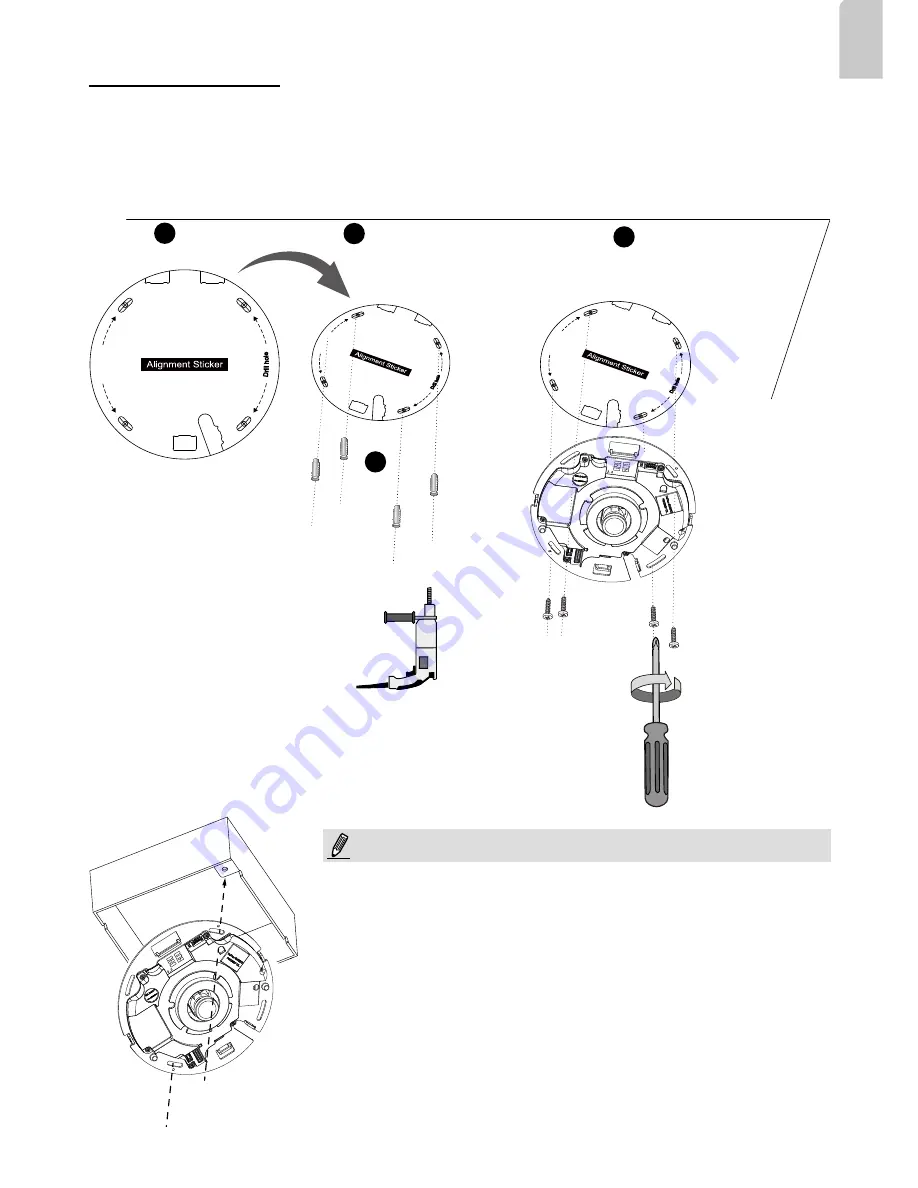
1. Attach the supplied alignment sticker for the camera base to the a ceiling or wall.
2. Using the circles on the sticker, drill pilot holes into the ceiling. Then hammer the supplied plastic
anchors into the holes.
3. (Optional) Drill a cable hole on the ceiling/wall, and feed the cables through the hole.
4. Secure the camera base to the ceiling/wall with the supplied screws.
You may also install the camera to a U.S. standard 4 in. junction box.
You can align the camera’s curved slots with the mounting holes on
a junction box. Use diagonal mounting positions on the camera to
match those on a junction box.
NOTE:
Содержание FE9182-H
Страница 1: ......
Страница 12: ...TC 11 中文 繁體 實體外觀說明 2 內視圖 J12 J7 排針 彈簧接腳 A 鏡頭 紅外線單元的接點 乙太網路10 100 RJ45插槽座 MicroSD SDHC SDXC卡插槽 重設按鈕 狀態LED 電纜佈線孔 ...
Страница 21: ...SC 20 物理描述 2 内视图 J12 J7 排针 弹簧接腳 A 镜头 红外元件的触点 以太网10 100 RJ45插座 MicroSD SDHC SDXC卡插槽 重置按鈕 电线插口 状态LED灯 ...
Страница 25: ...SC 24 将镜头盖上的卡扣固定支架对准相机底座的孔式支架 将 塑料镜头盖慢慢压入相机底座进行安装 将镜头盖和基板对齐后再按下 用卡口固定装置固定镜头 盖 装上上部护盖 卡口固定支架 圆盖 ...
Страница 164: ...AR 163 Quick Installation Guide NOTES ...
Страница 165: ...AR 164 Quick Installation Guide NOTES ...
Страница 166: ...AR 165 Quick Installation Guide NOTES ...
Страница 167: ...AR 166 Quick Installation Guide NOTES ...
Страница 168: ...AR 167 Quick Installation Guide NOTES ...
Страница 170: ......


