background image

6

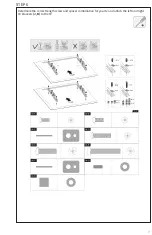
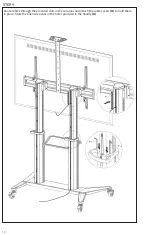
STEP 5

Loosen the two bolts on both of the upright brackets of the media shelf

 (I) 

using the allen wrench 

(P-I)

. Then slide the shelf down into the groove on the lower columns and then retighten the four 

bolts once at the desired height.

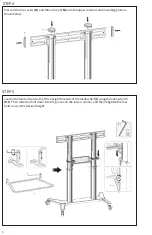
STEP 4

Press on the top covers 

(O)

 and the end caps 

(N) 

onto the upper columns and mounting plate as 

shown below.

Содержание STAND-TV120B

Страница 1: ...e or follow the link for helpful videos and specifications related to this product Instruction Manual https vivo us com products stand tv120b SKU STAND TV120B help vivo us com www vivo us com 309 278 5303 Chat live with an agent GET IN TOUCH Monday Friday from 7 00am 7 00pm CST ...

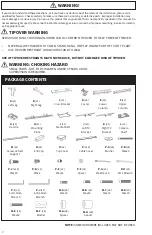
Страница 2: ...njury caused by improper mounting incorrect assembly or inappropriate use NOTE SOME HARDWARE INCLUDED MAY NOT BE USED N x2 End Cap M x1 Camera Shelf Support O x2 Top Cover P F x1 Spacer P G x1 M6 Wrench P E x2 M8x12 P A x8 Washer P B x8 M8x80 P D x2 M5x8 P H x1 M12 Wrench P C x16 M8x20 P I x1 5mm Allen Wrench M A x4 M5x14 M B x4 M6x14 M C x4 M6x30 M D x4 M8x30 M E x4 M8x50 M F x4 Washer M G x8 Spa...

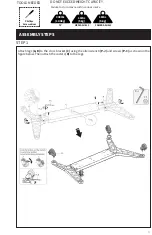
Страница 3: ...he allen wrench P J and screws P C as shown in the figure below Then attach the casters D to the legs 308lbs 140kg DO NOT EXCEED WEIGHT CAPACITY Failure to do so may result in serious injury Phillips Screwdriver TOOLS NEEDED TV 11lbs 5kg MEDIA SHELF 11lbs 5kg CAMERA SHELF ...

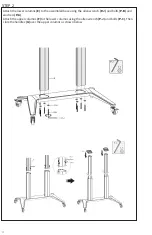
Страница 4: ...s E to the assembled base using the allen wrench P J and bolts P B and washers P A Attach the upper columns F to the lower columns using the allen wrench P J and bolts P C Then slide the handles G over the upper columns as shown below ...

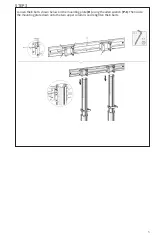
Страница 5: ...5 STEP 3 Loosen the 8 bolts shown below on the mounting plate H using the allen wrench P I Then slide the mounting plate down onto the two upper columns and retighten the 8 bolts ...

Страница 6: ...edia shelf I using the allen wrench P I Then slide the shelf down into the groove on the lower columns and then retighten the four bolts once at the desired height STEP 4 Press on the top covers O and the end caps N onto the upper columns and mounting plate as shown below ...

Страница 7: ...7 STEP 6 Determine the correct length screw and spacer combination for your tv and attach the left and right TV brackets J K to the TV ...

Страница 8: ...8 STEP 7 Hang the TV and TV brackets over the mounting plate and secure it by tightening the security bolt on the bottom of the TV brackets using a phillips screwdriver ...

Страница 9: ... screwdriver and screws P D Then mount the shelf support M to the desired height attaching it to the Mounting plate H Attach it using the allen wrench P I bolts P E and washers P F making sure the washers go between the camera shelf support M and the mounting plate H as shown below ...

Страница 10: ...10 STEP 9 Route cables through the provided slots in the columns and attach the cable covers O to hold them in place Store the allen wrenches in the holes provided in the handle G ...

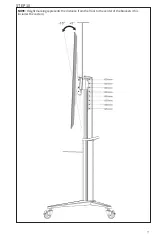
Страница 11: ...11 STEP 10 NOTE Height marking represents the distance from the floor to the center of the brackets this includes the casters ...

Страница 12: ...sure you have a fully functioning product FOR MORE VIVO PRODUCTS CHECK OUT OUR WEBSITE AT www vivo us com help vivo us com AVG RESPONSE TIME within office hrs 1HR 8M 23 within 15m 38 within 30m 61 within 1hr 83 within 2hr 92 within 3hr Love your new VIVO setup and want to share Tag us in your photo vivo_us AVG RESOLUTION TIME within office hrs 15 M www vivo us com Chat live with an agent AVG RESOL...

Отзывы: