D
D
D
L
L
L
P
P
P
P
P
P
r
r
r
o
o
o
j
j
j
e
e
e
c
c
c
t
t
t
o
o
o
r
r
r
–
–
–
U
U
U
s
s
s
e
e
e
r
r
r
’
’
’
s
s
s
M
M
M
a
a
a
n
n
n
u
u
u
a
a
a
l
l
l
–
13
–
Setting an Access Password (Security Lock)
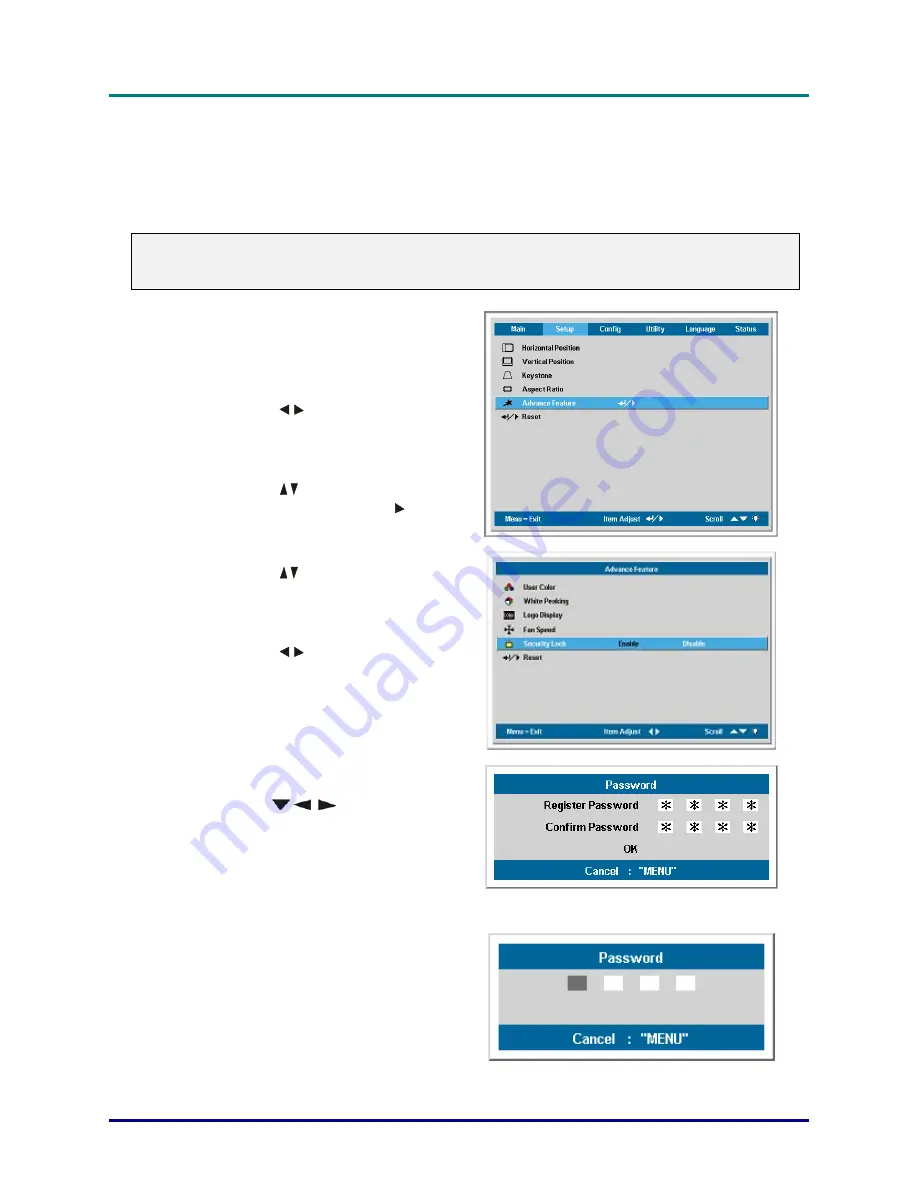
You can use the cursor (arrow) buttons to set a password and prevent unauthorized use of the pro-
jector. When enabled, the password must be entered after you power on the projector. (See
“Navigating the OSD” on page 18 and “Setting the OSD Language” on page 19 for help on using
OSD menus.)
Important:
Keep the password in a safe place. Without the password, you will not be able to use the projector.
If you lose the password, contact your reseller for information on clearing the password.
1.
Press the
Menu
button to open the OSD
menu.
2.
Press the cursor
button to move to the
Setup
menu.
3.
Press the cursor
button to select
Ad-
vance Feature
and press
Enter
or .
4.
Press the cursor
button to select
Secu-
rity Lock
.
5.
Press the cursor
button to select
En-
able
. (White text is selected.)
A password dialog box automatically ap-
pears.
6.
You can only use the following three
cursor buttons:
in the password fields. You can use any
combination including the same arrow
four times, but not less than four.
Press the cursor buttons in any order to set
the password. When you confirm the
password,
OK
appears.
Every time you start the projector, a
password dialog box appears.
Enter the password in the order you set it
at step 6. (Press the
Menu
button to cancel
if you enter the wrong password.)


