Vivitar Vivicam 3935 Скачать руководство пользователя страница 53

E

53

MOVIE MODE

Recording Video Clips

The movie mode allows you to record video clips at a resolution of 320 x 240 pixels. Voice can
also be recorded using the small microphone on the top of the camera.

1. Turn the camera on by sliding the 

POWER

 switch.

2. Press (and hold breifly) the     button.

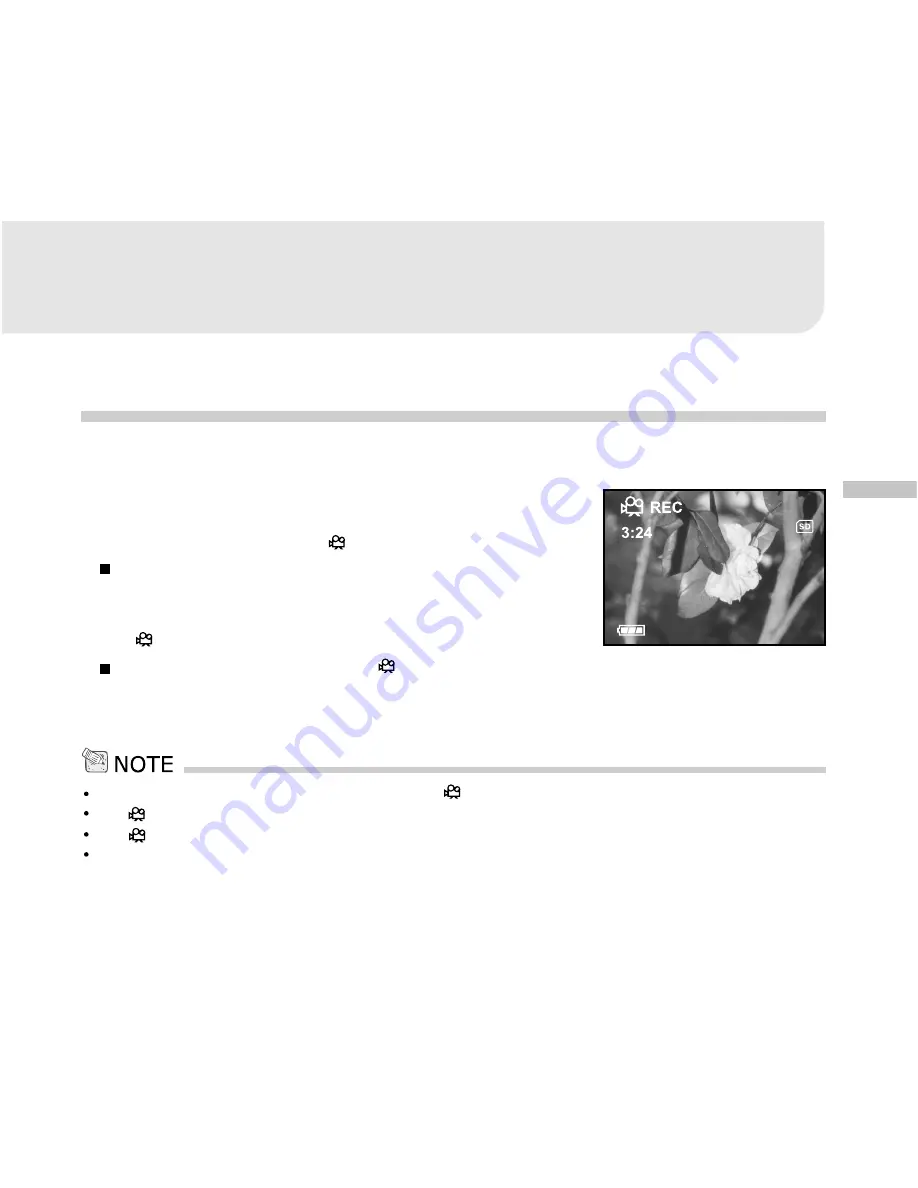
The record time, REC icon, card indicator, and
battery level will display on the LCD monitor.

3. You can start recording the video clip simply by pressing

the     button.

To stop the recording, press the    button.

It is not possible to zoom in or zoom out while in the [ 

 ] Movie mode.

In [ 

 ] Movie mode,  image size (resolution) and the self-timer function cannot be set or activated.

In [ 

 ] Movie mode, the flash mode is set to OFF.

You can set image quality in the Capture menu before recording a video clip.

Содержание Vivicam 3935

Страница 1: ...s and can radiate radio frequency energy and if not installed and used in accordance with the instructions may cause harmful interference to radio communications However there is no guarantee that int...

Страница 2: ...ss B limits in Subpart B of Part 15 of the FCC rules Do not make any changes or modifications to the equipment unless otherwise specified in the manual If such changes or modifications should be made...

Страница 3: ...stered trademarks of their respective owners READ THIS FIRST Please start by reading the important messages below first 1 The bundled driver software design specifications and user s manual that were...

Страница 4: ...contact your dealer or authorized service facility for repairs Never attempt to repair this camera by yourself as this is dangerous Do not use the camera if any foreign objects have entered the camera...

Страница 5: ...ticular care when using the camera under extreme weather conditions such as rain or snow or when operating the camera at the beach or near water Water in the camera may cause a fire or an electrical s...

Страница 6: ...the case and cause a fire Always use the camera and its accessories in well ventilated locations Handle the camera carefully and do not bump the camera into any hard object Handling the camera roughl...

Страница 7: ...to the camera check the polarity markings on the battery and to ensure that you insert the battery correctly Incorrect battery polarity may result in the batteries splitting or leaking and causing a f...

Страница 8: ...OUR VIVICAM 3935 14 Front View 14 Rear View 15 Mode Dial 16 LED Indicators 17 LCD Monitor Information 18 GETTING STARTED 21 Installing the Batteries 21 Using an AC Power Adapter Optional Accessory 22...

Страница 9: ...ing the Image Resolution and Quality 27 CAPTURING IMAGES 29 Basic Settings 29 Viewfinder 29 LCD Monitor 30 Zoom Functions 31 Self Timer 32 Flash 33 Photography Modes 35 Manual Mode 36 Aperture Priorit...

Страница 10: ...lete One Image Video Clip at a Time 49 Delete All Images Video Clips at Once 50 Formatting an SD card or Internal Memory 51 Protecting Images Video Clips 52 MOVIE MODE 53 Recording Video Clips 53 View...

Страница 11: ...mputers Running Windows 58 For Computers Running Mac OS 58 INSTALLING PHOTOSUITE 59 INSTALLING PHOTOVISTA 60 INSTALLING ACROBAT READER 61 USER S MANUAL ON CD ROM 62 MENU OPTIONS 63 Capture Menu 63 Pla...

Страница 12: ...Secure Digital SD Memory Cards store images that you have captured Even if the ViviCam 3935 s power is turned OFF the images saved on the SD Memory Card are not erased SD Memory Card can be repeatedl...

Страница 13: ...ith your ViviCam 3750 may be different from those described in this manual due to the fact that different retailers often specify slightly different product inclusions and accessories to suit their ma...

Страница 14: ...Front View 7 Power switch 8 Flash 9 Viewfinder window 10 Lens 11 Self timer LED 12 Microphone 1 Mode dial movie record button 2 Shutter button 3 Camera strap lens strap lug 4 A V OUT Audio Video Out...

Страница 15: ...n Self timer button 4 Arrow button Left 5 OK OK button Display On Off 1 Viewfinder 2 LED indicator 3 LCD monitor 4 Delete button 5 Tripod socket 6 T Optical Zoom Telephoto Digital zoom button W Optica...

Страница 16: ...Portrait Mode Select this mode to make people stand out with the background out of focus 5 Landscape Mode This mode is used when the distance to the subject is greater than 6 feet 6 NightSceneMode Sel...

Страница 17: ...Blinking red The flash is Charging No LED indicator Blinking green Image is being recorded to the memory card No LED indicator Blinking green USB communication transfer in progress No LED indicator S...

Страница 18: ...images 1 Scene mode 3 Image quality M Manual mode Fine A Automatic mode Normal Macro mode Economy Portrait mode Landscape mode Night Scene mode Sports mode 2 Image size resolution 4 Saturation 2560 x...

Страница 19: ...ry level Full battery power Medium battery power Virtually no battery power 13 EV compensation 6 White balance Automatic Daylight Cloudy Sunset Tungsten Fluorescent 7 ISO Automatic 100 200 400 8 Flash...

Страница 20: ...e displayed when playing images back 1 Reverse arrow 2 Card indicator 3 Forward arrow 4 Current image total number of images 5 Battery level Adapter indicator These indicators are displayed when playi...

Страница 21: ...stalling the Batteries 1 Make sure the camera is off 2 Slide the battery SD memory card cover 3 Insert the batteries noting correct polarity and 4 Close the battery SD memory card cover firmly If you...

Страница 22: ...3 Connect the other end to an electrical outlet Make sure to use only the AC power adapter specified for the camera Damage caused by the use of an incorrect adapter is not covered under the warranty...

Страница 23: ...battery SD memory card cover 3 Insert an SD memory card If the card cannot be inserted check the orientation 4 Close the battery SD card cover To remove the SD memory card make sure the camera is off...

Страница 24: ...is firmly secured Attaching the Lens Strap To prevent losing your lens cap always use the lens strap Attach the lens strap as follows 1 Pass the end of the lens strap through the strap eyelet on the l...

Страница 25: ...ppears prompting you to choose a language for displayed information and the LCD monitor Follow the steps below to set the OSD On Screen Display language 1 Select a language that you prefer by using th...

Страница 26: ...g the batteries AC power adapter or replacing the batteries When the date and time setting screen appears follow the steps to set the correct date and time You may skip this procedure by pressing Exit...

Страница 27: ...for printed output and situations requiring the finest detail Lower resolution quality images take up less memory space and may be quite suitable for sharing images via e mail in a report or on a web...

Страница 28: ...er of shots that you can capture at each setting based on internal memory or an 8MB 16MB 32MB 128MB 256MB SD memory card The above data shows the standard testing results The actual capacity varies ac...

Страница 29: ...ompose images and examine all the details but using it will also consume more battery power However always use the LCD monitor for MACRO shots to avoid parallax effects Viewfinder Using the viewfinder...

Страница 30: ...itor 4 Press the shutter button The LED indicator blinks green while the camera is processing a captured image In Capture mode each press of the OK button switches the display state as LCD On Non Info...

Страница 31: ...ery Manual Automatic Macro Portrait Landscape Night Scene or Sports 3 Press T button to activate the zoom function Digital zoom s range is from 1 25x to 4x within 11 stages 1 25x 1 5x 1 67x 1 75x 2x 2...

Страница 32: ...first 2 seconds and then blinking rapidly for the last 3 seconds 1 Secure the camera to a tripod or place it on a stable surface 2 Turn the camera on by sliding the POWER switch 3 Set the mode dial b...

Страница 33: ...the POWER switch 2 Set the mode dial base on the desired scenery Manual Automatic Macro Portrait Landscape Night Scene or Sports 3 Press the button located on the rear side of the camera repeatedly u...

Страница 34: ...red eye phenomenon Select this mode when capturing images of people and animals in low light conditions Fill Flash on The flash will always fire regardless of the surrounding brightness Select this mo...

Страница 35: ...ration Macro Mode This mode is used to shoot a close up of the subject such as flowers or insects Portrait Mode This mode is used to make the main subject stand out precisely while the background deta...

Страница 36: ...on by sliding the POWER switch 2 Rotate the mode dial to M 3 Press the Menu button 4 To set Image size Image quality EV White balance ISO Color Saturation and Sharpness you may press button or press...

Страница 37: ...2 F3 6 F 4 0 F4 5 F 5 0 F5 6 F6 3 F7 1 to F8 0 Shutter Speed Priority In M Manual mode images can be captured with the priority given to the shutter speed The aperture is automatically set according t...

Страница 38: ...t Image size Image quality EV White balance and ISO you may press button or press button and then the OK button to enter the sub menu and choose the setting with you preference After the settings are...

Страница 39: ...n and then the OK button to enter the sub menu and choose the setting with you preference After the settings are all set press the OK button to confirm 5 Compose the image 6 Press the shutter button d...

Страница 40: ...Image quality EV White balance Color Saturation and Sharpness you may press button or press button and then the OK button to enter the sub menu and choose the setting with you preference After the set...

Страница 41: ...ial to 3 Press the Menu button 4 To set Image size Image quality EV White balance Color Saturation and Sharpness you may press button or press button and then the OK button to enter the sub menu and c...

Страница 42: ...sliding the POWER switch 2 Rotate the mode dial to 3 Press the Menu button 4 To set Image size Image quality EV White balance Color Saturation and Sharpness you may press button or press button and t...

Страница 43: ...EV White balance Color Saturation and Sharpness you may press button or press button and then the OK button to enter the sub menu and choose the setting with you preference After the settings are all...

Страница 44: ...ckly scan for the image you want You can also change the size resolution or quality of images which is handy when you utilize an image as a mail attachment for example In Playback mode pressing the Pl...

Страница 45: ...n To view the next image press the button When playing back images you may also display image information Press the OK button and detailed image information is displayed The recorded time appears on t...

Страница 46: ...ation allows you to view fine details 1 Turn the camera on by sliding the POWER switch 2 Press the button 3 View and select your recorded images by using the button 4 To zoom an image press the T butt...

Страница 47: ...hen the button Nine thumbnail images appear on the LCD monitor assuming there are nine or more recorded images in memory To view a full size image select an image using the Button and press the teleph...

Страница 48: ...s the Playback button 3 Then press the Menu button and select Slide show by using button 4 Press the OK button and to set the playback interval by using button 5 And then press the OK button again to...

Страница 49: ...k menu Delete One Image Video Clip at a Time 1 Turn the camera on by sliding the POWER switch 2 Press the button on the rear side of the camera to see captured images and video clips 3 Select the unwa...

Страница 50: ...he button 6 Press the OK button again to confirm After that No Image is displayed To exit the screen press the playback button menu button or rotate the mode dial The camera is ready to capture the ne...

Страница 51: ...Using this option you may format internal memory or an SD memory card 1 Turn the camera on by sliding the POWER switch 2 Press the Playback button on the rear side of the camera 3 Then press the menu...

Страница 52: ...ll by pressing button 4 Select Lock by pressing button and then press OK To protect one image you may also press button to set the setting Once the image video clip is protected the protection icon wi...

Страница 53: ...tton The record time REC icon card indicator and battery level will display on the LCD monitor 3 You can start recording the video clip simply by pressing the button To stop the recording press the bu...

Страница 54: ...video clip the image number and duration will be displayed To stop or start playback press the OK button To exit playback press the playback button or rotate the mode dial Then the camera will be rea...

Страница 55: ...lips from the ViviCam 3935 to your computer follow the steps below Step 1 Instal the USB driver only for Windows 98 Step 2 Connecting the ViviCam 3935 to Your Computer Step 3 Downloading Images Video...

Страница 56: ...he CD ROM packaged with the ViviCam 3935 into the CD ROM drive The welcome screen appears 2 Click Install USB Driver Follow the on screen instructions to complete the installation After the USB driver...

Страница 57: ...actually the memory or memory card in your camera Typically the camera will be assigned drive letter e or higher 6 Double click on the removable disk and locate the DCIM folder 7 Double click on the D...

Страница 58: ...nu You may also drag and drop image files from the camera to a desired location For Computers Running Mac OS Open the untitled disk window and the hard disk or the destination location Drag and drop f...

Страница 59: ...otoSuite 1 Insert the CD ROM packaged with the ViviCam 3935 into the CD ROM drive The welcome screen appears 2 Click Install PhotoSuite Follow the on screen instructions to complete the installation F...

Страница 60: ...a to create spectacular 3600 panoramic images please refer to its online help For Windows 2000 XP users make sure to install and use the PhotoVista while logged in as a user with an Administrator acco...

Страница 61: ...t sections of interest 1 Insert the CD ROM that came with the camera into the CD ROM drive The welcome screen appears 2 Click Install Acrobat Reader Follow the on screen instructions to complete the i...

Страница 62: ...in other languages may be found on our website 1 Insert the CD ROM that came with the camera into the CD ROM drive The welcome screen appears 2 Click Install User s Manual Follow the on screen instruc...

Страница 63: ...t Scene or Sports 3 Press the button and then scroll through the options by pressing the button 4 To set Image size resolution Image quality EV White balance ISO Color Saturation or Sharpness you may...

Страница 64: ...ations where you wish to manually override the automatic determination of the camera and under or over expose the image This is called EV compensation The EV compensation of your ViviCam 3935 can be a...

Страница 65: ...it portraits Very bright scenes such as snowfields and highly reflective subjects Shots made up predominantly of sky Negative Compensation Spot lighted subjects particularly against dark backgrounds I...

Страница 66: ...s under specific lighting conditions Automatic Daylight Cloudy Sunset Tungsten and Fluorescent To set white balance you may press button in the main menu or press button and then the OK button to ente...

Страница 67: ...owever when capturing high quality images use a lower ISO setting To set ISO press button in the main menu or press button and then the OK button to enter the sub menu and choose the setting After the...

Страница 68: ...ll demonstrate different impression by choosing different types of color To set Color Full color Black White Sepia you may press button in the main menu or press button and then OK button to enter the...

Страница 69: ...is set press the OK button again to confirm The saturation setting is not available in A Automatic mode Sharpness The ViviCam 3935 can automatically emphasize the borders between light and dark areas...

Страница 70: ...tton Delete Refer to Deleting Images Video Clips in Playback Mode Copy to card This feature allows you to copy your images from the ViviCam 3935 s internal memory to a memory card However you can only...

Страница 71: ...onomy To perform this function press OK button to display the submenu Select the image quality as you preference by pressing button then press the OK button Resize After an image has been captured you...

Страница 72: ...lect the video output standard according to where you are located To set this option first press the OK button Then use the button to select your TV broadcast format NTSC or PAL and then press OK butt...

Страница 73: ...on Then select beeper Louder Soft or Off by using the button and then OK button to confirm The ViviCam 3935 defaults to Off Language This option allows you to select the language for the On Screen Dis...

Страница 74: ...era has powered off then you must turn the camera on again by sliding the POWER switch To change the power saving interval when the camera is charging with batteries press button in the main menu or p...

Страница 75: ...E 75 USB Cable Notebook Computer TV PCMCIA Adapter SD Card Reader SD Card Reader VIDEO Cable SD Memory Card Printer CONNECTINGTHEVIVICAM3935TOOTHERDEVICES...

Страница 76: ...2560 x 1920 1600 x 1200 1280 x 960 640 x 480 Movie image 320 x 240 Image quality Fine Normal Economy Recording media 16 MB internal memory 14 MB available for image storage SD memory card optional Len...

Страница 77: ...ip Standards JPEG EXIF 2 1 MPEG 1 Level I Interface DC IN jack USB connector VIDEO OUT jack NTSC or PAL Operatingenvironment Operation 00 C 400 C 15 90 humidity Storage 200 C 600 C 10 95 humidity Powe...

Отзывы: