Vivitar Vivicam 3695 Скачать руководство пользователя страница 12

22

6-6 TV Output


You can display your images on a standard TV as follows: 


1. Please select the video standard that matches the TV you 

wish to use. Turn the 

Mode Dial


to 

Setup Mode


and select NTSC or PAL.


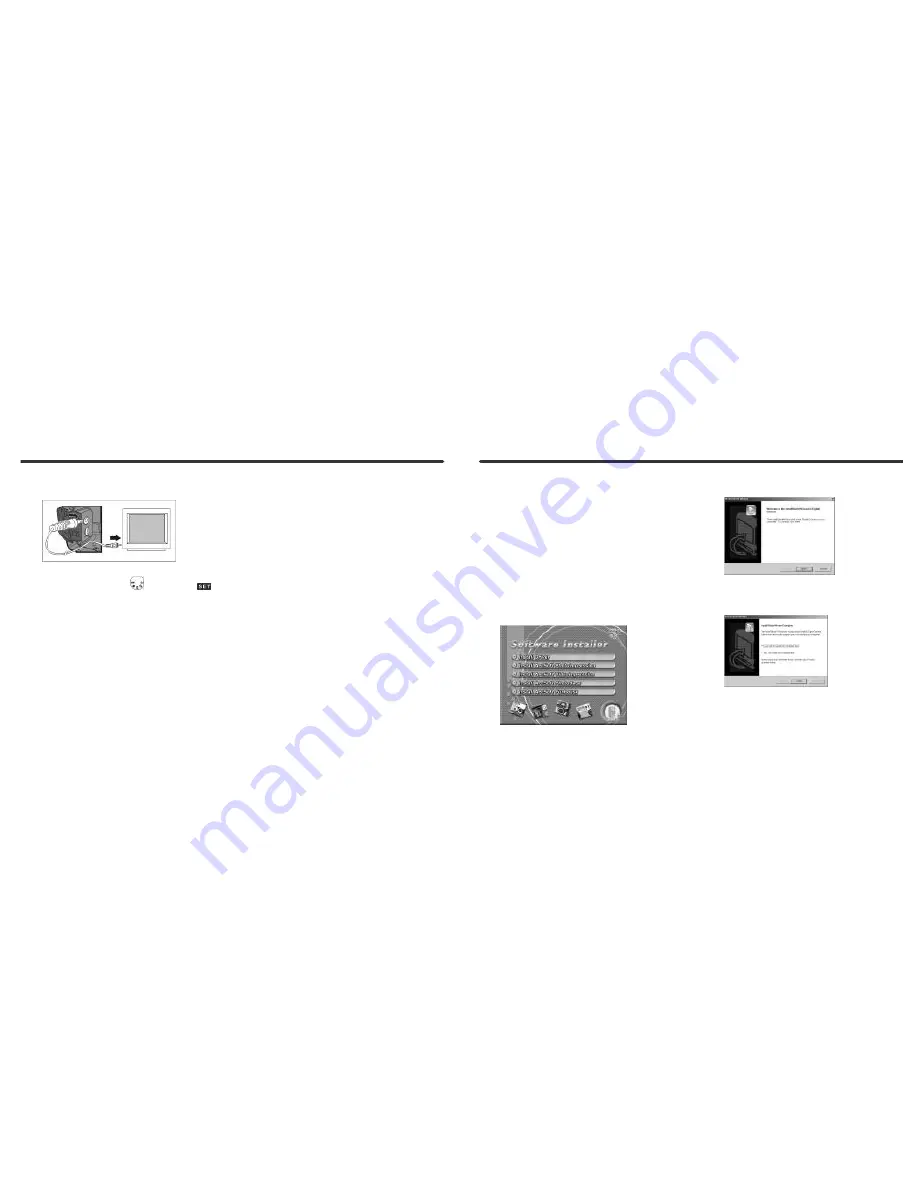
2. Use the TV cable provided with the camera to connect the 

camera and output device. 

3. Turn on the camera. No images will appear on the camera 

LCD Monitor.    The images will now appear on the output 
device's display. 

Notes:   

• 

You can use the camera normally when connected to a 
TV.  The only difference is that your images, and 
image information will now appear on the TV screen. 

• 

While connected to a TV out cable, images will be not 
appear on the camera LCD Monitor. To restore the 
display the camera LCD Monitor, disconnect the TV 

cable from the camera.


23

7-1 Installing the PC Camera Driver 


You can use your camera in either PC Camera or Mass Storage 
modes on a PC. Win Me/2000/XP users do not usually require a 
driver for Mass Storage operations. However, a driver 

is

 required 

for PC/Web camera operation (PC only). Mac OS and Lycoris 
users do not need a driver for mass storage operation. 

Install 

the PC camera driver before connecting the camera to your 
PC

 as follows:


1. Insert the V3695 CD-ROM into your CD-ROM drive.


2. The CD will Auto-run and the welcome screen appears:


(If your CD-ROM does not auto-run double click on the "

My 

Computer

" icon on your desktop. Double click the CD-ROM 

drive icon and double click on the 

InstallMgr.exe

 file. 


3. Click on Install driver and this screen will appear: 


4. Click the Next to continue the setup program. After the 

camera driver installs successfully, a message will appear: 


5. Click Finish to restart your computer and finish the camera 

driver installation. 


You may now connect your camera to your PC.


Chapter 7 Driver Installation


Содержание Vivicam 3695

Страница 1: ...10 3 9 Macro Switch 10 Chapter 4 Navigating Modes and Menus 4 1 Record Mode 11 4 2 Play Mode 12 4 3 Movie Mode 12 4 4 Setup Mode 13 4 5 PC Connection Selection 15 Chapter 5 Preparing Your Camera 5 1 A...

Страница 2: ...If anyone accidentally swallows the liquid rinse the mouth with water drink large amount of water and consult a physician to receive treatment as soon as possible 3 1 3 Operational Precautions Your c...

Страница 3: ...er Power Switch 3 Lens 4 Shutter Button 5 Self timer LED 6 Red eye Reduction LED 7 Macro Switch 8 USB and TV Port Cover 5 Memory Card Slot Rear View 1 LCD Monitor 2 Display Button 3 Mode Dial 4 Status...

Страница 4: ...Fine 100 40 25 15 Quality Normal 200 100 60 40 Movie File duration in 16MB internal memory 100 seconds Power 2 AA Alkaline Batteries or one CR V3 Dimensions 93 x 56 x 38 mm Weight About 120g without...

Страница 5: ...d with two step shutter When you press and hold the Shutter button half way down a set of brackets will appear in the center of the LCD display as the exposure value is set Press the Shutter button do...

Страница 6: ...e camera above the of the LCD monitor will be on Note When you select Macro Mode the flash will be disabled automatically Note After using the camera for close up macro shots it is very important to s...

Страница 7: ...s of shots Start Auto Play 1 Movie Mode 2 Recorded Movie Time seconds 3 Recording indicator 4 Battery Status 5 Time Date 13 4 4 Setup Mode 1 Image Resolution 2048x1536 1600x1200 800x600 1280x960 2 Ima...

Страница 8: ...ages by double clicking on My Computer Look for a disk drive icon labeled removable disk Double click on this icon and look for a folder labeled DCIM digital camera images Your images will be found in...

Страница 9: ...lock the battery cover NOTE Exercise caution when opening the battery cover to avoid damaging the battery compartment cover and hinges If the battery power indicator shows only one segment battery po...

Страница 10: ...ou can adjust camera functions including Resolution Image Quality White Balance EV Compensation OSD Language Date Time TV Output standard lighting frequency Format Media and reset settings to their de...

Страница 11: ...Dial to Play Mode 2 Use the lens cover to turn the camera on As the camera powers up the last recorded image appears on the LCD 3 Press the arrow buttons on the MENU ENTER Button to review your image...

Страница 12: ...Driver You can use your camera in either PC Camera or Mass Storage modes on a PC Win Me 2000 XP users do not usually require a driver for Mass Storage operations However a driver is required for PC We...

Страница 13: ...con on your desktop Double click the CD ROM drive icon and double click on the InstallMgr exe file 3 Click on any of the Arcsoft applications to install A screen will appear as follows 4 Select desire...

Отзывы: