Vivitar Vivicam 3675 Скачать руководство пользователя страница 28

27

E

Deleting images

You can delete one image/video clip or all images/video clips at a time depending
how long you press the   button.

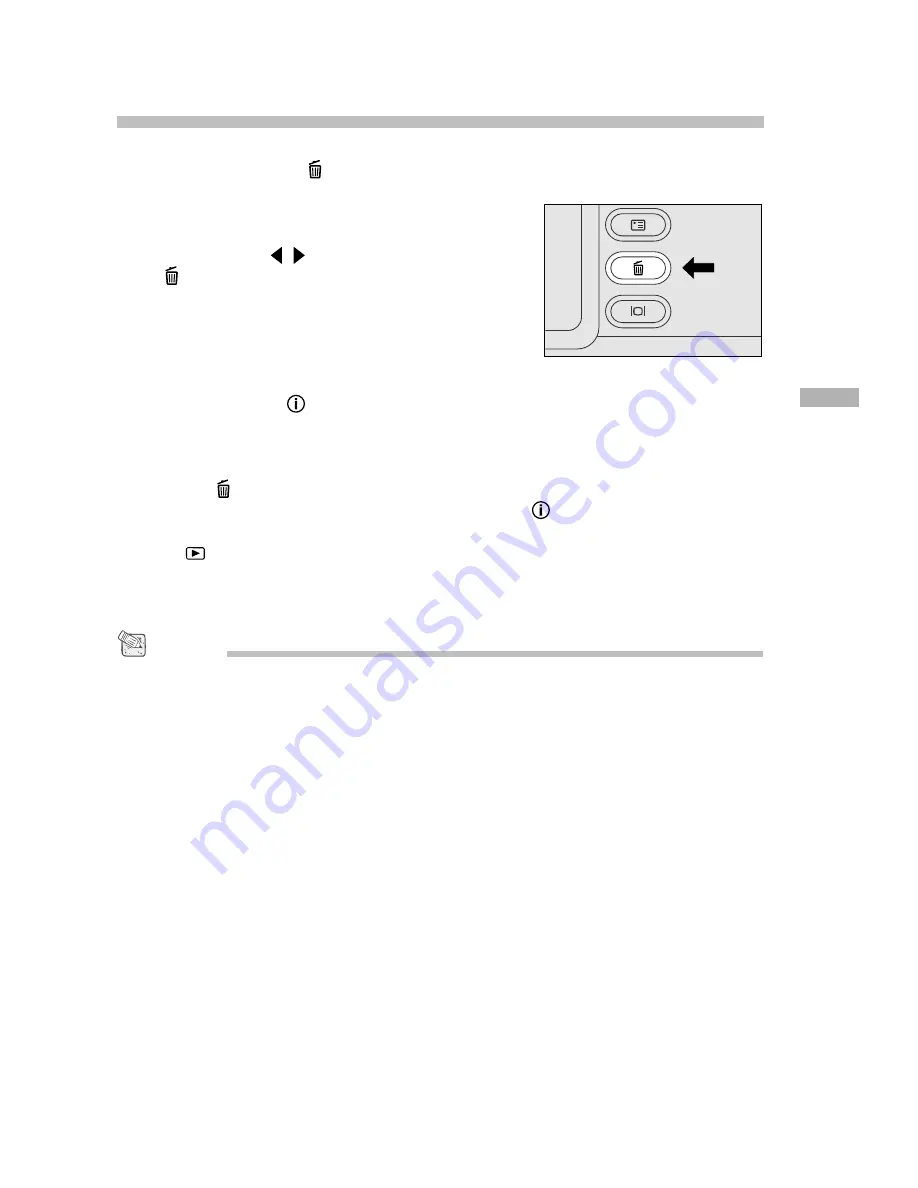
To delete one image at a time:

1. Select the image/video clip you want to de-

lete by using the  /   button. And then press
the   button.

2. Select [YES], and then press the 

ENTER

button. The next image/video clip appears.

 If you want to cancel the deletion, select

[NO].

3. Continue the deletion if necessary. If all im-

ages are deleted, [

 NO IMAGES] pops up.

To exit, turn the mode dial to other mode.

To delete all images at a time:

1. Press the   button for over 1 second.
2. Select [YES] and press the 

ENTER

 button. The [ 

  NO IMAGES] pops up. To

exit, turn the mode dial to other mode. If you select [NO], the screen will return
to the 

 mode.

• To delete the images or video clips stored in the internal memory, remember not to insert the

memory card in the camera. Otherwise, you will delete the images or video clips stored in the

SD memory card.

NOTE

Содержание Vivicam 3675

Страница 1: ...Vivicam 3675 User Manual English 030326...

Страница 2: ...ations However there is no guarantee that interference will not occur in a particular installation If this equipment does cause harmful interference to radio or television reception which can be deter...

Страница 3: ...Incorporated Other names and products may be trademarks or registered trademarks of their respective owners READ THIS FIRST Please start by reading the important messages below first 1 The bundled dr...

Страница 4: ...r an electrical shock If the camera has been dropped or if the camera case has been damaged turn the camera off and then disconnect the power source batteries or AC power adapter If you are using the...

Страница 5: ...o may damage the cords or cables and cause a fire or an electrical shock When leaving the camera unused for long periods such as during a vacation always unplug the camera from the power source batter...

Страница 6: ...LCD monitor 18 Reviewing the last picture in the record manual record mode 18 Using the digital zoom 19 Using the optical zoom 19 Using the self timer 20 Using the macro mode 21 Using the flash 21 Ta...

Страница 7: ...T 37 LCD BRIGHTNESS 38 QUICKVIEW 38 DIGITAL ZOOM 38 WHITE BALANCE 38 Manual record menu 38 EV COMPENSATION 39 SHARPNESS 39 EXIT 39 Playback menu 40 LCD BRIGHTNESS 40 SLIDE SHOW 40 COPY TO CARD 40 DPOF...

Страница 8: ...s you have taken can be easily downloaded to your computer without an effort by the supplied USB cable and USB driver for Win98 and Mac OS 8 6 You can enhance and retouch your pictures on your compute...

Страница 9: ...2 Mode dial 3 Power switch 4 Shutter button 5 Strap eyelet 6 USB connector 7 VIDEO OUT jack 8 Battery SD card cover 1 2 3 4 5 6 7 8 9 10 11 12 13 14 9 Quality Resolution button 10 Flash mode button 11...

Страница 10: ...tton 3 ENTER button 4 Arrow button right Quick playback button 5 Arrow button down Self timer button 1 LED indicator 2 Viewfinder 3 LCD monitor 4 DC IN jack 5 Telephoto button Zoom in button 6 Wide an...

Страница 11: ...ode to choose your preferences on the camera s settings LED indicators Indicator Status Description Sound LED Indicator Solid red The camera is powered on No LED Indicator Blinking red When detecting...

Страница 12: ...ry power Medium battery power Low battery power No battery power Digital indicator This display varies according to the mode dial setting Displays the estimated shots that you can take in Record mode...

Страница 13: ...formation The displayed indicators when recording still images The displayed indicators when recording video clips The displayed indicators when playing images back The displayed indicators when playi...

Страница 14: ...f time then remove them from the camera to prevent leaks or corrosion Never use manganese batteries Never use different types of batteries together or mix old and new batteries Low temperatures can sh...

Страница 15: ...serted check whether the direction is correct 4 Close the battery SD card cover To remove the SD memory card make sure the camera is off Open the battery SD card cover Slightly press the SD memory car...

Страница 16: ...NGUAGE The date time setting screen will pop up under the two situations below when first turning the camera on when the camera is turned on again after removing the batteries AC power adapter and the...

Страница 17: ...n the status LCD Resolution Quality The camera provides 2 resolution modes and 3 quality modes which can be changed cyclically by pressing the button The cyclical order is repeat Resolution quality in...

Страница 18: ...mpose pictures and examine all details but consume more battery power Using the viewfinder 1 Turn the camera on by sliding the POWER switch 2 Turn the mode dial to the mode or the mode 3 Compose the p...

Страница 19: ...bright light This is not a malfunction Using the LCD monitor for an extended period of time may result in the decrease of shots that you can take To increase the shots and conserve battery power turn...

Страница 20: ...n is only available when you set the LCD monitor and the digital zoom to ON To enable the digital zoom refer to DIGITAL ZOOM in Record Manual record menu 1 Turn the camera on 2 Turn the mode dial to t...

Страница 21: ...ce it on a stable surface 2 Turn the camera on 3 Set the mode dial to the mode or the mode 4 Press the button The icon appears on the LCD monitor and status LCD 5 Compose the picture 6 Press the shutt...

Страница 22: ...viewfinder in macro mode may cause images composed to be off center due to the parallax phenomenon We recom mend that you use the LCD monitor instead to compose the picture in this situation After one...

Страница 23: ...artificial light backlighting fluorescent lighting etc The flash does not fire Select this mode when taking pictures at a place where the flash photography is prohibited or under the situation that t...

Страница 24: ...E BALANCE EV COMPENSATION or SHARPNESS in Manual Record menu To take pictures manually 1 Turn the camera on 2 Turn the mode dial to the mode 3 Press the button 4 Move to WHITE BALANCE EV COMPENSA TION...

Страница 25: ...ode dial to the mode 3 Select the image that you want to view by using the button To view the previous image press the button To view the next image press the button If there is no image stored in the...

Страница 26: ...ng it again magnifies the image to 4X When enlarging the recorded image you will see a red frame with a red box inside The red frame indicates the entire image while the red box shows the enlarged are...

Страница 27: ...e only Image and OSD on screen display Thumbnail image display Slideshow display Slideshow function enables you to play your images back in order automatically which is very useful and convenient for...

Страница 28: ...etion select NO 3 Continue the deletion if necessary If all im ages are deleted NO IMAGES pops up To exit turn the mode dial to other mode To delete all images at a time 1 Press the button for over 1...

Страница 29: ...recordable movie time displays on the status LCD and the LCD monitor 3 You can start recording a video clip by press ing the shutter button The elapsed time displays on the LCD monitor while recordin...

Страница 30: ...aying back the video clip will change the status as follows Movie playback starts Movie playback pause The first screen of the movie Shutter button Shutter button Arrow down button or time out Arrow d...

Страница 31: ...our family or friends via e mail or post them on the Web Before doing those things you need to connect the camera to your computer by using the USB cable and then transfer the images video clips To tr...

Страница 32: ...ng anything separately is not necessary For Mac OS 8 6 users however you need to install USB driver first 1 Insert the CD ROM packaged with the camera into the CD ROM drive 2 Select and double click D...

Страница 33: ...ect the images video clips that you want and then choose Copy from the Edit menu Then open the destination location and choose Paste from the Edit menu For computers running Mac OS Open the untitled d...

Страница 34: ...images ready and go explore this amazing program To install MGI PhotoSuite 1 Insert the CD ROM packaged with the cam era into the CD ROM drive The welcome screen appears 2 Click Install MGI PhotoSuite...

Страница 35: ...d its intuitive inter face will let even a novice get great results in minutes To install MGI PhotoVista 1 Insert the CD ROM packaged with the cam era into the CD ROM drive The welcome screen appears...

Страница 36: ...looks 1 Insert the CD ROM packaged with the cam era into the CD ROM drive The welcome screen appears 2 Click Install Acrobat Reader Follow the on screen instructions to complete the installation For M...

Страница 37: ...this step you will be able to view or print this electronic document 1 Insert the CD ROM packaged with the cam era into the CD ROM drive The welcome screen appears 2 Click Install User s Manual Follo...

Страница 38: ...then press the ENTER button QUICKVIEW By enabling quick view you can temporarily view the image on the LCD monitor as soon as you take a picture After a temporarily preview t h e c a m e r a re t u r...

Страница 39: ...TE BALANCE The image appears different under different color of lighting Human eyes can solve this problem But for camera you need to make adjustments Normally the camera adjusts the white balance aut...

Страница 40: ...ghly reflective subjects Shots made up predominantly of sky Negative Compensation Spotlight subjects particularly against dark backgrounds Copying of printed text white characters on black paper Scene...

Страница 41: ...his option can automatically display one im age at a time in order with the delay time that you select Use the button to select the delay time that you want and then press the ENTER button 2 sec 4 sec...

Страница 42: ...et press the button PRINT QUANTITY you can select image quantity from 1 9 PRINT SIZE you can select your preferred image size PRINT STD 3x5 4x6 5x7 8x10 PRINT INDEX this option allows you to print the...

Страница 43: ...u want to set by using the button LCD BRIGHTNESS This option adjusts the brightness of the LCD monitor Refer to LCD BRIGHTNESS in Record menu for detailed information EXIT This option exits the movie...

Страница 44: ...s you to select the language displayed on the LCD monitor Press the ENTER button to enter the LANGUAGE sub menu And then select the language that you want by using the button and press the ENTER butto...

Страница 45: ...witzerland Thailand Norway etc AUTO POWER OFF In case no activities are carried out for a certain period of time while powered on the camera stays idle or turns off automatically to conserve power Ina...

Страница 46: ...he ENTER button The following table shows the default setting for each item Item Description Image resolution 1600x1200 pixels Image quality Super Fine Flash Auto Quick view Off White balance Auto EV...

Страница 47: ...46 E CONNECTINGTHECAMERATOOTHERDEVICES USB Cable Computer Computer TV PCMCIA Adapter SD Card Reader SD Card Reader VIDEO Cable SD Memory Card Printer...

Страница 48: ...mal Wide 10cm to infinity at telephoto Tele 40cm to infinity at telephoto Macro Wide 10cm to 80cm at telephoto Tele 40cm to 80cm at telephoto Exposure Auto Compensation Manual 1 8 1 8EV 0 3EV step Whi...

Отзывы: