

Suggestions before using the iron for the first time
1. Certain part s of the iron have been lightly greased therefore the iron
could give off a little smoke when plugged in for the first time. This
will cease after a short while.
2. Before using the iron for the first time, remove the plastic protector
from the base and clean the base with a soft cloth.
3. Keep the base very smooth. Do not run it over metal objects (such as
against the ironing board, buttons, zips, etc.)
4. Pure wool fibers (100% wool) can be ironed with the appliance in the
steam position. by preference, select a high steam position and use a
dry ironing cloth.
Selecting the temperature
1. Check the ironing instructions on the garment to be ironed.
2. If the garment does not have any ironing instructions but you know the
kind of fabric in question, use the chart below.
3. Fabrics that have some kind of finish (polishing. wrinkles, contrasts….)
can be ironed at the lowest temperatures.
4. If the fabric contains several kinds of fibers, always select the
temperature applicable, if an article contains 60% polyester and 40%
cotton, you must always choose the temperature corresponding to
polyester and without steam.
5. First classify the articles to be ironed according to the
most suitable ironing temperature: wool with wool,
cotton with cotton, etc. as the iron heats up as fast as
it cools, start by ironing the articles requiring the lowest
temperature such as those made of synthetic fibers.
Progress towards those that require the highest temperatures.
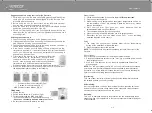
6. Press the temperature control button (fig.0) until it is in underside of
the appropriate signal according to the following:
·
Position for nylon and acetate (fig.1)
··
Position for wool, silk or mixtures (fig.2)
···
Position for cotton (steam) (fig.3)
MAX Position for linen (steam). (fig.4)
Filling water :
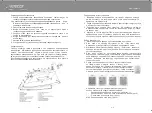
1. Unplug the iron.
2. Set the steam button to “0” position. (fig.5)
3. Fill the tank through the filling hole. (fig.6)
-
If you have hard water, it is advisable to use only distilled water.
-
do not use chemically de-limed water or perfumed
4. Do not store the iron with water in the tank.
Steam ironing:
1. Fill the iron as described in the section “
how to fill the water tank
”.
2. Plug the iron into the mains.
3. Steam ironing is only possible when the highest temperatures shown on
the temperature control are selected. Otherwise, water may escape
through the soleplate.
4. Wait until the pilot light goes out, which indicates that the
selectedtemperature has been reached.
5. Turn the steam button to the required position.
6. When the ironing is finished, place the iron in its upright position.
7. Disconnect the iron from the mains supply. Pour of any remaining
waterand leave the iron to cool off.
Spray
1. The spray can be used in any position, either in dry or steam ironing,
aslong as the water tank is filled with water.
2. Press the spray button for this function
NOTE:
This button has to be pressed repetitively to start this function for the
first time.
Shot of steam
Shot of steam give extra steam for removing persistent wrinkles.
1. Place the temperature selector at the "max" (fig.4) position and wait until
the pilot light goes out.
2. Wait for a few seconds for the steam to penetrate the fiber before
pressing again.
NOTE:
For the best steam quality, do not use more than three successive
bursts each time. Several pumping actions are needed to start this function.
Excessive use of this feature will cause the iron to cool, ensure that the pilot
light is out, before operating the shot of steam control
Dry ironing:
Turn the steam control to minimum position, set the temperature button to
the suitable position, you can dry ironing.
Self cleaning:
Set the temperature control to the maximum position; press the self clean
button for about 1 minute, strong steam will be sprayed to clean the steam
chamber. Use the function once every two weeks
Anti-drip:
This iron is equipped with a drip stop function: the iron automatically stops
steaming when the temperature is too low to prevent water from dripping out
of the soleplate.
P/3
P/4
www.vitesse.ru


