5
ENGLISH
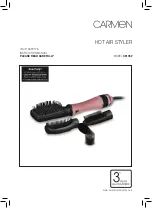
Styling your hair
Set switches (1,2) into positions of slight heating
and slow speed correspondingly, attach con-
centrating nozzle (6) to provide directed airflow.
Divide your hair into locks and start creating
hairstyle you need using round brush for setting
hair. While styling, direct airflow straight on your
hair in any direction you want.
If necessary, direct air jet on each lock for
2-5 seconds to fix it. Time of setting locks you
should determine on your own taking into ac-
count type of your hair.
“Cool shot”
This model is equipped with function of “cool
shot”, which can be used for fixing your hair-
style. Press and hold “cool shot” button (3). This
option helps to protect the hairstyle you have
created.
PROTECTION AGAINST OVERHEATING
The appliance is equipped with function of
protection against overheating. This function
switches the appliance off if temperature of out-
going air is higher then admitted. If hair dryer is
switched off during operation, turn it off by set-
ting switch (1) into position “0”, take power cord
plug out of wall outlet, examine if air inlet or out-
let openings are blocked, leave the appliance
for a while for cooling down for 5-10 minutes,
then switch it on again. Do not block air open-
ings while using hair dryer and avoid your hair
getting inside its air inlet opening.
CLEANING AND MAINTENANCE
This hair dryer is intended for household usage
only.
• It is recommended to remove air inlet grill (4)
and clean it from time to time.
• Set switch (1) into position “0” and disconnect
the appliance from power supply.
• Turn the grid (4) counterclockwise and re-
move it. Clean the grid with a brush, install the
grid back to its place and turn it clockwise un-
til bumping.
• Wipe hair dryer housing with damp cloth and
wipe it dry afterwards.
STORAGE
• Unplug power cord from wall outlet when hair
dryer is not in use.
• Do not wind power cord around the appliance
as doing so may cause cord’s malfunction.
Handle power cord carefully, do not pull, twist
or stretch it, especially near the plug and the
place of connection with appliance housing.
If power cord is twisted during operation,
straighten it from time to time.
• Eyelid for hanging (5) is provided for conve-
nient storage. You can hang the appliance this
way on condition there is not any possibility of
water dropping on the appliance.
• Store hair dryer at a place inaccessible by
children.
DELIVERY SET
1. Hair dryer – 1 piece
2. Concentrating nozzle – 1 piece
3. Operating manual – 1 piece
SPECIFICATIONS
Supply voltage: 220-240 V ~ 50 Hz
Power: 1800-2200 W
The manufacturer reserves the right to change
the device’s characteristics without prior notice.
Service life of the unit – 3 years
Guarantee
Details regarding guarantee conditions can be
obtained from the dealer from whom the appli-
ance was purchased. The bill of sale or receipt
must be produced when making any claim un-
der the terms of this guarantee.
This product conforms to the EMC
Directive 2014/30/EU and to the Low
Voltage Directive 2014/35/EU.
IM VT-8205.indd 5
26.07.2017 16:11:39
Содержание VT-8205 BK
Страница 1: ...1 VT 8205 BK 3 6 10 13 Hair dryer 17 IM VT 8205 indd 1 26 07 2017 16 11 39...
Страница 2: ...IM VT 8205 indd 2 26 07 2017 16 11 39...
Страница 6: ...6 VT 8205 BK 1 0 I II 2 I II III 3 4 5 6 30 IM VT 8205 indd 6 26 07 2017 16 11 39...
Страница 7: ...7 www vitek ru 1 0 I II 2 I II III 2 III 1 2 III 1 6 2 1 IM VT 8205 indd 7 26 07 2017 16 11 40...
Страница 8: ...8 2 I 1 I 3 1 2 6 2 5 3 1 0 5 10 4 1 0 4 5 1 1 2 1 3 1 IM VT 8205 indd 8 26 07 2017 16 11 40...
Страница 10: ...10 VT 8205 BK 1 0 I II 2 I II III 3 4 5 6 30 IM VT 8205 indd 10 26 07 2017 16 11 40...
Страница 11: ...11 8 8 www vitek ru 1 0 I II 2 I II III 2 III 1 2 III 1 6 2 1 IM VT 8205 indd 11 26 07 2017 16 11 40...
Страница 13: ...13 VT 8205 BK 1 0 I II 2 I II III 3 COOL 4 5 6 30 IM VT 8205 indd 13 26 07 2017 16 11 40...
Страница 14: ...14 8 8 www vitek ru 1 0 I II 2 I II III 2 III 1 2 III 1 6 IM VT 8205 indd 14 26 07 2017 16 11 40...
Страница 15: ...15 2 1 2 I 1 I 3 1 2 6 2 5 COOL 3 1 0 5 10 4 1 0 4 5 IM VT 8205 indd 15 26 07 2017 16 11 40...
Страница 16: ...16 1 1 2 1 3 1 220 240 50 1800 2200 3 2014 30 2014 35 IM VT 8205 indd 16 26 07 2017 16 11 40...
Страница 17: ...17 VT 8205 BK 1 0 I II 2 I II III 3 4 5 6 30 IM VT 8205 indd 17 26 07 2017 16 11 40...
Страница 18: ...18 www vitek ru 1 0 I II 2 I II III 2 III 1 2 III 1 6 2 1 2 I 1 I IM VT 8205 indd 18 26 07 2017 16 11 40...
Страница 19: ...19 3 1 2 6 2 5 3 1 0 5 10 4 1 0 4 5 1 1 2 1 3 1 220 240 50 1800 2200 3 IM VT 8205 indd 19 26 07 2017 16 11 40...