background image

41

Variable Speed

Before using the Variable Speed option, always begin with the Variable Speed Dial 
marker pointing to the Stop Symbol ( ) at the top of the dial.

1. 

Rotate the dial to the right to Variable Speed 1.

2. 

To activate the blending process, press down on the Start/Stop Switch.

3. 

Slowly turn the Variable Speed Dial to the desired speed, depending on the 
recipe used.

4. 

At the end of the blending cycle, rotate the Variable Speed Dial back to the 
Stop Symbol ( ) at the top of the dial.
Use the highest setting stated in the recipe for as much of the processing 
time as possible to make smoothies, soup, shakes, frozen mixtures, purées, 
nut butter, and for grinding grain. Processing times will generally be less than 
one minute (most take less than 30 seconds). The higher speed provides 
the best quality of refinement, breaking down ice, frozen fruit, whole fruit or 
vegetables, and grains to a smooth, lump-free consistency.
Blending for too long at too low a speed setting will overheat the machine and 
cause the Automatic Overload Protection to turn off the machine. Blending 
on a higher speed maximises the working of the motor’s cooling fan to avoid 
overheating.

Programmes

Programme blending speeds and duration vary and will stop automatically at the end of 
the programme.

• 

The Smoothie ( ) programme runs for approximately 45 seconds.

• 

The Frozen Dessert ( ) programme runs for approximately 55 seconds.

• 

The Hot Soup ( ) programme runs for approximately 6 minutes, 30 seconds.

hIntS FoR SEttInG SPEEDS


CAUTION

To Avoid Possible Burns, Never 

Start on Speeds Above 1 when 

Processing Hot Liquids.

Escaping steam, splashes or contents 
may scald.
To secure the contents, lock the lid and lid 
cap securely in place prior to operating 
the machine.
Always start on Variable 1, then slowly 
increase to 10.

Содержание PROFESSIONAL SERIES 500

Страница 1: ...Bedienungsanleitung Lesen Sie diese Hinweise und bewahren Sie sie auf Vita Mix Corporation 8615 Usher Road Cleveland OH 44138 2103 USA 1 800 848 2649 1 440 235 4840 Professional Series 500 vitamix com ...

Страница 2: ...ise zum sicheren Gebrauch 5 Bauteile und Funktionen 8 Bedienfeld 10 Über die Klingen 12 Stößel 13 Verwendung des Stößels 14 Hinweise zum Einstellen der Geschwindigkeit 15 Betriebsanleitung 16 Reinigung und Pflege 19 Fehlerbehebung 21 Garantie 22 Recycling Informationen 25 Technische Daten 28 ...

Страница 3: ...in dieser Broschüre sorgfältig bevor Sie beginnen Stellen Sie den Vitamix auf eine trockene ebene Fläche Vergewissern Sie sich dass das Gerät ausgeschaltet und an eine geerdete Steckdose angeschlossen ist Reinigen Sie das Gerät danach entsprechend den Anweisungen auf Seite 19 um es für den Gebrauch vorzubereiten Das Gerät sollte vor dem ersten Gebrauch unbedingt gereinigt werden Lassen sie uns anf...

Страница 4: ... Modellnummer Seriennummer Kaufdatum Gekauft bei Wenden Sie sich für Kundendienst und Registrierung in Deutschland bitte an einen der folgenden Händler Keimling Naturkost GmbH Zum Fruchthof 7a Buxtehude 21614 49 4161 51 160 keimling de naturkost keimling de Moravan Warenhandels GmbH Am Loferfeld 56 München 81249 49 89 86 37 98 48 moravan de info naturespirit de Hergestellt von Vita Mix Corporation...

Страница 5: ... Spielzeug verwenden 6 Verwenden Sie das Mixgerät nur wenn es auf einer ebenen stabilen Fläche ohne Wasserpfützen aufgestellt ist Vermeiden Sie dass der Behälter die Motorbasis oder das Stromkabel mit heißen Oberflächen in Berührung kommt oder über den Rand eines Tisches oder einer Arbeitsplatte hinausragt 7 Befüllen Sie den Behälter nicht über die angegebene Kapazität hinaus Die maximale Kapazitä...

Страница 6: ...s und ziehen Sie den Stecker bevor Sie Zubehörteile auswechseln oder sich beweglichen Teilen nähern 13 Bewahren Sie keine Fremdkörper z B Löffel Gabeln Messer oder die Verschlusskappe im Behälter auf Befindet sich ein Fremdkörper im Mixgerät wenn es eingeschaltet wird kann dies zu Schäden am Gerät und zu Verletzungen führen 14 Betreiben Sie das Mixgerät nicht wenn Stromkabel oder Stecker beschädig...

Страница 7: ...dem Behälter Wenden Sie sich an einen autorisierten Vitamix Kundendienstmitarbeiter um es reparieren oder ersetzen zu lassen 18 Verwenden Sie das Gerät nicht im Freien 19 Wenn Sie Nussbutter oder Lebensmittel auf Ölbasis herstellen verarbeiten Sie sie nicht länger als eine Minute nachdem die Mischung begonnen hat sich im Behälter zu drehen Eine längere Verarbeitung kann zu Beschädigungen am Behält...

Страница 8: ...Aus Schalter befindet sich auf der Vorderseite der Motoreinheit Über den Ein Aus Schalter regeln Sie die Stromversorgung des Geräts Start Stop Schalter Durch Betätigen des Start Stop Schalters wird der Mixvorgang gestartet Durch erneutes Betätigen des Start Stop Schalters wird der Mixvorgang beendet Geschwindigkeitsregler DermittigeGeschwindigkeitsreglerdientzweiFunktionen der Verwendung der drei ...

Страница 9: ...tierende Klingen Nicht während des Betriebs in den Behälter greifen Puls Schalter Der Puls Schalter kann bei Verwendung der Geschwindigkeitswahl oder der Programme genutzt werden Behälter Markierungen für Mengen in Millilitern Ounces oz und Cups ACHTUNG Die zu den unterschiedlichen Behälterformen typen und größen passenden Deckel und Stößel sind nicht untereinander austauschbar Zweiteiliger Deckel...

Страница 10: ...ie den Ein Aus Schalter zurück auf On stellen 2 Ein Aus Leuchte Die Ein Aus Leuchte befindet sich auf der Vorderseite des Geräts über dem Ein Aus Schalter Ein Leuchten bedeutet dass das Gerät an die Stromversorgung angeschlossen und der Ein Aus Schalter auf On gestellt ist Kurz vor Abschluss eines Programms beginnt die Leuchte zu blinken 3 Start Stop Schalter Wenn Sie den Geschwindigkeitsregler vo...

Страница 11: ...egler während des Mixens zwischen 1 und High hin und her um die Geschwindigkeit der Klingen zu erhöhen oder zu verringern d Drehen Sie den Geschwindigkeitsregler nach Abschluss des Mixvorgangs wieder nach oben auf das Stop Symbol 6 Programme Ihr Gerät besitzt drei Programmeinstellungen für die gängigsten Rezepte Drehen Sie den Geschwindigkeitsregler nach links um ein Programm für Smoothies gefrore...

Страница 12: ...ch durch ein D dry trocken gekennzeichnet und wurden speziell für die Verarbeitung trockener Materialien wie Getreide Cerealien und Kaffee entworfen Außerdem werden sie zum Kneten von Brotteig eingesetzt Die Trockenklingen können Flüssigkeiten NICHT effizient verarbeiten Wenn Sie regelmäßig Kräuter verarbeiten empfehlen wir die Anschaffung eines zusätzlichen trockenklingenbehälters D W D W Der Nas...

Страница 13: ...unten Vergewissern Sie sich dass der Stößel geeignet ist bevor Sie ihn bei einem Mixvorgang verwenden Für niedrige Behälter 2 0 l wird Stößel P N 016041 benötigt der ca 25 cm lang ist Für hohe Behälter 2 0 l wird Stößel P N 000760 benötigt der ca 32 cm lang ist Für Behälter mit 0 9 l und 1 4 l Fassungsvermögen wird Stößel P N 015033 benötigt der ca 28 cm lang ist Legen Sie den Deckel auf den leere...

Страница 14: ... gefüllt sein wenn der Stößel während des Mixens zum Einsatz kommt Verwenden Sie den Stößel NICHT länger als 30 Sekunden am Stück um ein Überhitzen während des Mixvorgangs zu vermeiden Spritzschutz des Stößels Stößel Deckel Verwendung des StöSSels Bauteil mit Klingen Wenn die Lebensmittel nicht zirkulieren können hat sich möglicherweise eine Luftblase gebildet Entfernen Sie bei fest verschlossenem...

Страница 15: ...Früchten oder Gemüse und erzeugt ein feines Mahlgut ohne Klumpen Zu langes Mixen bei zu niedriger Geschwindigkeit kann das Gerät überhitzen und bewirken dass der automatische Überlastungsschutz es abschaltet Mixen bei höherer Geschwindigkeit steigert die Leistung des Kühlerlüfters des Motors sodass eine Überhitzung vermieden wird Programme Die Programmgeschwindigkeit und dauer variiert Das Gerät s...

Страница 16: ...etem Motor auf die Basis zu stellen und schalten Sie die Motorbasis nicht ein wenn kein Behälter darauf befestigt ist 5 Stellen Sie mit dem Geschwindigkeitsregler eine Funktion ein Geschwindigkeitswahl Drehen Sie den Regler nach rechts auf 1 Programme Drehen Sie den Regler nach links auf das gewünschte Programm 6 Aktivieren Sie die Klingen indem Sie den Start Stop Schalter betätigen Ihr Behälter k...

Страница 17: ... 2 Verschließen Sie den zweiteiligen Deckel sicher Verwenden Sie beim Mixen immer den kompletten zweiteiligen Deckel es sei denn der Stößel befindet sich in der Verschlusskappenöffnung 3 Stellen Sie den Trockenklingenbehälter bei ausgeschaltetem Motor auf die Motorbasis indem Sie ihn auf der Auflage zentrieren Versuchen Sie niemals den Behälter bei eingeschaltetem Motor auf die Basis zu stellen un...

Страница 18: ...hen Sie den Geschwindigkeitsregler langsam auf die gewünschte Geschwindigkeit Programme DieProgrammgeschwindigkeitund dauervariiert DasGerät stoppt nach Beendigung des Programms automatisch Das Programm kann durch Betätigen des Start Stop Schalters jederzeit unterbrochen werden Durch erneutes Betätigen des Start Stop Schalters beginnt das Programm von vorne ...

Страница 19: ... das Gerät entsprechend den oben stehenden Anweisungen 2 Füllen Sie den Behälter zur Hälfte mit Wasser und geben Sie 1 Teelöffel flüssiges Bleichmittel hinzu 3 Lassen Sie den kompletten zweiteiligen Deckel einrasten 4 Drehen Sie den Geschwindigkeitsregler auf 1 Betätigen Sie den Start Stop Schalter Drehen Sie den Geschwindigkeitsregler langsam auf High Lassen Sie das Gerät 30 bis 60 Sekunden lang ...

Страница 20: ...e Vertiefungen um die Schalter Trocknen Sie alle Flächen sofort 5 Reiben Sie sie mit einem weichen Tuch trocken Lösen der Überwurfmutter Sollte sich die Überwurfmutter die sich am Boden des Behälters befindet lösen und das Bauteil mit den Klingen dadurch nicht mehr ausreichend fest sitzen VERWENDEN SIE DEN BEHÄLTER NICHT Wenden Sie sich für weitere Anweisungen unverzüglich an einen Händler oder Ve...

Страница 21: ... des Überspannungsschutzes 1 StellenSiedenEin Aus Schalter auf Off O 2 Trennen Sie das Gerät von der Stromversorgung 3 Nehmen Sie den Behälter ab 4 Legen Sie die Motorbasis auf die Seite 5 Drücken Sie den Reset Knopf an der Unterseite des Geräts 6 Verbinden Sie das Gerät erneut mit dem Stromnetz und fahren Sie mit dem Mixen fort Wenn das Mixgerät sich nicht unmittelbar starten lässt ist der Motor ...

Страница 22: ...ängeln oder infolge des aus dem normalen Gebrauch im Haushalt resultierenden Verschleißes entwickeln garantiert Vitamix dem Eigentümer das eingesandte Gerät oder Teile davon innerhalb von 30 Tagen nach Erhalt kostenlos zu reparieren Falls Vitamix nach eigenem Ermessen zu dem Schluss kommt dass das defekte Gerät oder Komponenten davon nicht reparabel sind kann Vitamix entweder A das Gerät kostenlos...

Страница 23: ...ser Garantie unterliegen zusammen mit einer Motorbasis genutzt werden die nicht ausdrücklich von Vitamix zugelassen wurde 6 Autorisierung von Rücksendungen im Rahmen dieser Garantie Sollten Wartungsarbeiten oder Reparaturen am Gerät oder an Teilen davon notwendig sein wenden Sie sich telefonisch unter der Rufnummer 1 800 848 2649 oder 1 440 235 4840 an den Kundendienst von Vitamix Bei Produkten di...

Страница 24: ...ten Partner importiert wurde einen entsprechenden Hinweis finden Sie auf dem Produktetikett oder der Rechnung wenden Sie sich an Keimling Naturkost GmbH Zum Fruchthof 7a Buxtehude 21614 49 4161 51 160 www keimling de naturkost keimling de Moravan Warenhandels GmbH Am Loferfeld 56 München 81249 49 89 86 37 98 48 www moravan de info naturespirit de In allen anderen Fällen Vita Mix Corporation 8615 U...

Страница 25: ...die nicht den gesetzlichen Vorschriften entspricht Deponien potenziell umweltschädlich sind Die Abbildung der durchgestrichenen Mülltonne auf diesem Produkt soll Sie daran erinnern es nach Möglichkeit dem Recycling zuzuführen Bitte verhalten Sie sich umweltbewusst und führen Sie dieses Produkt am Ende seiner Lebensdauer über die Recycling Einrichtungen bei Ihnen vor Ort dem Recycling zu Recycling ...

Страница 26: ...iftliche Genehmigung der Vita Mix Corporation weder ganz noch teilweise reproduziert oder in jeglicher Form übertragen oder auf irgendeine Weise in einer Datenbank oder einem Abrufsystem gespeichert werden 104372 7 13 Technische Daten Wenn zutreffend Gedruckt in den USA Motor PS Motor mit 2 Spitzen Ausgangsleistung Elektrischer Strom 220 240 V 50 Hz 1100 1200 W Abmessungen Höhe 51 6 cm Breite 22 4...

Страница 27: ...Owner s Manual Read and save these instructions Vita Mix Corporation 8615 Usher Road Cleveland OH 44138 2103 U S A 1 800 848 2649 1 440 235 4840 Professional Series 500 vitamix com ...

Страница 28: ...ortant Instructions for Safe Use 33 Parts and Features 36 Control Panel 38 About the Blades 40 Tamper 41 How to Use the Tamper 42 Hints for Setting Speeds 43 Operating Instructions 44 Care and Cleaning 47 Troubleshooting 49 Warranty 50 Recycling Information 53 Specifications 56 ...

Страница 29: ... material found in this booklet before getting started Set your Vitamix machine on a dry level surface Make sure the power switch is set to Off and that the machine is plugged into an earthed electrical outlet Then follow the cleaning instructions on page 47 to prepare your machine for use Always clean your machine before you first use it Let s get started ...

Страница 30: ...of Purchase Purchased From For customer service and registration in Germany please contact your local distributor including Keimling Naturkost GmbH Zum Fruchthof 7a Buxtehude 21614 49 4161 51 160 keimling de naturkost keimling de Moravan Warenhandels GmbH Am Loferfeld 56 München 81249 49 89 86 37 98 48 moravan de info naturespirit de Manufactured by Vita Mix Corporation vitamix com English only se...

Страница 31: ...hildren should be supervised to ensure that they do not play with the blender 6 Operate only when the blender is on a flat and stable surface free from standing water Do not let the container motor base or power cord touch hot surfaces or hang over the edge of a table or counter 7 Do not fill the container beyond its stated capacity The maximum capacity is marked on the container 8 Always begin bl...

Страница 32: ...iance and unplug before changing accessories or approaching parts that move in use 13 Do not leave or store foreign objects such as spoons forks knives or the lid cap in the container Starting the blender with a foreign object in the container will damage the blender and may cause injury 14 Do not operate the blender with a damaged cable or plug If the supply cable is damaged it must be replaced b...

Страница 33: ... the container Contact your nearest Vitamix authorised service representative for service or replacement 18 Do not use outdoors 19 When making nut butter or oil based food do not process for more than one minute after the mixture starts to circulate in the container Processing for longer periods can cause damage to the container and overheating of the motor SAVE THESE INSTRUCTIONS NOTICE FAILURE T...

Страница 34: ...r Switch is on the front of the machine base The On Off Switch controls the power to the machine Start Stop Switch Pressing down on the Start Stop Switch will initiate the blending process Pressing down on the Start Stop Switch again will stop the blending process Variable Speed Dial The centre Variable Speed Dial serves two functions the use of three programmes or the use of ten Variable Speed se...

Страница 35: ... Features WARNING Rotating Blades Can Cause Severe Injury Do not reach into the container while the machine is running Pulse Switch The Pulse Switch can be used when using Variable Speeds or Programmes Container Millilitres ounces and cups are clearly marked CAUTION Lids and tampers are not interchangeable between different container styles types and sizes 2 PartLid The2 partLidiseasytoputonandtak...

Страница 36: ... On Off switch back to the On position 2 On Off Light The On Off light is located at the front of the machine above the On Off switch When lit the machine is plugged in and the On Off switch is in the On position The light will flash when a programme is nearing completion 3 Start Stop Switch After the marker on the Variable Speed Dial is rotated from the Stop Symbol either to Variable Speed 1 or a...

Страница 37: ... down on the Start Stop switch c Rotate the Variable Speed Dial between 1 and High during the blending cycle to increase or decrease the speed of the blades d At the end of the blending cycle rotate the marker on the Variable Speed Dial back to the Stop Symbol at the top of the dial 6 Programmes Your machine is equipped with three programme settings for the most commonly used recipes Rotating the ...

Страница 38: ...r These blades are clearly marked D and are designed specifically for processing dry materials such as grain cereal and coffee and are also used for kneading bread dough The dry blades CANNOT process liquids efficiently if you prepare herbs on a regular basis you may wish to purchase a separate dry blade container D W D W The wet blade container comes as standard with the Vitamix machine The blade...

Страница 39: ...low Before using the tamper during the blending process verify that it is the correct tamper 2 0 L 64 oz Short Containers use Tamper P N 016041 which is approximately 9 inches long 2 0 L 64 oz Tall Containers uses Tamper P N 000760 which is approximately 12 inches long 0 9 L and 1 4 L 32 oz and 48 oz Containers use Tamper P N 015033 which is approximately 11 inches long To verify that you are usin...

Страница 40: ...tainer should not be more than two thirds full when the tamper is used during blending To avoid overheating during blending DO NOT use the tamper for more than 30 consecutive seconds Tamper Splash Disk Tamper Lid How to Use the Tamper Blade Assembly If the food does not circulate the machine may have trapped an air bubble Carefully remove the lid cap while making sure the lid stays firmly in place...

Страница 41: ...best quality of refinement breaking down ice frozen fruit whole fruit or vegetables and grains to a smooth lump free consistency Blending for too long at too low a speed setting will overheat the machine and cause the Automatic Overload Protection to turn off the machine Blending on a higher speed maximises the working of the motor s cooling fan to avoid overheating Programmes Programme blending s...

Страница 42: ...ner onto an operating motor base or to operate a motor base without a container properly in place 5 Use the Variable Speed Dial to select a function Variable Speed Rotate the dial to the right of centre to Variable Speed 1 Programmes Rotate the dial to the left of centre to the desired programme 6 Activate the blades by pressing the Start Stop Switch Your container may shift as it is aligned Varia...

Страница 43: ...t on the motor base 2 Fasten the 2 part lid securely Always use the complete 2 part lid when blending unless the tamper is inserted through the lid cap opening 3 With the motor off set the dry blade container on the motor base by aligning it over the centring pad Never attempt to put a container onto an operating motor base or to operate a motor base without a container properly in place 4 To begi...

Страница 44: ...lowly increase the Variable Speed to the desired speed Programmes The programme blending speeds and duration vary and will stop automatically at the end of the programme Programmes can be interrupted by pushing down the Start Stop switch at any time If reactivated by pushing down the Start Stop switch the programme will start at the beginning ...

Страница 45: ...ariable Speed Dial pointing to the Stop Symbol at the top of the dial 1 Follow the cleaning instructions above 2 Fill the container half full of water and add 1 teaspoons of liquid bleach 3 Snap or push the complete 2 part lid into the locked position 4 Rotate the Variable Speed Dial to 1 Press the Start Stop switch Slowly increase the Variable Speed to High Run the machine for 30 to 60 seconds Ro...

Страница 46: ...aser or cleaner and clean the grooves around the switches Immediately dry all surfaces 5 Polish with a soft cloth Retainer Nut Loosening In the event that the retainer nut at the bottom of your container loosens and no longer holds the blade assembly securely in place DO NOT CONTINUE TO USE THE CONTAINER Contact your local dealer or distributor immediately for instructions Care and Cleaning WARNIN...

Страница 47: ...Protection Resetting Procedure below Overcurrent Protection Resetting Procedure 1 Push the On Off switch down to the Off position O 2 Unplug the unit 3 Remove the container 4 Turn the motor base on its side 5 Press the reset button on the bottom of the machine 6 Plug unit in and continue with the blending cycle Iftheblenderwillnotstartimmediately the motor has overheated Allow the motortocoolfor20...

Страница 48: ...erial or workmanship or as a result of normal wear and tear from ordinary household use Vitamix will within 30 days of receipt of the returned product repair the failed Machine or component part of the Machine free of charge If in Vitamix s sole discretion the failed Machine or component part of the Machine cannot be repaired Vitamix will elect to either A replace the Machine free of charge or B r...

Страница 49: ...ombination with a motor base or container that is not expressly authorized by Vitamix 6 How to Obtain Return Authorization Under This Warranty In the event that the Machine or any component part of the Machine needs service or repair please call Vitamix Customer Service at 1 800 848 2649 or 1 440 235 4840 You will be asked to provide a date of purchase and proof of purchase for any product that ha...

Страница 50: ...importing partners below You will find an indication on the product label or the purchase bill please contact Keimling Naturkost GmbH Zum Fruchthof 7a Buxtehude 21614 49 4161 51 160 www keimling de naturkost keimling de Moravan Warenhandels GmbH Am Loferfeld 56 München 81249 49 89 86 37 98 48 www moravan de info naturespirit de In all other cases Vita Mix Corporation 8615 Usher Road Cleveland Ohio...

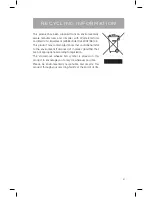
Страница 51: ...in substances that could be harmful to the environment if disposed of in places landfills that are not appropriate according to legislation The crossed out wheelie bin symbol is placed on this product to encourage you to recycle wherever possible Please be environmentally responsible and recycle this product through your recycling facility at the end of its life Recycling Information ...

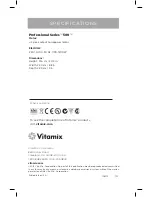
Страница 52: ... publication may be reproduced or transmitted in any form or by any means or stored in a database or retrieval system without the written permission of the Vita Mix Corporation 104372 7 13 Specifications When applicable Printed in the U S A Motor 2 peak output horsepower motor Electrical 220 240 V 50 Hz 1100 1200 W Dimensions Height 51 6 cm 20 3 in Width 22 4 cm 8 8 in Depth 22 9 cm 9 in Professio...

Отзывы: