VIS-600T-LED
Single Door Magnetic Lock
W/LED & Timer (600lbs)
Technology Within Your Reach
ref.
Disclaimer:
VISIONIS reserve the right to go ahead with any modifications of models or features or price without forewarning. All the
information and specifications stated in this document are current at the time of publication. Attention: We are not responsible for the
improper installation of this kit. If you are not handy with electrical equipment you should contact a professional electrician. You will also
need to check with your local Fire authority to see if you need anything else to comply with local Fire Codes. We are not responsible for
any damage or fees that can occur.
www.visionistech.com
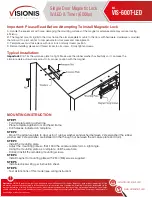
Important: Please Read Before Attempting To Install Magnetic Lock
A. Handle the equipment with care, damaging the mounting surfaces of the magnet or armature plate may reduce locking
efficiency.
B. The magnet mounts rigidly to the door frame, the armature plate mounts to the door with hardware. Hardware is provided
that allows it to pivot center to compensate for door wear and misalignment.
C. Template use must take place with door in its normally closed position.
D. Before installing, please add thread locker to all screws . Firmly tighten screws.
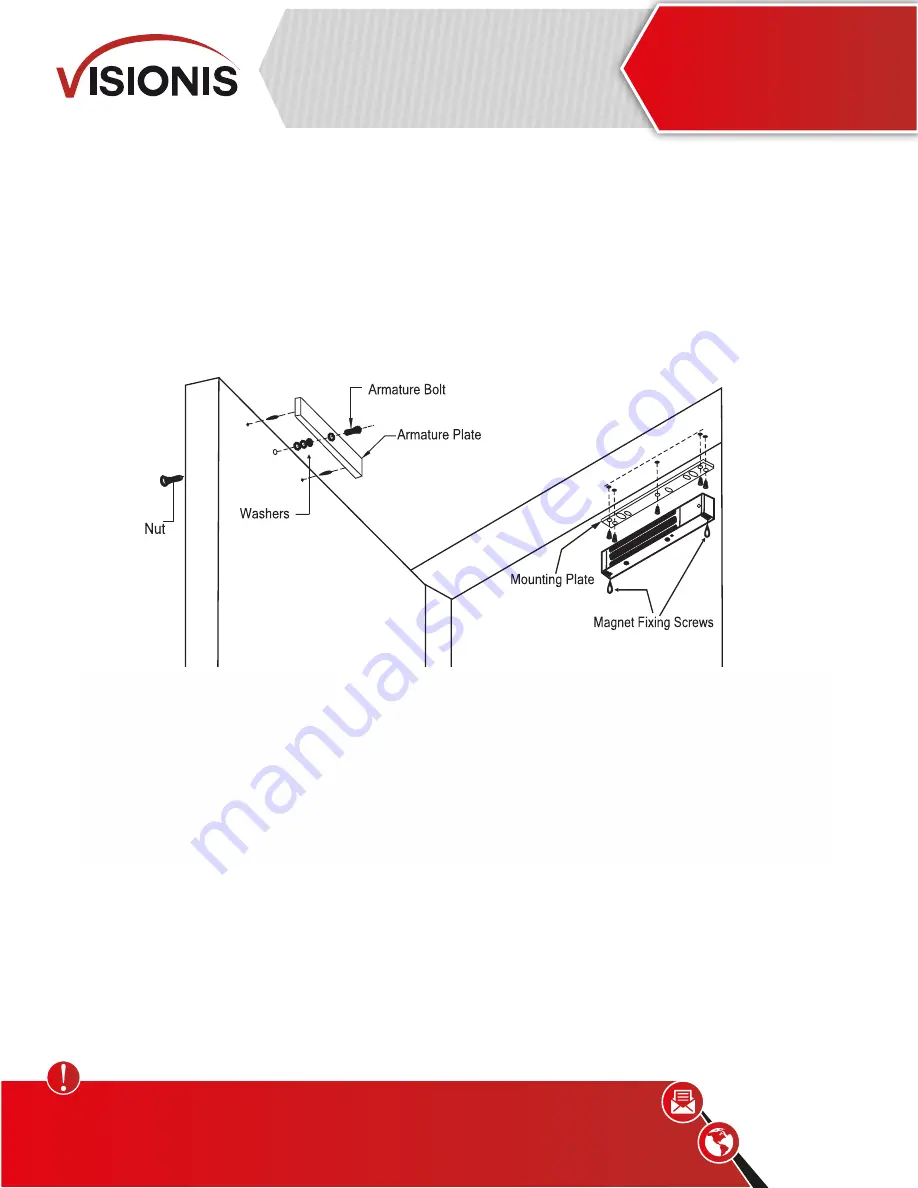
Typical Installation:
Important:
Don't fix the armature plate too tight. Make sure the rubber washer has flexibility so it can make the
armature plate automatically adjust to its proper position with the magnet.
MOUNTING INSTRUCTION
STEP 1
- Fold template along dotted line.
- Place template against door and head frame.
- Drill holes as indicated on template.
STEP 2
- Mount the armature plate to door using 1 rubber washer sandwiched between 2 steel washer (the rubber
washer and 2 steel washer are installed on the through nut between the armature plate and door).
STEP 3
- Install the mounting plate.
- Adjust the mounting plate so that it and the armature plate form a right angle.
- Using the mounting plate as a template, drill the wire hole.
- Drill and install the remaining mounting screws.
STEP 4
- Install magnet to mounting plate with 2 M4 (M6) screws supplied.
STEP 5
- Install electrical wiring per instruction sheet.
STEP 6
- Test all functions of this model (see wiring instruction)


