background image

S

CANNING


FROM


THE

 B

UTTON

 P

ANEL


ON


THE

 S

CREEN

17

S

CANNING


FROM


THE

 B

UTTON

 P

ANEL


ON


THE

 S

CREEN

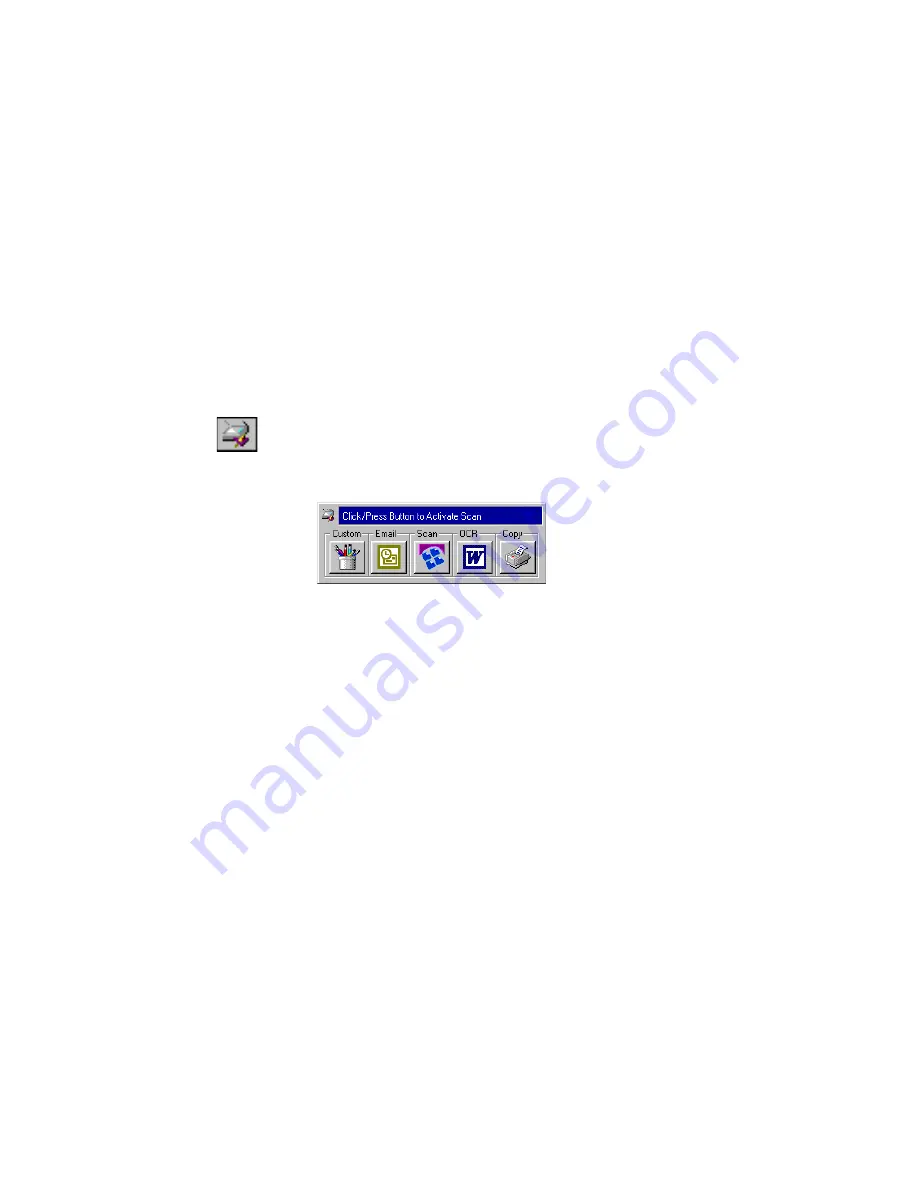
Scanning from the button panel on the screen works just like pressing a 
scanner button. The scanner scans the item, and then sends the image 
to the destination associated with the button. This method of scanning 
is especially helpful if the scanner is not located close to your computer.

To scan from the button panel on the screen:

1. Place an item face down on the glass. Align the edge of the item 

with the arrow marker at the upper-left corner of the glass.

2. Close the document cover, and click the scanner icon on the right-

hand side of the Windows taskbar.

The button panel opens on the screen.

3. Click a scan button. 

The scanner starts scanning the item. When the scan is complete, 
the scanned image appears in the destination application.

4. To close the button panel, click the scanner icon in the button 

panel’s upper-left corner.

The icons on the buttons indicate the destination application for the 
scanned image. For example, in the illustration above, the icon on the 
email button is for the email application, MS Outlook. When you click 
the email button, the item is scanned, and then MS Outlook opens. In 
this case, the scanned image automatically becomes an attachment to an 
email message.

A question mark icon on a button means your computer does not have 
an application that corresponds to that button’s functions. For example, 
if your computer does not have an email application, the email button 
will have a question mark icon on it.

Содержание OneTouch 9320

Страница 1: ...Visioneer OneTouch 9320 USB Scanner Installation Guide F O R W I N D O W S...

Страница 2: ...nsible for complying with all such laws and regulations Technical Support Visit Visioneer s web site at www visioneer com for technical support including help during installation driver updates spare...

Страница 3: ...out the OneTouch Buttons 16 Scanning from the Button Panel on the Screen 17 Scanning from the PaperPort Software 18 Scanning 35mm Slides and Negatives 23 Scanning from a Computer Running Windows XP or...

Страница 4: ...Zooming In and Out 53 Setting Scan Manager Pro Preferences 54 Creating a New Scan Manager Pro Profile 55 Maintenance 57 Troubleshooting 57 Cleaning the Scanner Glass 58 How to Uninstall Your Scanner...

Страница 5: ...r electronic images on your computer WHAT S IN THE BOX Before starting the installation check the contents of the box to make sure that all parts are included If any items are missing or damaged conta...

Страница 6: ...TALLATION GUIDE THE VISIONEER 9320 USB SCANNER Glass Reference marks Document cover Option port OneTouch buttons panel USB port Status light OneTouch buttons Power jack Custom Email To PaperPort OCR P...

Страница 7: ...paper sizes OneTouch button panel Allows scanning directly from the scanner Status light Shows the scanner s status Green light scanner is ready to scan Orange light scanner is busy Option port Connec...

Страница 8: ...24 bit or 32 bit Set the resolution to at least 800 by 600 pixels To set your monitor s colors and resolution open the Windows Control Panel double click Display and then click the Settings tab Note...

Страница 9: ...structions Visioneer OneTouch 9320 Scanner Installation Guide detailed installation scanning configuration and maintenance information ScanSoft PaperPort User s Guide on the Installation CD contains d...

Страница 10: ...ion CD into your computer s CD ROM drive The CD automatically starts Note You must install the PaperPort software before connecting the scanner to the computer Otherwise the correct software to run yo...

Страница 11: ...ation do not change or remove the Serial Number and then click Next 7 On the Setup Type window click Next 8 Click Install to begin the installation 9 On the ScanSoft Registration window select one of...

Страница 12: ...scanner Slide the locking tab on the bottom to its unlocked position 2 Make sure that the TPA cable is securely plugged into the Option port on the back of the scanner Note You do not have to shut off...

Страница 13: ...y make sure that you are plugging it in correctly Do not force the plug into the connection Some computers have keyboards with USB ports You can plug the cable into the keyboard instead of the USB por...

Страница 14: ...d click Finish 7 On the Visioneer Product Registration window complete the required information and then click Register The registration serial number for your scanner is located on the underside of t...

Страница 15: ...a scanner icon on the Windows taskbar at the bottom right corner of the computer screen If the scanner is properly connected the scanner icon looks like the one pictured below If the icon has a red X...

Страница 16: ...come on plug the power adapter into another electrical outlet Is the scanner s locking tab in the locked position Slide the locking tab to the unlocked position If you tried to scan with the scanner...

Страница 17: ...the Readme file and the scanner icon still has a red X through it you may have a malfunctioning scanner Visit our Web site at www visioneer com for additional technical information You can also recei...

Страница 18: ...the PaperPort software PRESSING A ONETOUCH BUTTON ON THE SCANNER Pressing a scanner button scans the item and then sends the image to the destination associated with the button To scan by pressing a O...

Страница 19: ...ning the item Messages just above the Windows taskbar show the status of the scanning process During scanning the scan progress window shows a copy of the image as illustrated here When the scan is co...

Страница 20: ...it to a new email message in your email application OCR Converts the item s text to black and white word processing text and displays it in a word processing application Copy Print Prints the scanned...

Страница 21: ...panel opens on the screen 3 Click a scan button The scanner starts scanning the item When the scan is complete the scanned image appears in the destination application 4 To close the button panel clic...

Страница 22: ...he TWAIN standards for scanning which includes many graphics and imaging applications Refer to the user s guides you received with those applications for their specific steps to scan To scan an item f...

Страница 23: ...choose Document or Photograph 6 Click Settings to view and change the format for the scanned item s file name and the file type The default file type for documents is pdf and the default for photograp...

Страница 24: ...When Click an icon to select a configuration Color Grey Scale or Black White Clicking the sign in front of Custom shows Custom s scan settings Click a setting in the list to change it The setting s o...

Страница 25: ...pe of image to produce the optimal scanned image See Setting Scan Manager Pro Preferences on page 54 to set the AutoScan settings The Scanning dialog box opens while the scan is in progress Check mark...

Страница 26: ...ns on the right side of the Scan Manager Pro for the selected setting Select new options on that panel See Adjusting the Settings in the Scan Manager Pro on page 42 for details on changing scan settin...

Страница 27: ...If a 35mm slide or negative is on the glass however the light from the bottom of the scanner would shine up through the transparent 35mm slide or negative and would not reflect its image onto the sens...

Страница 28: ...d place the 35mm slide horizontally into the slide holder Notice that the mask has a narrow slot next to the slide holder That slot is for calibration to assure that you get the best possible scan res...

Страница 29: ...rs 2 Click the drop down menu at the top of the Scan Manager Pro and choose the type of transparency to scan Scan 35mm Using for a 35mm slide Scan Negative Using for a 35mm negative 3 Click Preview to...

Страница 30: ...image 6 When finished remove the mask from the scanner 7 If you adjusted the resolution and other settings for scanning slides or negatives reset those settings for scanning paper items Tip For 35mm...

Страница 31: ...9 0 and then click PaperPort The PaperPort desktop opens 3 Click the Scan icon on the PaperPort command bar The Folders pane is replaced by the Scan pane 4 From the Scanner drop down list select WIA...

Страница 32: ...cans 10 Click Preview to preview the image before scanning The image is displayed on the right side of the window 11 Adjust the settings of the previewed image as desired Change the button selection f...

Страница 33: ...to the right or left to adjust the brightness and contrast of the scanned image The Contrast setting does not apply to Black and White picture or text Resolution DPI Choose the dots per inch dpi of r...

Страница 34: ...each OneTouch button with appropriate settings If you want to change the settings you can reconfigure the buttons by selecting new options from the Configuration dialog box When you change button set...

Страница 35: ...a tab shows the settings for the corresponding button For example the highlighted selections in the following figure show the current settings for the Scan button The Scan button is set to scan an it...

Страница 36: ...t Double click a configuration to view its settings Select Format and Page s A set of options for selecting a format for the scanned image and whether to scan a single page or multiple pages The forma...

Страница 37: ...u select in the Select Application list If you select another application the configurations are for that application 4 Select one of the Format and Page s options 5 Click OK Now when you press the sc...

Страница 38: ...ed in the Select Configuration list so you can use it again To create a new configuration 1 Open the Configuration dialog box 2 Select the tab that corresponds to the button for which you are creating...

Страница 39: ...er higher dpi settings take longer to scan and produce larger files for the scanned images Brightness and Contrast Drag the sliders to the right or left to adjust the brightness and contrast of the sc...

Страница 40: ...llows you to achieve precise color matching Because the computer cannot always transmit the exact color information to the hardware you may have to make some adjustments using the Gamma feature The de...

Страница 41: ...onfiguration dialog box and select the tab that corresponds to the button with the configuration you want to edit 2 In the Select Configuration list click the configuration you want to adjust and clic...

Страница 42: ...ick the Page Settings tab and adjust page settings as required 5 When finished click OK 6 On the Configuration dialog box click OK to save and apply the changes to the button Note If you selected the...

Страница 43: ...tab of the dialog box shows which button you selected for new preferences 3 Set preferences for the selected button as follows Show All Destinations This option automatically selects all the destinat...

Страница 44: ...hoose the types of applications to include in the button s list of destination applications Click in the boxes for the types of applications to include in the button s list Show Scan Progress Window S...

Страница 45: ...nning resumes On System Standby Shutdown Select this option to turn off the lamp when you turn off your computer or when the computer s energy saver option automatically puts the computer into standby...

Страница 46: ...the Scan Manager Pro 2 On the left side of the Scan Manager Pro select a configuration for example Color Configurations 3 Click a setting in the list of settings or click its corresponding button on t...

Страница 47: ...solution the finer the details however higher dpi settings also produce larger files sizes Usually the higher resolution settings are used for precision work such as photographs or fine artwork Sharpn...

Страница 48: ...al business card 2 To set the resolution manually drag the Resolution slider to the left to decrease the resolution or to the right to increase it 3 To adjust the sharpness drag the Fidelity slider to...

Страница 49: ...he Reduce Moire option ADJUSTING THE BRIGHTNESS AND CONTRAST Sometimes an item is scanned with the brightness and contrast set to be too light or too dark For example a note written with a light penci...

Страница 50: ...e if you select Red from the menu and drag the Brightness and Contrast sliders you can see how the red component of the histogram changes Note however that the Green and Blue components also change re...

Страница 51: ...ness of the midtones of the color saturation is the strength or purity of a color and hue is the color your eyes see as reflected from the image These color settings are represented by a response curv...

Страница 52: ...inter on the curve The Gamma slider remains fixed when you use the Freestyle option 3 Drag the Gamma Saturation and Color Hue sliders to the left to decrease the settings or to the right to increase t...

Страница 53: ...scanning a photograph and want to focus on one section adjusting the output size removes the rest of the photograph from the final scanned image The following figure shows the output size options To...

Страница 54: ...come active 3 Put the pointer on the image and drag the mouse to enclose the section you want in the scanned image As you drag the mouse a dotted box appears on the image and the size settings change...

Страница 55: ...he line and drag the mouse To use the pointer to drag the line make sure the pointer button is selected at the top of the window 5 To rotate the selected area 90 degrees click Rotate 90 Degrees then s...

Страница 56: ...click Scan 8 If you want to remove the selected area and start over click Remove on the Scan Info box SAVING A CUSTOM SIZE If you have several items of the same size such as a group of small photograp...

Страница 57: ...to zoom in enlarge 4 Click the right mouse button to zoom out reduce 5 To return the image to its full size click the Pointer button directly above the Zoom button put the pointer on the image and cl...

Страница 58: ...epth enhanced color but other devices called the TWAIN clients such as older cameras that you can use with the Scan Manager Pro support only a 24 bit depth range of colors Select this option to automa...

Страница 59: ...item its scanned image is initially stored in a folder before being sent to the PaperPort desktop or some other application Instead of using the default folder specified by the Scan Manager Pro you c...

Страница 60: ...he custom Response Curve and store it in this profile You can also create custom settings for the colors of a scanned image Those color settings are called the Response Curve Select this option to sav...

Страница 61: ...th your scanner for technical assistance telephone numbers Also visit our Web site at www visioneer com for additional technical information Problem The scanner won t scan What s wrong Check for one o...

Страница 62: ...ons What do I do Close any other active applications so that additional memory is available If you click Continue PaperPort moves the file to the PaperPort data directory and renames the file with the...

Страница 63: ...ms window opens Make sure the Change or Remove option is selected 3 From the list of programs select Visioneer OneTouch 9320 Windows 98SE and ME Click the Add Remove button Windows 2000 or XP Click th...

Страница 64: ...ow read the Warning information and then click Next 5 If the Remove Shared Files window opens select No to All The PaperPort software is removed A message appears offering to keep or remove your scann...

Страница 65: ...nsions Height 3 25 inches 8 3 cm Width 12 25 inches 31 1 cm Length 17 25 inches 43 8 cm Weight 5 8 pounds 2 64 kg USB Standard USB 1 1 and USB 2 0 Operating temperature 50 104 F 5 35 C without condens...

Страница 66: ...62 VISIONEER ONETOUCH 9320 USB SCANNER INSTALLATION GUIDE...

Страница 67: ...box 31 configuration settings adjusting 37 contrast 35 45 sampler 46 copy print button 16 custom button 16 custom size image 52 D DeScreen 36 destination application 15 32 documentation 5 dots per inc...

Страница 68: ...slide 24 scan button 16 scan info box 53 Scan Manager Pro adjust settings 42 55 appearance panel 45 new profile 55 output size panel 49 preferences 54 response curve panel 47 scan negative 24 scan set...

Отзывы: