background image

53

V

ISIONEER

 O

NE

T

OUCH

 8800 S

CANNER

 I

NSTALLATION

 G

UIDE

V

ISIONEER

 O

NE

T

OUCH

 8800 S

CANNER

 S

PECIFICATIONS

Bit Depth

42-Bit color (internal), 14-Bit gray 
(internal), 1-Bit line art/text

Scanning resolution

Optical resolution: 1200 x 2400 dpi

Maximum Item sizes

8.5


x 11.69 inches (21.6 x 29.7 cm)

Scanner dimensions

Height

4.0


inches


(10.2 cm)

Width

11.7 inches (29.7 cm)

Length

16.7 inches


(42.4 cm)

Weight

6.2 pounds (2.7 kg)

Operating temperature

50°–104° F (5°–35° C without 
condensation)

Relative humidity

20%–80% (@35° C without 
condensation)

Power supply

Input voltage/frequency

100 Vac, 50/60 Hz (Japan)
120 Vac, 60 Hz (North America)
230 Vac, 50 Hz (Europe)

Output voltage/watt

12 V DC, 15 watt maximum

Safety and agency certifications

UL, ULc, GS, FCC Class B, 
VCCI Class 2, CE

Hardware warranty

One-year limited warranty

Содержание OneTouch 8800

Страница 1: ...Visioneer OneTouch 8800 Scanner FOR USB CONNECTION Installation Guide...

Страница 2: ...YOUR EXCLUSIVE REMEDY CONCERNING THE PRODUCT ALL OTHER REPRESENTATIONS WARRANTIES OR CONDITIONS EXPRESS OR IMPLIED WRITTEN OR ORAL INCLUDING ANY WARRANTY OF MERCHANTABILITY FITNESS FOR A PARTICULAR P...

Страница 3: ...e Ways to Scan 13 Scanning by Pressing the OneTouch Buttons 14 Scanning from the Button Panel on the Screen 15 About the OneTouch Buttons 16 Configuring the Scanner 17 About the Configuration Dialog B...

Страница 4: ...d Contrast 41 Adjusting Gamma Saturation and Color Hue 42 Adjusting Output Size 44 Saving a Custom Size 48 The Scan Info Box 49 Zooming In and Out 49 Setting Preferences 49 Getting Help with the Scan...

Страница 5: ...can paper documents and color photos to place their electronic images on your computer WHAT S IN THE BOX Before starting the installation check the contents of the box to make sure that all parts are...

Страница 6: ...HE VISIONEER ONETOUCH 8800 SCANNER 2 THE VISIONEER ONETOUCH 8800 SCANNER Glass Document pad Reference frame Document cover On Off switch Power jack OneTouch button panel TPA port USB port On Off light...

Страница 7: ...Touch buttons panel Press a OneTouch button to scan copy print email fax OCR convert items to text or scan with custom settings On Off light Shows that the scanner is receiving power On Off switch Tur...

Страница 8: ...hard disk space A VGA or SVGA monitor Recommended settings for your monitor are as many colors as possible High Color 16 bit True Color 24 bit or 32 bit Set the resolution to at least 800 by 600 pixe...

Страница 9: ...no other applications are running 2 Insert the PaperPort CD into your computer s CD ROM drive The CD automatically starts Note You must install the PaperPort software before connecting the scanner to...

Страница 10: ...the computer 4 Follow the steps in the next section to connect the scanner When you re finished click Finish in the dialog box above STEP 2 CONNECTING THE SCANNER The OneTouch 8800 scanner connects t...

Страница 11: ...end of the USB cable into an available USB port Some newer computers also have keyboards with USB ports You can plug the scanner into the keyboard instead of the USB port on the computer 2 Turn the s...

Страница 12: ...t attach easily make sure that you are plugging it in correctly Do not force the plug into the connection 4 Plug the power adapter cable into the power jack on the back of the scanner 5 Plug the power...

Страница 13: ...log box on the computer screen becomes active 7 Click the Finish button The scanner s on off light turns from amber to green when the scanner and computer are communicating properly That completes the...

Страница 14: ...e the one in this figure If the icon has a red X through it the scanner is not properly connected See the next section If the Scanner Is Not Properly Connected for the steps to fix the problem To chec...

Страница 15: ...o another electrical outlet Is the scanner s locking tab in the locked position Slide the locking tab to the unlocked position If you tried to scan with the scanner locked you must restart your comput...

Страница 16: ...ppears 2 Choose Connect from the shortcut menu The software finds the scanner and makes the connection The scanner icon will no longer have a red X through it and you re ready to begin scanning If you...

Страница 17: ...n the scanner s front panel Scan from the Screen Click the scanner icon on the Windows taskbar A panel representing the scanner buttons appears Click a button on the panel on the screen Scan from the...

Страница 18: ...s face down and press one of the scanner buttons The scanner starts scanning the item A message just above the Windows taskbar shows the status of the scanning When scanning is complete the status mes...

Страница 19: ...scan The scanner starts scanning the item the messages about the scanning appear above the Windows taskbar the progress window shows the image as it is scanned When the scan is complete the scanned i...

Страница 20: ...ur printer copier at the printer copier s default resolution Fax Displays the scanned item in your fax software as a black and white image at the default resolution of your fax software or modem OCR C...

Страница 21: ...o display the Configuration dialog box from the shortcut menu 1 Right click the scanner icon The shortcut menu appears 2 Choose Configure on the shortcut menu The Configuration dialog box appears Clic...

Страница 22: ...med Quick Color Scan 4x6 Photo and then after the scanning is finished to open Microsoft Paint to display the scanned image The Format and Page s setting is to scan as a bitmap for a single page item...

Страница 23: ...pages The formats are bitmap JPEG and PaperPort Use PaperPort for scanning any item Bitmap and JPEG formats are usually for photos or artwork See About JPEG Compression on page 26 for more information...

Страница 24: ...o do You use the Configuration dialog box to select new options To select new options for a scanner button 1 Display the Configuration dialog box Click the tab of the button whose options you want to...

Страница 25: ...scans the image using the new configuration settings and displays the scanned image in the new destination application CREATING NEW CONFIGURATIONS You cannot change settings such as brightness or cont...

Страница 26: ...1 Display the Configuration dialog box Click the tab of the button whose options you want to change 2 In the Select Configuration list click the configuration that you want to adjust For example the f...

Страница 27: ...aphs The scanning produces an image in varying shades of gray Select Color to scan color photographs and other color items Resolution Drag the slider to the right or left to adjust the dots per inch d...

Страница 28: ...to in the middle of the glass the scanner will automatically determine the size of the photo When AutoCrop is selected the scanner makes two passes the first pass senses the item s size and the second...

Страница 29: ...o select image compression settings Please see About JPEG Compression on page 26 for information about the JPEG settings Enable hardware compression JPEG Click to make the JPEG compression options act...

Страница 30: ...ade off between image quality and file size In many cases loss of quality due to compression is not readily apparent but the amount of compression you select if any depends on the quality you want The...

Страница 31: ...references dialog box appears The dialog box shows which button you selected for new preferences If the Button tab on the Preferences dialog box is not selected click it Show All Destinations Clicking...

Страница 32: ...vidually choose the types of applications to include in the button s list of destination applications Click in the boxes for the types of applications to include in the button s list Show Scan Progres...

Страница 33: ...lick in the box and enter the number of minutes for the lamp to remain idle before turning off If you scan when the lamp is off it warms up before scanning resumes On System Standby Shutdown Select th...

Страница 34: ...op appears 2 From the PaperPort File menu choose Select Source The Select Source dialog box appears and shows your Visioneer OneTouch scanner as well as all other Twain devices installed on your compu...

Страница 35: ...d Bar or choose Acquire from the File menu The Visioneer Scan Manager Pro appears Note Your Visioneer OneTouch scanner is initially set to scan from the PaperPort software with the setting Color Docum...

Страница 36: ...k a setting in the list if you want to change it The setting s options appear on the right side of the Scan Manager where you can select new options if necessary Click AutoScan to scan with your prese...

Страница 37: ...scanner scans the item and displays a preview using the options you selected 3 Review the image to make sure it s what you want 4 To adjust one of the settings for the scan click it in the list of set...

Страница 38: ...ings In addition your OneTouch 8800 scanner has built in image analysis capabilities that find the optimum combination of settings for the item you re scanning When you click AutoScan the scanner anal...

Страница 39: ...rt User s Guide on the CD for more information about using the PaperPort software GETTING HELP WITH THE PAPERPORT SOFTWARE The PaperPort software includes a complete set of help topics that answer que...

Страница 40: ...utton on the right side of the Scan Manager The following figure shows an example of the Scan Manager if you click the Resolution setting in the list or click the Resolution and Sharpen button Resolut...

Страница 41: ...1 Select a configuration on the Scan Manager such as Color Custom 2 Adjust the settings that you want for later use Click to close the settings panel Note The information in the scan settings list an...

Страница 42: ...saved with this profile See Saving a Custom Size on page 48 for more about a custom image size Save the custom Response Curve and store it in this profile you can also create custom settings for the...

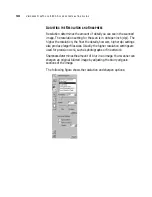
Страница 43: ...he higher the resolution the finer the details however higher dpi settings also produce larger files sizes Usually the higher resolution settings are used for precision work such as photographs or fin...

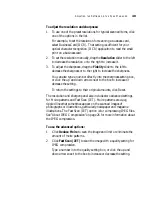
Страница 44: ...harpness setting box or click the up and down arrows next to the box to increase or decrease the setting To return the settings to their original amounts click Reset The resolution and sharpen panel a...

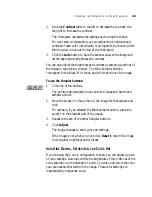
Страница 45: ...ight pencil may need to be scanned darker to improve legibility The following figure shows the brightness and contrast options To adjust the brightness and contrast 1 Drag the Brightness slider to the...

Страница 46: ...an image To use the Sampler buttons 1 Click one of the buttons The pointer automatically moves onto the image and becomes a sampler pointer 2 Place the pointer on the portion of the image for that sam...

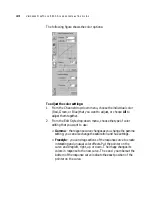
Страница 47: ...u choose the type of color editing that you want to use Gamma the response curve changes as you change the gamma setting you can also change the saturation and hue settings Freestyle you can drag sect...

Страница 48: ...tings on other images This is especially helpful for complex Freestyle response curves A dialog box appears that lists the names of previously saved settings Type a name for your new settings and clic...

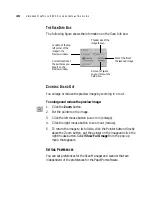
Страница 49: ...mage in the window Check to make sure the dotted line encloses the image that you want A new Scan Info box on the lower left portion of the Scan Manager shows the information for the autotrimmed area...

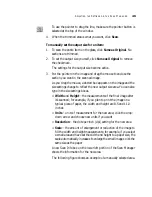
Страница 50: ...utput size area You can also type in the size settings boxes Width and Height the measurements of the final image after it s scanned for example if you plan to print the image on a typical piece of pa...

Страница 51: ...click Rotate 90 Degrees 6 To maintain the selected area s length to width relationship known as the aspect ratio click Maintain Aspect Note that as you rotate the area or maintain its aspect ratio th...

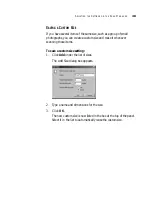
Страница 52: ...can create a custom size and reuse it whenever scanning those items To save a custom size setting 1 Click Add under the list of sizes The Add Size dialog box appears 2 Type a name and dimensions for...

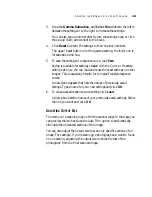
Страница 53: ...5 To return the image to its full size click the Pointer button directly above the Zoom button put the pointer on the image and click the right mouse button Select Show Full Image from the pop up menu...

Страница 54: ...24 bit depth range of colors Select this option to automatically allow the Scan Manager s color settings to support more than a 24 bit bit depth if the other devices also support the greater range of...

Страница 55: ...rary Images when you scan an item its scanned image is initially stored in a folder before being sent to the PaperPort Desktop or some other application Instead of using the default folder specified b...

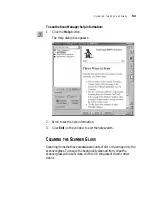
Страница 56: ...roll to see the help information 3 Click Exit on the window to exit the help system CLEANING THE SCANNER GLASS Scanning items that have excessive amounts of dirt or dust may dirty the scanner s glass...

Страница 57: ...imensions Height 4 0 inches 10 2 cm Width 11 7 inches 29 7 cm Length 16 7 inches 42 4 cm Weight 6 2 pounds 2 7 kg Operating temperature 50 104 F 5 35 C without condensation Relative humidity 20 80 35...

Страница 58: ...VISIONEER ONETOUCH 8800 SCANNER SPECIFICATIONS 54...

Отзывы: