To set elevation values
NOTE: Whenever setting values you must always enter both minimum
(flat) & maximum (10%) elevation.
4.
Set minimum (0%) elevation
Press the UP
↑
elevation arrow key until the middle display window displays P4. To set the minimum
incline, use the SLOW
↑
key to operate the elevation motor until the deck raises to the minimum incline.
The right display window should change with the movement of the elevation motor. Verify the right
window display reads 058 – 060. This is the flat or 0% incline.
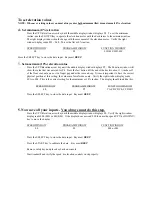
SPEED WINDOW
PROGRAM WINDOW FUNCTION WINDOW
4.0 P4 03B,03C,03D,03F
Press the SELECT key to store the data input. Key must
BEEP.
5.
Set maximum (10%) elevation value
Press the UP
↑
elevation arrow key until the middle display window displays P5. The Function window will
show the value that was entered for P4. Press the fast button till the end of the deck is about 1 ½ inches off
of the floor or about a one or two finger gap under the rear end cap. It is most important to have the correct
physical position at this setting, the values are for reference only. Verify the right window display reads
0EA to 0E4. This is the correct setting for the maximum or 10% incline. The display should look like this.
SPEED WINDOW
PROGRAM WINDOW FUNCTION WINDOW
4.0 P5
CA,CB,CD,CE,CF,D0,D1
Press the SELECT key to store the data input. Key must
BEEP.
5. Now save all your inputs - You always must do this step.
Press the UP
↑
elevation arrow key until the middle display window displays P6. Verify the right window
display reads 000 (ML) or 001(KM). If the display does not read 000 then use the speed UP
↑
or DOWN
↓
key to move the display.
SPEED WINDOW
PROGRAM WINDOW FUNCTIOWINDOW
4.0 P6
000 or 001
Press the SELECT key to store the data input. Key must
BEEP
.
Press the START key to calibrate the data. Key must
BEEP
.
Remove safety key and place key back on console.
Start treadmill and verify the speed & elevation controls work properly.


