


VWR_Quick_Guide_VisicamTC20_Feb15_rev0.docx
2
/
4
1.
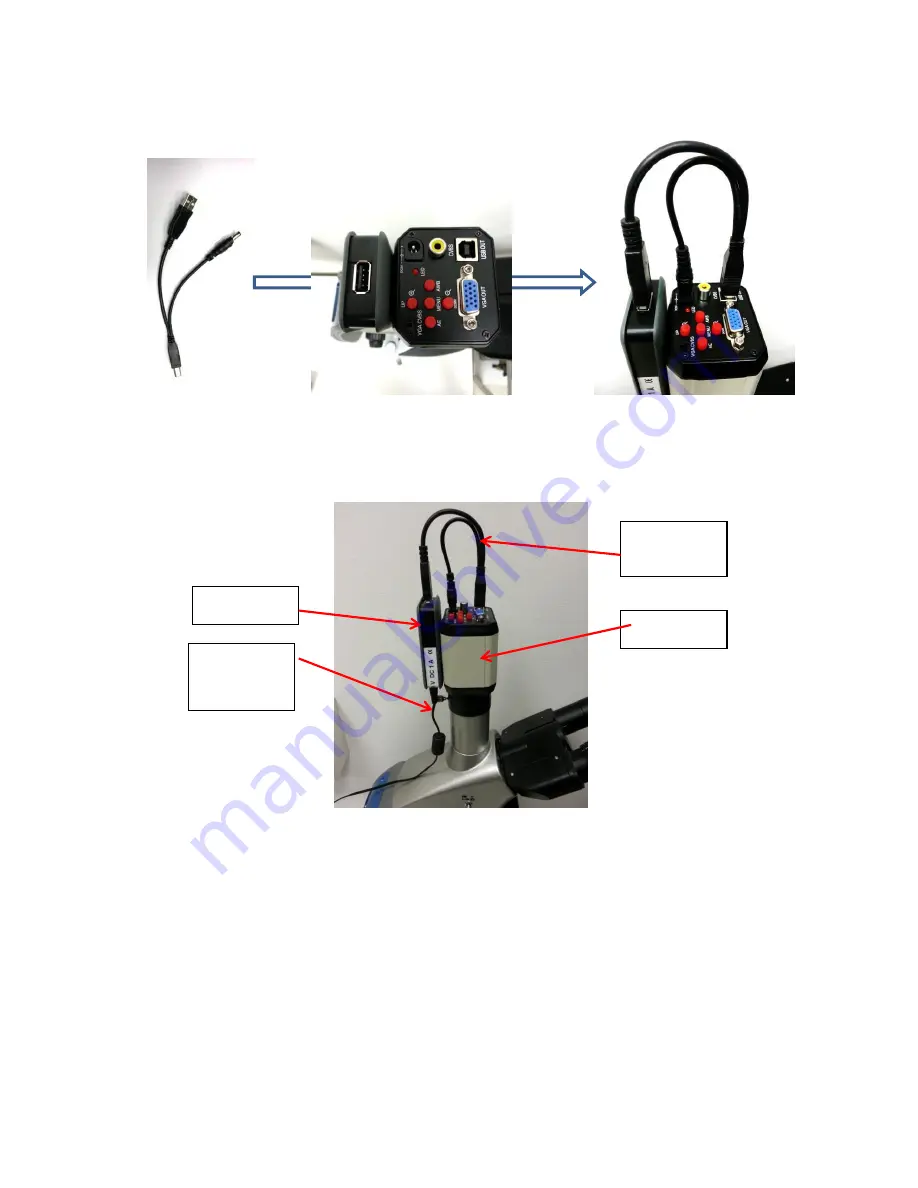
Connect
the connection bifurcate cable to camera and to WiFi module
2.
Connect the 9 Volt
power supply to the WiFi module
3.
Put the camera
on your microscope trinocular port* or into one of the two eyepieces* (*a C-mount
adapter is necessary, not supplied)
4.
Now
connect
the 9 Volt power supply of WiFi module to the electrical mains, you should see the
red led light on the camera back side switch on
5.
Put the
Tablet support
on the table and put the Tablet on the support
6.
Now
switch on
the Tablet
7.
On the Tablet, go to
Settings / Language
and set your preferred language (factory setting is English)
8.
On the Tablet, go
to Settings / Wi-Fi
/ and you will find the network created by the Wi-fi module of
the camera, this is called “Wireless 11n AP-xxxxx” (where xxxxx is unique number for each VISICAM
TC20 system). No password is required to connect to this network.
If you do not find this network on the list of networks available, please check that the power supply
(9 Volt) of Wifi module if has been properly connected to the Wi-Fi module and that the
connections between camera and Wi-Fi module have been made correctly.
If connection to the network of the camera has been succesful, then exit the Settings menu and
return to the main window of the Tablet
9.
Now you can touch the icon “
Tabkam View
” Application to start working
WiFi module
9Volt power
supply
Camera
Bifurcate
cable


