2: Installing a 6000 series router in the UK
Installing your 6000 Series Router
© Virtual Access Ltd.
Issue 1.1
Page 6 of 11
2.3
Installing a UK 6000 series router before it is automatically configured
The SMG is shipped in its factory default configuration for automatic configuration. After you
have powered up the router for the first time, the config LED flashes to indicate that it is in a
factory default configuration. The SMG automatically downloads its firmware and configuration
files either via the ADSL or dial modem connection. After connecting the cables, the automatic
configuration process will take between 5 – 10 minutes. After the configuration is complete,
the unit will reboot. After reboot the config LED will be solid to indicate that the automatic
configuration process has been successful.
If this process is not successful, contact your support team.
2.4
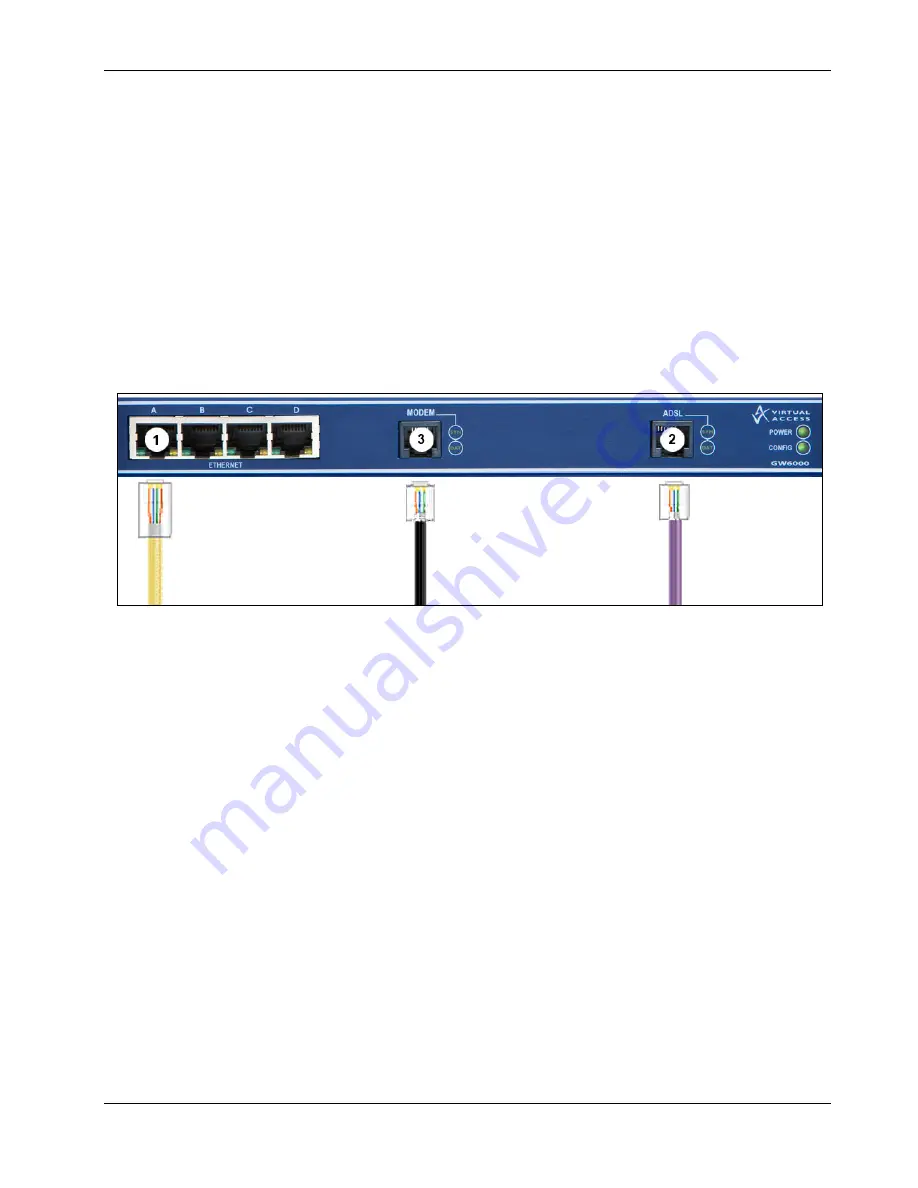
Installing a GW6000 or GL6000 ADSL router in the UK
Figure 2: The cables you need to connect an ADSL connection in the UK
1.
On your GW6000 or GL6000 SMG, connect one end of the yellow RJ45 Ethernet cable to
the Ethernet port marked A. Connect the other end into the LAN port of your PC or to a
LAN hub or switch.
2.
To connect directly to an ADSL service, connect one end of the RJ11 connector on the
purple cable to the port marked ADSL. Connect the other end of the RJ11 connector to the
ADSL socket on the wall or the splitter. This socket can be an RJ45 or an RJ11 port. The
RJ11 will fit into both.
3.
If you have a dial modem, connect the RJ11 end of the black cable to the port marked
MODEM. Connect the other end to a PSTN telephone socket or the splitter.
If you are using a cable or ADSL modem and not a direct service connection, do not connect
the ADSL cable. Connect one end of the Ethernet cable to one of the Ethernet ports marked B,
C, or D. Connect the other end of the cable to the Ethernet port on your ADSL or cable
modem.
4.
Connect the power supply connector to the power port on the back of the SMG.


