background image

6

© 2012 Directed. All rights reserved.

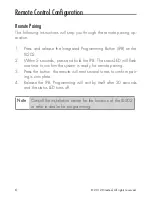
Remote Control Configuration

Remote Pairing

The following instructions will step you through the remote pairing op-
eration.

1.  Press and release the Integrated Programming Button (IPB) on the 

XL202.

2.  Within 5 seconds, press and hold the IPB. The status LED will flash 

one time to confirm the system is ready for remote pairing.

3.  Press the button, the remote will emit several tones to confirm pair-

ing is complete. 

4.  Release the IPB. Programming will exit by itself after 30 seconds 

and the status LED turns off. 

Note

Consult the installation center for the location of the XL202 
or refer to dealer for programming.

Содержание 4218V

Страница 1: ...Remote Control Configuration 6 Remote Pairing 6 Remote Start Features 7 Disabling Remote Start 7 Remote and System Operations 8 Out of Range 8 Battery Information 8 Battery Replacement 9 Government R...

Страница 2: ......

Страница 3: ...nal Antenna Used for transmitting and receiving information Transmit LED Transmit LED flashes once when transmitting and receiv ing information 1 Remote Start Press for one second to activate remote s...

Страница 4: ...he runtime on the remote starter is predetermined based on vehicle application The remote starter will shut down when the preset runtime times out or when any shutdown zone becomes active Note Refer t...

Страница 5: ...e vehicle shuts down from the remote start mode The remote plays the remote start shut off tone and the orange LED flashes 1 time The remote starter will also shut down when the preset runtime times o...

Страница 6: ...the XL202 2 Within 5 seconds press and hold the IPB The status LED will flash one time to confirm the system is ready for remote pairing 3 Press the button the remote will emit several tones to confir...

Страница 7: ...that are specific to each vehicle Disabling Remote Start Remote start can be disabled by moving the Toggle Switch to the Off position If remote start is attempted while Off the engine will not start...

Страница 8: ...ed the Responder One will expect a command confirmation from the system If a command confirmation is not received a long fault tone plays as an alert Battery Information Your remote is powered by two...

Страница 9: ...lastomer con tact located inside the unit as shown does not fall out during the replacement process 2 Turn the circuit board over remove batteries from clip and replace Note Verify that the battery po...

Страница 10: ...ent does cause harmful interference to radio or television which can be determined by turning the equipment OFF and ON the user is encouraged to try to correct the interference by one or more of the f...

Страница 11: ...and 2 Never remotely start the vehicle with the keys in the ignition The user must also have the neutral safety feature of the vehicle periodically checked wherein the vehicle must not remotely start...

Страница 12: ...cted All rights reserved This product is designed for fuel injected automatic transmission vehicles only Use of this product in a standard transmission vehicle is dangerous and contrary the product s...

Страница 13: ...WARRANTY REPAIR WITHOUT PROOF OF PURCHASE FROM AN AUTHORIZED DEALER WILL BE DENIED This warranty is non transferable and is automatically void if the unit s date code or serial number is defaced miss...

Страница 14: ...SED FROM DIRECTED OR AN AUTHORIZED DIRECTED DEALER OR IF THE UNIT HAS BEEN DAMAGED BY ACCIDENT UNREASONABLE USE NEGLIGENCE ACTS OF GOD NEGLECT IMPROPER SERVICE OR OTHER CAUSES NOT ARISING OUT OF DEFEC...

Отзывы: