background image

-

14

-


Connect the camera to a computer using a Mini USB cable.

 Device will automatically turn on and “Mass  Storage” will be  

      displayed.

 The computer will detect “removable disk”.

 There will be three folders under the DCIM folder:

       \ Movie ( Loop recording video files )
      \  RO ( Event recording files )
      \ Photo ( Video snapshot )

 Copy files are needed to computer drive.

 Download the latest firmware, unzip the file. Copy & paste or 

drag & drop the .bin file to the root of the Micro SD card. 

 Insert the Micro SD card into the camera’s card slot once the 

transfer is completed.

 Plug into a power source and then turn the camera ON. 

 LED indicator will start flashing to confirm the update’s 

progress.

Note:

• Before using a Micro SD card to upgrade the firmware, formatting 
the card in-camera is necessary to ensure stable read and write 
operation.
• Do not unplug or power-off the camera during a firmware 
upgrade, it may cause the camera to fail from booting.

7) PC Mode

9) 

Firmware Upgrade

During a private conversation, pressing the ‘ MIC ’ button will 
mute the audio.

8) Mute

 The camera will automatically reboot after the upgrade is 

completed.

 Currently installed firmware version can be verified by accessing 

the ‘Version’ tab within the settings menu (last tab).

Содержание A119 V3

Страница 1: ...User Manual Copyright c 2019 VIOFO Inc All rights reserved ...

Страница 2: ...cord Audio Screen Saver Boot Delay LED Date Time Time Zone Language Beep Sound Frequency Image Rotation Format Format Warning Default Setting Car Number Custom Text Stamp Firmware Version Accessories Installation Method Tips Interface LED Buttons and Icons Switch ON Switch OFF Loop Recording Emergency Recording Motion Detection Play PC Mode Mute Firmware Upgrade Table of Contents Setting Notice In...

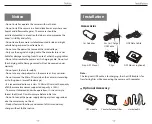
Страница 3: ...nufacturer is not liable for damage resulting from the use of other charging cables Do not disassemble the camera or its charging cable Do not cut the charging cable Damage caused will not be covered under warranty Do not press the lens forcefully Do not use any sharp objects on the camera or its accessories Do not remove the Micro SD card when the camera is recording or shutting down avoids file ...

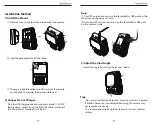
Страница 4: ...he lens up down Peel the glue protector off the sticker Choose a suitable location to install mount the camera ensuring that it provides the best possible view Plug the USB charging adapter into your vehicle s 12V 24V female power socket Insert the Mini USB cable s male port into the camera s female Mini USB port For GPS version mount use the female Mini USB port on the mount or on the camera s si...

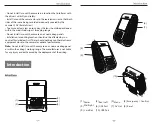
Страница 5: ...OV field of view To ensure a clear view on rainy days the lens should be positioned within the windshield wiper s sweeping range Do not install mount the camera on or near airbag panels Installation mounting location should not be affected by sun control film window tint There should not be any other electronic equipment close to the camera for optimal performance Note Do not install mount the cam...

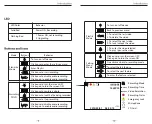
Страница 6: ...ick once to lock the file being recorded Click once to stop recording Click once to disable audio recording Click again to enable audio recording Click once to turn the screen OFF Click again to turn the screen ON 1 To select the last video 2 To delete the video 1 To select the next video 2 To lock unlock the video 1 To enter the video selected 2 To play pause the video Click once to turn the scre...

Страница 7: ...camera s card slot Plug the USB car adapter into the vehicle s 12V 24V female power socket connect the Mini USB cable s USB port end to the USB car adapter and the Mini USB end to the camera s female Mini USB port Start the engine the device will switch ON automatically Automatic When the camera is ON simply turn OFF the engine or unplug the charging cable and the camera will switch OFF automatica...

Страница 8: ...slot once the transfer is completed Plug into a power source and then turn the camera ON LED indicator will start flashing to confirm the update s progress Note Before using a Micro SD card to upgrade the firmware formatting the card in camera is necessary to ensure stable read and write operation Do not unplug or power off the camera during a firmware upgrade it may cause the camera to fail from ...

Страница 9: ...s Time lapse recording Time lapse record a video at low frames at 1 2 3 5 10 15 fps It keeps recording continuously without audio recorded Low bitrate recording This mode record video in low bitrate 4MB s for both front and rear It keeps recording continuously in mini file size with audio recorded Note We recommend to buy VIOFO HK3 ACC hardwire kit cable for parking mode recording Parking G sensor...

Страница 10: ... adjusted for daylight savings Language Display language setting English Traditional Chinese French etc Beep Sound Turns all notification sounds ON OFF Frequency Frequency adjustment setting to minimize flickering and banding in recorded video Image Rotation Turns the screen upside down Format The operation will delete all data on the Micro SD card Note Once you format the Micro SD card all inform...

Отзывы: