background image

OPERATION DESCRIPTION

Upgrade And Downgrade:

1.Press the Key “    ”,desk will go up to the highest point and stop automatically.
2.Press the Key “    ”,desk will come down to the lowest point and stop automatically.

Save Height:

1.Use the UP or DOWN button to move the desk to the desired height.
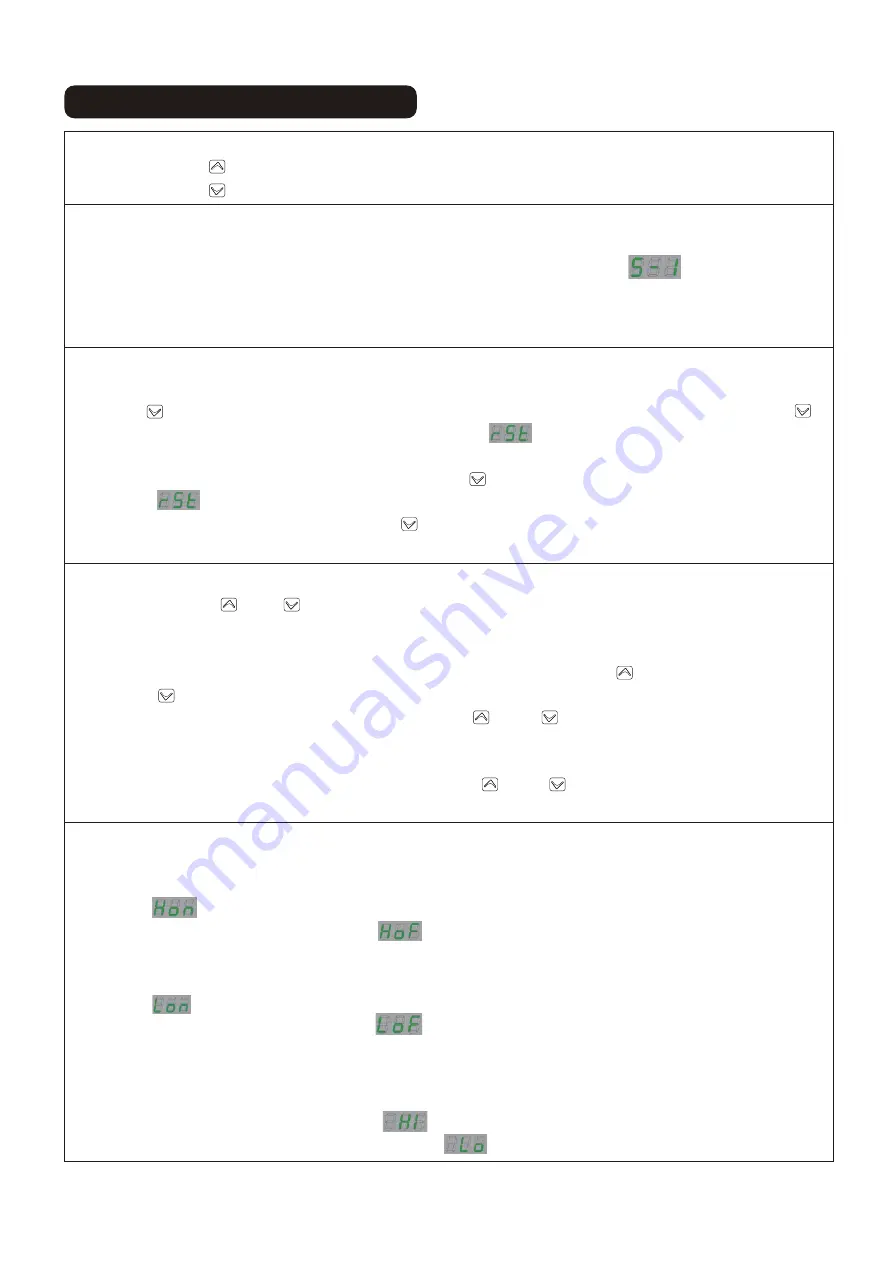
2.When the desktop is stil ,press key “1” for more than 3 seconds,”S-1”              is displayed, 
    indicating that the current height is saved to “1” key successfully. When desktop at other 
    heights , press key “1” shortly,desktop will run to the default position automatically.

3.The operation of memory keys “2” “3” “4” is same to key “1”.

Reset Function:

1.When the height of the desktop is incorrect ,reset and correction are required.Press and hold
the Key “     ” to reduce the desktop to the lowest place and loosen it.Press and hold the key “      ”

again for more than 3 seconds and release after “rSt”           is displayed. It means the system has
entered the reset preparation state.
2.When “Erl” is displayed ,Press and hold the key “     ”again for more than 3 seconds and release

after “rSt”            is displayed.It means the system has entered the reset preparation state.
3.If need to reset,Press and hold the key “     ”.The system will go down to the lowest point of the

machine and start to reverse up automatically then release after system rest is complete.

Anti-collision Sensitivity Adjustment:

1.Press the Keys “     ”and“     ”at same time for more than 3 seconds,then enter the upward anti-
   collision sensitivity setting state ,”U-X”is displayed at this time,”X”is “0-9”,”0”means the system 
   will disable the upward anti-collision function,and “9”is the most sensitive upward anti-collision.

2.In the anti-collision sensitivity setting state ,you can press the Key “     ”shortly to add or press
   the Key “     ” shortly to decline.
3.After the setting is over,press and hold the Keys “     ”and “     ” again at the same time for more 

   than 3 seconds, then save the current settings and enter the downward anti-collision sensitivity

   setting state.
4.After the setting is over , press and hold the Keys “     ”and “     ”again at the same tine for more
   than 3 seconds,then  save the current settings and exit the anti-collision sensitivity setting state. 

Run Interval Settings:

1.When the desktop is still , long press Keys “ 1 ”and “ 2 ” for more than 3 seconds, you can set or 
   cancle the current desktop height for the upper limit of operation,setting successfully rear 
   display:
   cancellation successful rear display:
2.When the desktop is still , long press Keys “ 3 ”and “ 4 ” for more than 3 seconds, you can set or 
   cancle the current desktop height for the lower limit of operation,setting successfully rear 
   display:
   cancellation successful rear display:
3.Note that the upper limit postion must higher than lower limit position when setting.If not ,the 
   system will ignore one of them.
4.After the setting is successful,each runs to this limit position, it will stop automatically.When it
   reaches the upper limit ,it will prompt:
   When it reaches the lower limit ,it will prompt:

39

Содержание 920-076V90

Страница 1: ...URIT ET DE FONCTIONNEMENT AINSI QUE DES AVERTISSEMENTS CONCERNANT L UTILISATION DE CE PRODUIT PEUT ENTRA NER DE GRAVES DOMMAGES MAT RIELS OU CORPORELS 80KG Max 80kg ASSEMBLY INSTRUCTION MANUAL INcfb06...

Страница 2: ...e Ces bureaux sont con us uniquement pour les usages d crits dans ce manuel Ils ne doivent pas tre utilis s dans des environnements tr s humides ou mouill s Toute autre utilisation se fait aux risques...

Страница 3: ...b c a b c Jx4 Qt 1 Pied Qt 1 Pied de moteur Qt 3 Bureau Qt 1 Support Adaptateur Qt 1 Commande Qt 1 Adapteur Qt 1 Tige motrice Qt 2 Supports lat raux Qt 2 Socle Qt 1 Barre transversale inf rieure Qt 1...

Страница 4: ...t de s curit nous recommandons deux personnes pour le montag tape 2 Placez le pied partie 1 et le pied du moteur partie 2 comme indiqu Alignez les trous de la traverse sup rieure partie 3 et de la tra...

Страница 5: ...tape 3 Utilisez la cl mat riel E pour desserrer l crou hexagonal de la tige motrice pi ce 7 Ins rez ensuite la tige motrice dans la jambe partie 1 jusqu ce qu elle soit cal e...

Страница 6: ...Faites glisser le manchon de la tige motrice partie 7 pour connecter la jambe du moteur partie 2 jusqu ce que le manchon soit bloqu Utilisez la cl mat riel E pour serrer l crou hexagonal de la tige m...

Страница 7: ...teur Ins rez 8 vis t te plate mat riel C Utilisez la cl Allen mat riel I pour serrer les vis en croix Si vous rencontrez des difficult s pour faire entrer toutes les vis c est que d autres vis sont tr...

Страница 8: ...tape 6 Une fois que toutes ces vis ont t pos es vous pouvez maintenant serrer les 6 vis t te plate Mat riel A de l tape 2 Vous devez serrer ces 6 vis COMPL TE MENT pour viter que le bureau ne vacille...

Страница 9: ...tape 7 Fixez le support de l adaptateur pi ce 9 la traverse sup rieure pi ce 3 l aide de 2 vis m caniques Mat riel D...

Страница 10: ...tape 8 Placez le cadre l envers comme indiqu Fixez chaque pied pi ce 6 avec 5 vis m taux mat riel B et serrez les boulons en croix...

Страница 11: ...tape 9 a b c JX4 X16 F...

Страница 12: ...tape 10 X10 F...

Страница 13: ...tape 11 Ne serrez pas les vis...

Страница 14: ...tape 12 Le c ble de la commande se trouve entre la traverse sup rieure et la traverse inf rieure 1 2 3 1 2 3...

Страница 15: ...tape 13...

Страница 16: ...tape 14...

Страница 17: ...tape 15...

Страница 18: ...apr s l affichage de rSt Cela signifie que le syst me est entr dans l tat de pr paration la r initialisation Maintenant vous allez pouvoir r initialiser en appuyant sur le bouton et en le maintenant...

Страница 19: ...ns l tat de pr paration la r initialisation 3 Si vous avez besoin de r initialiser appuyer sur le bouton et en le maintenant enfonc Le syst me va descendre jusqu au point le plus bas de la machine et...

Страница 20: ...te inf rieure de l op ration Annulation r ussie de l affichage arri re 3 Notez que la position de la limite sup rieure doit tre sup rieure la position de la limite inf rieure lors du r glage sinon le...

Страница 21: ...indique que le syst me est surchauff ce qui permet au syst me de se reposer pendant plus de 18 minutes avant une utilisation normale 4 Si la m thode ci dessus ne r sout pas le probl me d branchez l al...

Страница 22: ...Instruction Manual...

Страница 23: ......

Страница 24: ...Qty3 Fx26 a b c a b c Jx4...

Страница 25: ......

Страница 26: ......

Страница 27: ......

Страница 28: ......

Страница 29: ......

Страница 30: ......

Страница 31: ......

Страница 32: ...a b c JX4 X16 F...

Страница 33: ...X10 F...

Страница 34: ......

Страница 35: ...1 2 3 1 2 3...

Страница 36: ......

Страница 37: ......

Страница 38: ......

Страница 39: ...e up automatically then release after the system reset is complete Your desk is now ready to use KEYS INTRODUCTION 1 Key 1 The rst height user saved 2 Key 2 The second height user saved 3 Key 3 The th...

Страница 40: ...than 3 seconds then enter the upward anti collision sensitivity setting state U X is displayed at this time X is 0 9 0 means the system will disable the upward anti collision function and 9 is the mos...

Страница 41: ...code Erl indicates a fault which may be that the motor is not rotaing and hall data is not currently returned Press and hold the Key in the above way to enter the reset preparation state After check...

Страница 42: ...ut voltage 100 240 V Input AC frequency 50 60 Hz Output voltage 29 V Output current 1 8 A Output power 52 2 W Average active efficiency 88 Efficiency at low load 10 87 5 No load power consumption 0 21...

Страница 43: ......

Отзывы: