


3/5
5.
Operation Controls and Functions
5.1
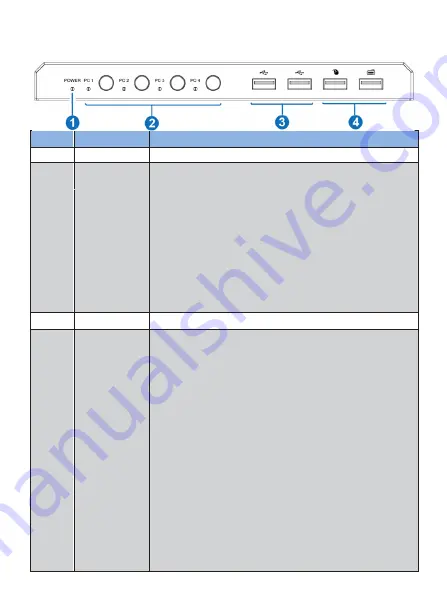
Front Panel
No.
Name
Function Description
1
POWER LED
When the product is powered on, a red LED will be on.
2
PC 1/2/3/4 LED
Input status indicators. When the input source is
selected, the corresponding PC 1/2/3/4 LED will be on.
Signal source
selection
buttons
Press these buttons to select the input signal source, and
the corresponding PC 1/2/3/4 LED will be on.
Note:
1. HDMI and USB ports are binding, so only one
input source can be selected.
2. The default setting is an auto switch; for
example, when you unplug the current selected
PC1, it will switch to PC2 automatically; if PC2
doesn’t connect source device, it will switch to
PC3
automatically, and so on in a similar fashion.
3
USB2.0 ports
Connect to a U disk or other standard USB2.0 devices.
4
USB1.1 ports
Connect to mouse or keyboard for KVM control.
▪
Mouse operation
:
1. Slide the mouse beyond the upper and left interface of
the screen to select the last input port.
2. Slide the mouse beyond the bottom and the proper
interface of the screen to select the next input port.
Note:
The mouse operation function is turned off by
default. Pressing “*+s” on the keyboard can turn on edge
detection (mouse sliding switch function); Pressing “*+1/
2/3/4” can turn off edge detection.
▪
The keyboard hotkeys are as follows:
1. Scroll Lock+ Scroll Lock + 1/2/3/4: switch ports.
Ctrl + Ctrl + 1/2/3/4: switch ports.
Two switching hotkey methods can coexist.
2. Scroll Lock + Scroll Lock + i + 5~999 s enter:
Scanning time setting.
3. Scroll Lock + Scroll Lock + s: start auto scanning;
Pressing any key on the keyboard will cancel the auto
scanning function.
Содержание VLKV-HD41
Страница 1: ...VLKV HD41 HDMI 4x1 KVM Switcher VER 1 02...


