


BASIC ON-SCREEN DISPLAY SETUP
1. To access the OSD Menu press ‘MENU’.
2. Use the ‘
+
’ or ‘
-
’ buttons to select the required menu item, then press
the ‘SOURCE’ button to select the Sub menu.
3. Continue to use the ‘SOURCE’ button to highlight the required field, then
press ‘
+
’ or ‘
-
’ to adjust the setting.
4. Press the ‘MENU’ button to return to previous menu.
5. Press the ‘MENU’ button again to exit the OSD Menu completely.
The layout of the OSD will change depending on the input
that is selected.
AV - Input Configuration
1.
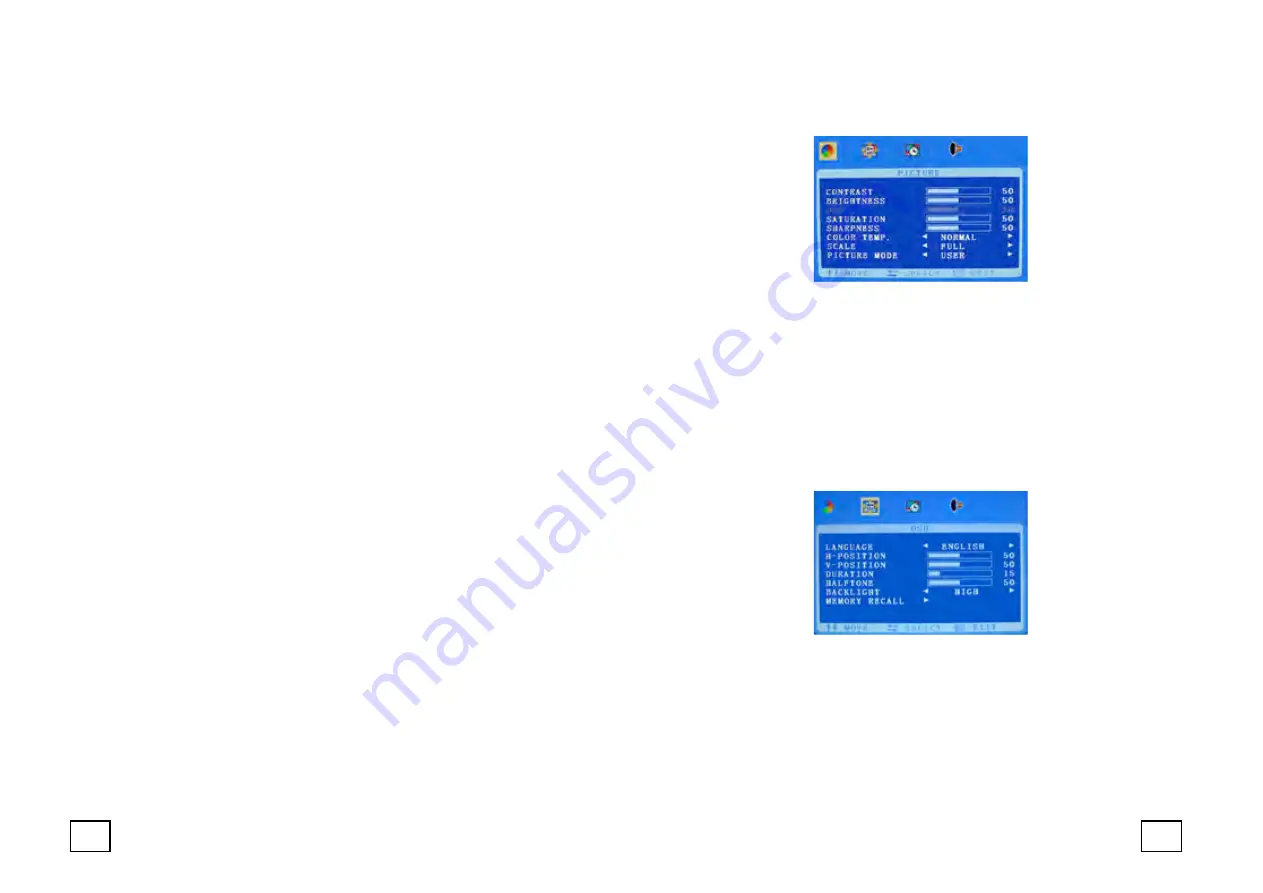
Picture
CONTRAST:
(0–100) Set the difference between the light and dark
areas of the picture.
BRIGHTNESS
:
(0–100) Set how bright the display is.
HUE:
-50 to +50 (only available if NTSC)
SATURATION:
(0-100)
SHARPNESS:
(0-100)
COLOR TEMP:
Select the color temperature.
(Normal/Warm/Cool)
SCALE:
Set the image size/position.
(Full/Normal/Center)
PICTURE MODE:
Select defaults or save user setting.
(
User/Standard/Soft/Vivid)
2.
OSD
LANGUAGE:
Select preferred language for OSD.
(En/Ch/Ger/Fr/Sp/It/Pt/Pl/Ru)
H-POSITION:
(0-100)
Set the horizontal position of the OSD.
V-POSITION:
(0-100)
Set the vertical position of the OSD.
DURATION
:
(5-60) Set seconds for the OSD to automatically close.
HALFTONE
:
(0-100) Set the colour level of the OSD menu itself
BACKLIGHT
:
Set power level in use by backlight (HIGH/MID/LOW)
MEM-RECALL
:
Restore all factory defaults.
8.
7.
Содержание DSM19LED-WGF
Страница 1: ......