


7
E
N
G
L
I
S
H
ViewSonic
VP151 ViewPanel
®
Getting Started
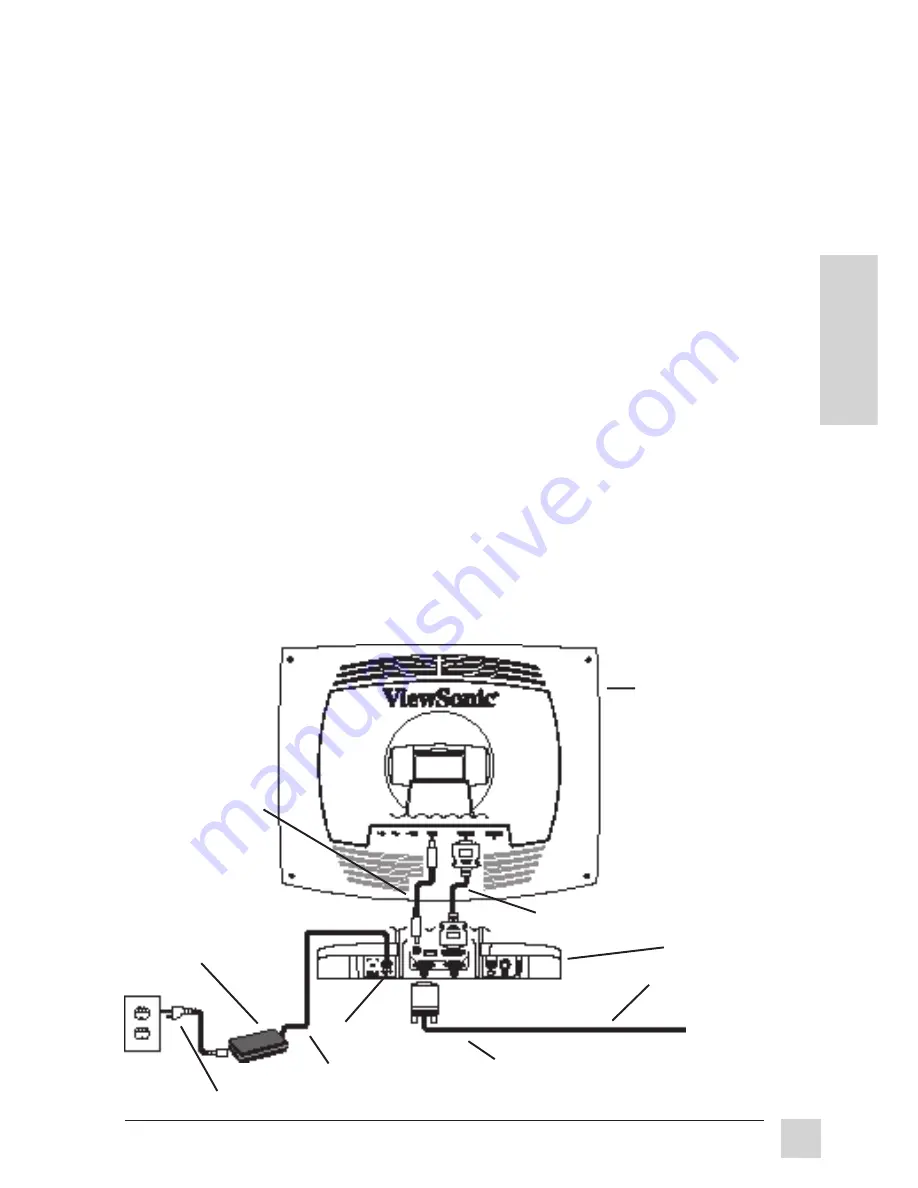
1 Connect power cord
Connect the small DC power
cord from the base of the
ViewPanel
®
to the head.
NOTE
: for first time installation,
this step will be completed by
the factory.
2 Connect DFP cord
Connect the digital flat panel
(DFP) cord from the base of
the ViewPanel to the head.
3 Connect DC power supply
Connect the cord from the DC
Power Supply to a properly
grounded AC outlet using the
proper cord adapter for your
region.
small DC Power
cord (step 1)
Video cable
(step 5)
small DFP
cable (step 2)
DC Power supply
(steps 3,4)
Installation (Desk Mount)
A desk installation allows for an analog data (CPU) connection, composite video
connection (VCR, camera, etc.), audio connection, and a USB connection. The steps
for a desk installation of the VP151 are presented on pages 7 and 8.
4 Connect DC power to
ViewPanel
Connect the cord from the DC
Power Supply to the DC input on
the rear left side of the base.
NOTE
: turn on power supply switch
after connecting to ViewPanel.
5a Connect video cable
PC users: Connect the video cable
from the back of the computer to
the back of the ViewPanel base as
shown below.
5b Connect video cable
Macintosh
®
users: Connect the
video cable to the computer using
a Macintosh adapter, if required. To
order an adapter, contact
ViewSonic (see the back cover of
this guide, part number: VMAC-1).
To computer
NOTE
: power switch
on power supply
should be turned on
LCD Digital
Head
Analog
Base
DC Input
Содержание ViewPanel VP151
Страница 9: ......
Страница 17: ...16 E N G L I S H Other Information ViewSonic VP151 ViewPanel...
Страница 21: ...20 E N G L I S H Other Information ViewSonic VP151 ViewPanel NOTES...


