background image

E

N

G

L

I

S

H

ViewSonic     N2010    20

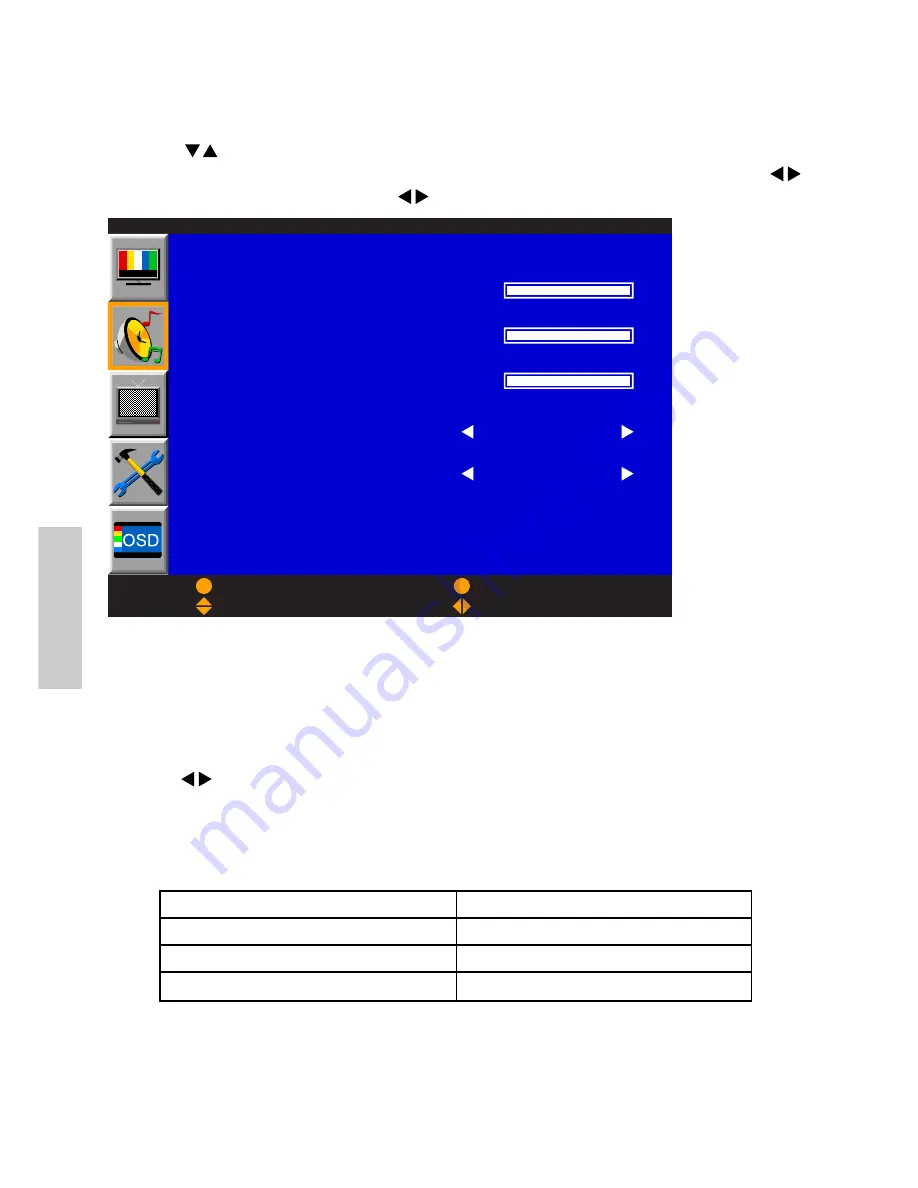
Sound Menu

MTS function only works when the input source is TV.
1.

Press 

Enter

 to get into Sound Menu.

2.

Use       to select the desired items.

3.

To adjust Bass, Treble, or Balance, press 

ENTER

 then adjust them with       .

4.    To setup AVC or MTS, press       directly.

Balance:


To adjust the bass.

Bass:

 To adjust the treble.

Treble:

 To adjust the left and right audio balance.

AVC:

 To turn the AVC on/off. It is an auto volume control, in order to avert the

volume suddenly becoming over loudly.

MTS:

 To switch the sound output for TV programs between Mono, Stereo and

Dual by       . The system-MTS, Multi-channel Television Sound, is designed to
allow reception of sound other than the main audio for the program.

Note: Choose the available sound output for channels that is preset by the TV
broadcasting station.

Program’s sound setting

dual

stereo

mono

Exchangeable sound output

dual I, dual II

stereo, mono

mono

S o u n d

B a s s

T r e b l e

B a l a n c e

A V C

M T S  

  O N

S t e r e o

E x i t

S e l e c t

E n t e r

A d j u s t

Содержание N2010

Страница 1: ...ViewSonic User Guide Guide de l utilisateur Bedienungsanleitung Guía del usuario Guida dell utente Användarhandbok Käyttöopas Руководство пользователя ViewSonic N2010 LCD TV Display ...

Страница 2: ...LCD Display 4 Package Contents 5 Front View of the Product 6 Rear View of the Product 7 Remote Control 8 Installation 12 Basic Operation 18 Getting Started OSD Functions In TV AV S Video YPbPr SCART Mode 19 In PC Mode 25 Other Information Specifications 27 Troubleshooting 28 Customer Support 29 Limited Warranty 30 Appendix Safety Guidelines 31 CE Conformity for Europe 31 ...

Страница 3: ...ons without notice Information in this document may change without notice No part of this document may be copied reproduced or transmitted by any means for any purpose without prior written permission from ViewSonic Corporation To meet your future needs and to receive any additional product information as it becomes available please register your product on the Internet at www viewsonic com Produc...

Страница 4: ...g these openings must not be blocked or covered Do not block the openings by placing the product on a bed sofa rug or other similar surface Do not place the product in a built in installation such as a bookcase or rack unless proper ventilation is provided or the manufacturer s instructions have been adhered to 5 Other Notices Avoid exposure the N2010 to direct sunlight or high temperature Avoid e...

Страница 5: ... improve 3 Power Lines An outside antenna system should not be located in the vicinity of overhead power lines or other electric light or power circuits or where it can fall into such power lines or circuits When installing an outside antenna system extreme care should be taken to keep from touching such power lines or circuits as contact with them might be fatal Cleaning the LCD Display Make sure...

Страница 6: ...ViewSonic LCD TV display Important Save the original box and all packing material for future shipping needs Package Contents Your LCD TV display package includes SCART Cable or SCART Adapter 37 Key Remote Control with batteries Quick StartGuide ViewSonic N2010 5 Note SCART Cable is for Europe SCART Adapter is for Pacific Asia ...

Страница 7: ...Increase sound volume or adjust a highlighted control while in OSD menu MENU Turn OSD menu ON OFF CH Down Scroll Down Channel down when source is at TV or select a control while in OSD menu CH Up Scroll Up Channel up when source is at TV or select a control while in OSD menu ENTER Confirm Select Power button Remote control receiver Power LED indicator 8 9 7 1 2 3 4 5 6 ...

Страница 8: ...o into this jack TV signal input Connect to the antenna or cable service SCART input Connect the external video devices such as VCR DVD and video game into this jack I H G F E D C B A AV Video input Connect the external video devices such as VCR DVD and video game into this jack J K L F ViewSonic N2010 7 Rear View of the Product A B C E J G H D I K S Video input Connect the external video devices ...

Страница 9: ...E N G L I S H ViewSonic N2010 8 Remote Control ...

Страница 10: ... sound sap type in TV mode Mute ON OFF OSD exit Select input source of sub picture in PIP PBP Multi Window condition Activate or inactivate PIP function Switch to TV input mode Select Input Source Input channel number Return to previous channel UP DOWN for OSD function Select and Left Right for function adjust VOL and VOL button Adjust the Volume when there is no OSD menu display CH and CH button ...

Страница 11: ...d you can select the desired page simply by using the four colours RED button Move cursor down GREEN button Move cursor up YELLOW button Change from current page to selected page BLUE button Exit the CURSOR Mode Index button Press this button you force the Teletext to LIST Mode It means that row 24 bottom row of Teletext will not have transmitting information only the pages that you have previousl...

Страница 12: ...d at the left top corner of the screen and the automatic changing is inhibited Store button Store current pages in List mode Press the LIST button to change from FLOF system to LIST Mode Press a coloured button to correspond to the coloured brackets on the screen for page number storage Enter the Teletext page number using the 0 9 digit buttons enter three digits Press the STORE button to memorize...

Страница 13: ...fire or lead to personal injury Insert batteries according to and markings Inserting the batteries incor rectly may result in cracking or leakage which may pose a risk of fire or lead to personal injury Dispose of the battery in accordance with local laws and regulations Keep the battery away from children and pets When the remote control will not to be used for an extended period remove the batte...

Страница 14: ...ct Video Audio cables from compatible devices into the back panel of N2010 3 Connect Audio Cable OPTIONAL To connect an external amplifier connect the L R RCA cable from the TV AUDIO OUT port to the appropriate AUDIO IN port on a compatible amplifier as shown on the right Stereo system AV model RCA A V Cable Cable not supplied Audio Cable Cable not supplied VCR ...

Страница 15: ... L I S H S Video model YPbPr model DVD Palyer or VCR ViewSonic N2010 14 VCR Audio in Cable Cable not supplied S Video Cable Cable not supplied YPbPr Cable Cable not supplied Audio in Cable Cable not supplied ...

Страница 16: ... 800 x 600 640 x 480 is the preferred resolution 5 Connect to the PC VGA 15pin D Sub Connect the Audio In cable green from audio output of your PC to the audio input terminal green of N2010 PC Audio in PC VGA 15 Pin Cable Cable not supplied PC PC Audio in Cable Cable not supplied Note PC must output 640 x 480 signal only ...

Страница 17: ...power cord to the N2010 then to a properly grounded AC outlet 6 Connect power cable AC wall socket ViewSonic N2010 16 Connect Earphone from compatible devices into the back panel of N2010 Earphone Earphone Earphone not supplied ...

Страница 18: ... Enter key of N2010 is the shortcut key for selection of input source to display TV key of remote control is a shortcut for TV selection ViewSonic N2010 17 Press the Power button on top of the LCD display or press the Power On red button on the Remote Control Turn Video source power ON 7 Turn Power ON ...

Страница 19: ... Menu press MENU 2 Select the OSD page use 3 Move the cursor bar up and down use 4 Confirm the desired item press ENTER 5 Adjust the condition use 6 Back to previous viewed page press EXIT Basic Operation Press CH or number key to select your desired channel How to select the desired channel by using remote control Ex If your desired channel is 8 Press 0 and then 8 or you may press 8 only Ex If yo...

Страница 20: ...ness of the display Colour Temp To select the colour temperature between normal warm and cool by Picture Mode To select the picture mode between standard Movie Game and User by If you select User in the item of Picture Mode you are able to adjust Contrast Brightness Colour Tint Sharpness Colour Temp and Picture Mode If you select Standard Movie or Game in Picture Mode you may adjust only Colour Te...

Страница 21: ...It is an auto volume control in order to avert the volume suddenly becoming over loudly MTS To switch the sound output for TV programs between Mono Stereo and Dual by The system MTS Multi channel Television Sound is designed to allow reception of sound other than the main audio for the program Note Choose the available sound output for channels that is preset by the TV broadcasting station Program...

Страница 22: ...em in memory 3 If you want to stop auto scan press any key System Select To select the signal input of TV system B G H D K L L I ALL with If you select L the auto scan system will only scan the channels of L system If selecting ALL it will scan all the available channels and it takes much more time to do it Channel Skip To add or erase TV channels 1 Use to select the desired channel 2 Then use to ...

Страница 23: ...e function is to give a minute search for possible existing channels and store them in memory For instance if you expect to search for pos sible channels nearby channel 1 1 Move your cursor to CH NO Then press channel number keys to select channel 1 2 a Search by channel frequency Move your cursor to Search Press or to search the possible chan nels nearby channel 1 b Search by System Move your cur...

Страница 24: ...n or 60min The Sleep Timer is used to automatically shut off your LCD TV after a preset period of time passed Choose OFF for disable Sleep Timer function Source Select There are some input sources provided you to select TV PC SCART YPbPr S Video and AV ViewSonic N2010 23 F u n c t i o n S l e e p T i m e r S o u r c e S e l e c t O F F T V E x i t S e l e c t E n t e r A d j u s t ...

Страница 25: ...sposal English French German Spanish Italian Finland Dutch Swedish and Russian OSD H Position To adjust the OSD horizontal position by OSD V Position To adjust the OSD vertical position by Memory Recall Restore the factory setting of Contrast Brightness Colour Sharpness Tint Colour Temperature Volume Treble Bass Balance OSD H Position and OSD V Position O S D L a n g u a g e O S D H P o s i t i o ...

Страница 26: ...rmation To display current condition including horizontal frequency vertical frequency and resolution Image Adjust To adjust the H V position H size and fine tune of the video Press Enter to confirm H Position To adjust the horizontal position of the video Press Enter to get into V Position V Position To adjust the vertical position of the video H Size To adjust the delay time between horizontal s...

Страница 27: ... adjust the On Screen Display vertical position OSD Time Out OSD Time Out is used to automatically shut off the OSD after a preset period of time passed PIP Menu PIP function allows you watch two screens from different sources at the same time Select PIP On Off to activate or inactivate PIP function Sound To select the sound source between Main screen and PIP screen PIP Source Select To select the...

Страница 28: ... On Active Off 20 1 TFT Active Matrix UP 15 Down 0 RGB analog 0 7 1 0 Vp p 75 ohms Separate Sync fh 30 37 5 kHz fv 50 75 Hz TV system Antenna PAL SECAM 1 compsite RCA 1 S Video 1YPbPr component 1 mini stereo 2 pairs of RCA L R stereo Up to 800 x 600 Non interlaced 640 x 480 60 75 Hz 800 x 600 60 Hz 5W x 2 1 pair of RCA L R stereo jack 100 240 VAC 50 60 Hz auto switch 408 mm H x 306 mm V 16 1 H x 1...

Страница 29: ...ng check the video cable to make sure it is securely connected Loose or broken pins in the cable connector could cause an improper connection Connect the LCD display to another Video source Control buttons do not work Press only one button at a time Snow appears on screen Check your antenna connection Check TV CATV selection No Sound Check your audio connection in accordance with Video source Pres...

Страница 30: ...on United Kingdom France German Nordics All other countries Web site www viewsonic com support www infocare no eservice www viewsonic com support T Telephone F FAX T 00 44 0 800 833 648 F 00 44 0 1475 657808 T 00 33 0 1 414 74930 F 00 33 0 1 47 99 75 30 T 00 49 0 800 1717 430 T 00 47 628 24 100 F 00 47 628 24 101 Email viewsonic brands co uk viewsoniceurope rts services de repair infocare no ...

Страница 31: ... s serial number 2 To obtain service under warranty you will be required to provide a the original dated sales slip b your name c your address d a description of the problem and e the serial number of the product 3 Take or ship the product freight prepaid in the original container to an authorized ViewSonic service center or ViewSonic 4 For additional information or the name of the nearest ViewSon...

Страница 32: ...NITED KINGDOM FOR YOUR SAFETY PLEASE READ THE FOLLOWING TEXT CAREFULLY IF THE FITTED MOULDED PLUG IS UNSUITABLE FOR THE SOCKET OUTLET THEN THE PLUG SHOULD BE CUT OFF AND DISPOSED OF SAFELY THERE IS A DANGER OF SEVERE ELECTRICAL SHOCK IF THE CUT OFF PLUG IS INSERTED INTO AN APPROPRIATE SOCKET CE Conformity for Europe The device complies with the requirements of the EEC directive 89 336 EEC as amend...

Страница 33: ...ViewSonic ...

Отзывы: