


Quick start guide
English
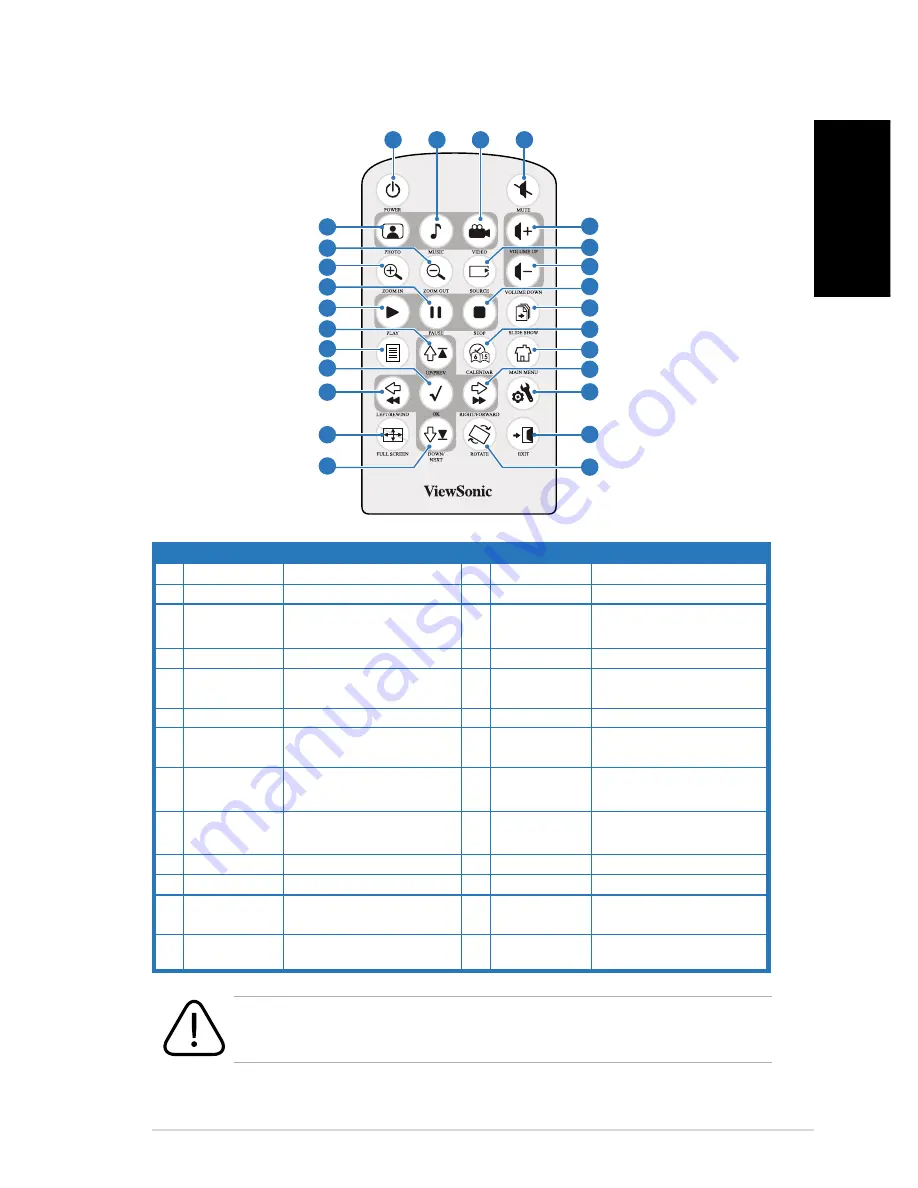
Remote Control
Refer to the following image and table for details of the remote control.
No.
Item
Description
No.
Item
Description
1 POWER
Disabled on this model
14 EXIT
Go back one menu level
2 MUSIC
Shortcut to the Audio menu 15 ROTATE
Rotate photo 90° clockwise
3 VIDEO
Shortcut to the Video menu 16 DOWN/NEXT Navigate down in menus/
skip to next available media
4 MUTE
Mute audio output
17 FULL SCREEN Enlarge image to full screen
5 VOLUME UP Increase audio volume
18 LEFT/
REWIND
Navigate left in menus/
rewind audio playback
6 SOURCE
Shortcut to Source menu
19 OK
Select/accept selected item
7 VOLUME
DOWN
Decrease audio volume
20 View
Display advanced media
options in media menus
8 STOP
Stop Video or Audio
playback
21 UP/PREV.
Navigate up in menus/skip
to previous available media
9 SLIDE SHOW Start slide show of available
photos
22 PLAY
Play selected media
10 CALENDAR Disabled on this model
23 PAUSE
Pause current media
11 MAIN MENU Display Main Menu
24 ZOOM IN
Enlarge photo image size
12 RIGHT/
FORWARD
Navigate right in menus/fast
forward audio playback
25 ZOOM OUT Reduce photo image size
13 Setting
Shortcut to Settings menu
26 PHOTO
Shortcut to Photo menu
•
POWER and CALENDAR functions are disabled on this model.
•
ZOOM IN/OUT are only available using the remote control.
Setting
View
1
2
3
4
5
6
7
8
9
10
11
12
13
14
15
16
17
18
19
20
21
22
23
24
25
26
Содержание DPX802
Страница 17: ......


