7.2. INSTALLATION
Installation
menu helps you to setup a
variety of parameters necessary for receiving
signal, and reset the channel data, etc.
When you select each submenu in
Installation
menu you may be asked to enter
your PIN code.
You can use submenus by entering it.
Push the MENU key to save it and return to
previous menu.
.
Mode
Network Search
Search Type
Move Motor
:
Auto – All TPs to be searched (recommended).
Manual – A specific TP to be searched.
:
Setting this on, unknown or new TPs to be searched.
:
Select kinds of channels to be searched.
:
drive your motor with checking the signal strength.
17
18
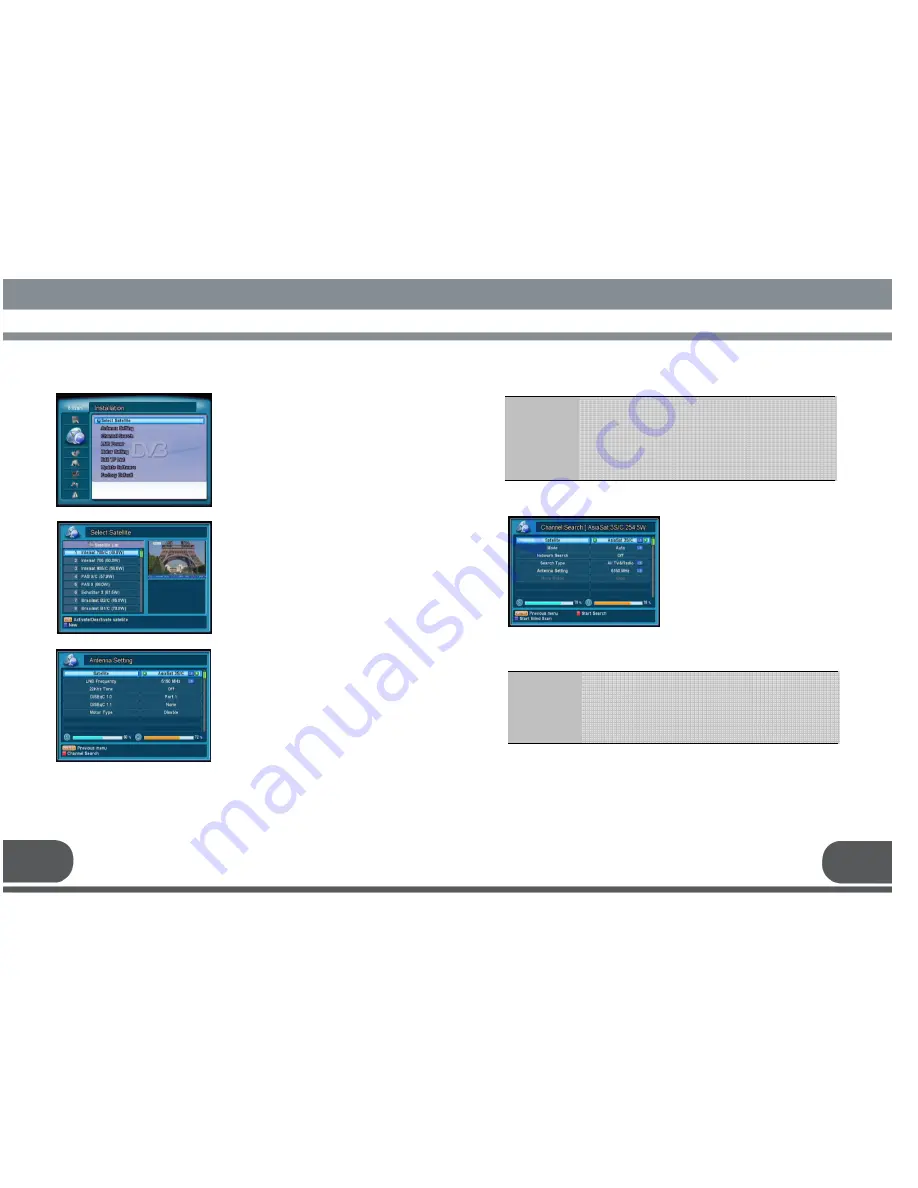
7.2.1. Select Satellite
Select
Select Satellite
menu in
Installation
menu.
Your receiver is provided with
preprogrammed information of transponders
for various satellites.
Select desired satellites to activate by using
the up/down keys (
▲·▼
) and OK key.
To deactivate satellites, push OK key again
on the selected satellite.
* Blue : Add new name of satellite
7.2.2. Antenna Setting
Select
Antenna Setting
menu in
Installation
menu.
Adjust the parameter at each submenu by
using the up/down (
▲·▼
) and the left/right
keys(
◀∙▶
) with checking the Quality and
Signal strength.
※
When OK icon available, push the OK key
to open the option list.
Satellite
LNB Frequency
22 KHz Tone
DiSEqC 1.0 &
DiSEqC 1.1
Motor Type
:
Select a Satellite to setup
:
Select a LNB Frequency.
:
Turn on or off the 22KHz Tone out.
:
Using DiSEqC 1.0 or 1.1 select a port number. Otherwise, select
None
:
Select either 1.2 / USALS / Disable
Select
Channel Search
menu in
Installation
.
Adjust the parameters at each sub menu by
using the up/down (
▲·▼
) and the left/right
keys(
◀∙▶
) with checking the Quality and
Signal strength.
After setting up all parameters, push Red key
to start searching channels
※
Caution: In case Signal and Quality bar is
colored in Grey, check the antenna
connection and parameters.
7.2.3. Channel Search
*Blue: Start Blind Scan
: Blind Scan search the channel when you don’t know the transponder information. That
scan procedure may take a few minutes.
After setting up all parameters, push Red key to go to next step.
※
Refer to the following description for each parameter.
Содержание VS PRO
Страница 1: ......
Страница 25: ...47 48 ...
Страница 26: ...49 50 13 WARRANTY CARD WARRANTY CARD WARRANTY CARD WARRANTY CARD WARRANTY CARD ...


