7
3.
Route the cable to terminals X11
and X13 on the PCB.
4.
Plug connectors X11 and X13 into
the PCB. Insert the strain relief.
5.
Connect the connector to the WiFi
module. Insert the WiFi module into
the control unit support from below.
6.
Close the control unit enclosure
and the Vitodens in reverse order –
see pages 4 and 5.
7.
Start up the WiFi module – see
page 11.
Installing the WiFi module in the Vitopend
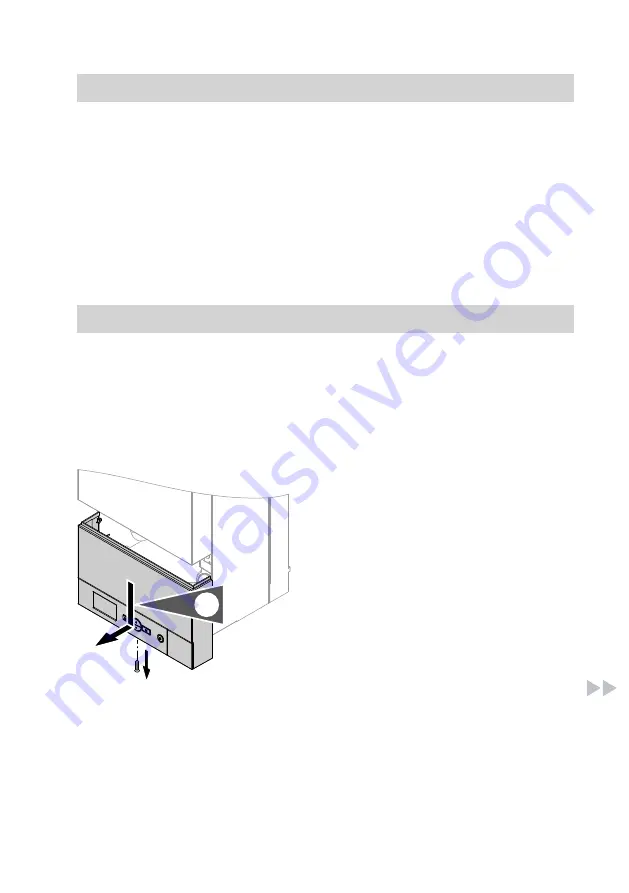
Opening the control unit enclosure
!
Please note
Electronic assemblies can be
damaged by electrostatic dis-
charge.
Prior to commencing any work,
touch earthed objects such as
heating or water pipes to dis-
charge static loads.
1.
1.
Undo the screw and push the con-
trol unit downwards.
Installing the WiFi module in the Vitodens
(cont.)
5838175
Содержание WiFi module
Страница 4: ...4 Opening the Vitodens 2x 2 1 Installing the WiFi module in the Vitodens 5838175 ...
Страница 19: ...19 5838175 ...


