


Page 4
Configuring the Account and Network Settings
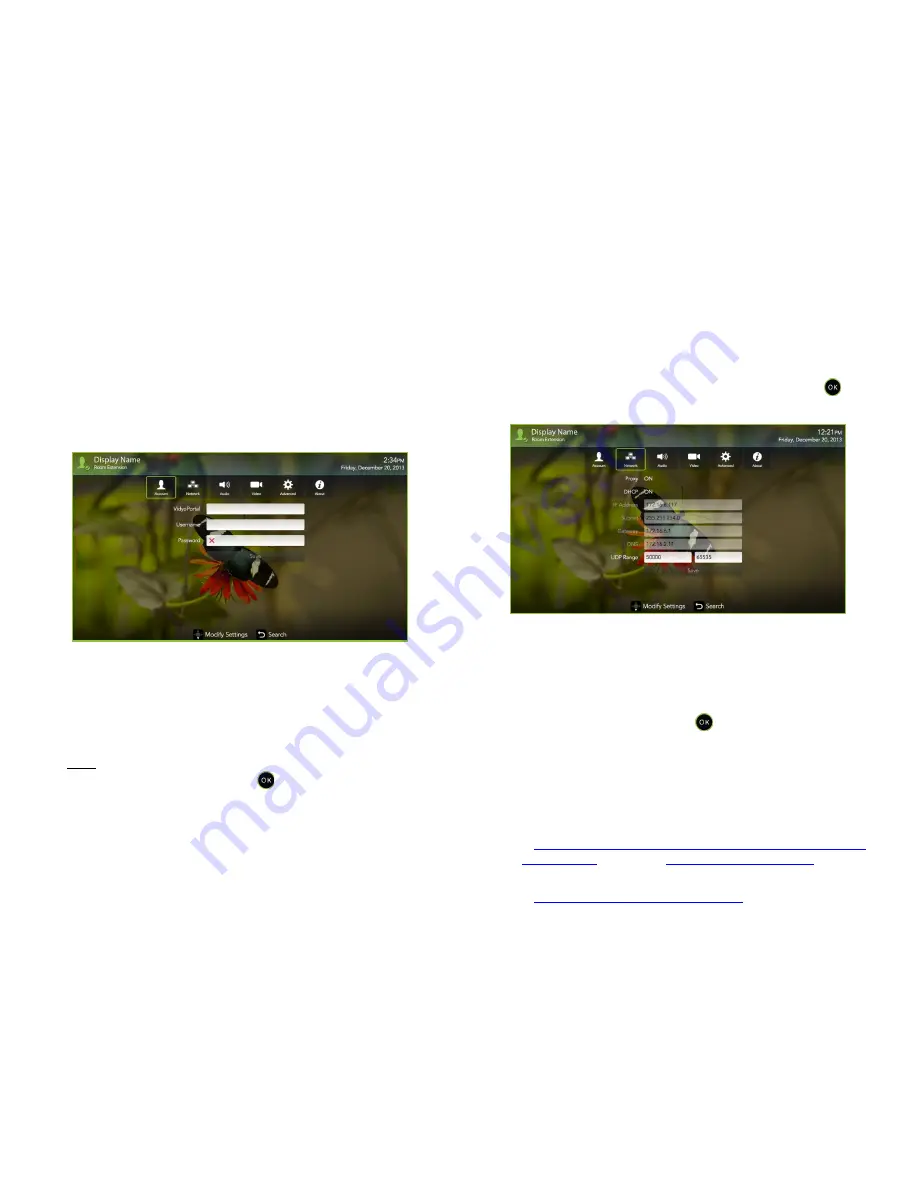
To configure the VidyoPortal™ account settings:
1.
When the VidyoRoom powers up, press the Settings button on the remote
control.
The Account screen displays the default IP address of your VidyoPortal as
well as the default user name and password that came with your
VidyoRoom. You must change these as described here.
2.
Navigate to the
Username
text box and use the Lucky Clover Keypad to
enter the name of the VidyoPortal.
3.
Navigate to the
Password
text box and use the Lucky Clover Keypad to
enter the password for the VidyoPortal.
4.
Navigate to the
VidyoPortal
text box and use the Lucky Clover Keypad to
enter the IP address or URL of the VidyoPortal. (You don’t have to enter
“http://”.)
5.
Navigate to the Save button and press
to save your settings.
To configure the network settings:
1.
Use the arrow buttons to navigate to the
Network
tab and press
.
The Network screen appears:
Your VidyoRoom is set to Use DHCP by default. This enables it to
automatically obtain its IP address.
2.
If you want to change your VidyoRoom network settings, press the down
arrow key to the DHCP field, then the right arrow key to turn DHCP OFF.
3.
Navigate to each text box, enter the appropriate network setting.
4.
Navigate to the Save button and press
to save your settings.
For complete information about how to configure your VidyoRoom, refer to the
VidyoRoom and VidyoPanorama 600 Administrator Guide
. For complete
information about how to use your VidyoRoom, refer to the
VidyoRoom and
VidyoPanorama 600 Quick User Guide.
To obtain user documentation and access other helpful resources, go
to
http://www.vidyo.com/services-support/technical-support/product-
documentation
or register at
selfservice.vidyo.com/register
.
To view a list of the various peripherals available with VidyoRoom, go
to
http://www.vidyo.com/support/peripherals.


