Videotree Videospa VSPA19LCD-AE1B Скачать руководство пользователя страница 6

INSTALLATION PROCEDURE 

1.  Using the cutout template, mark the area on the wall where the TV will be posi-

tioned.  Cut out this area.  Take care ensuring the cut is accurate to ensure the 
frame and the Backbox* ( if it’s installed) are not distorted when fitted.  

3.  Run  a  generous  amount  of  silicone  sealant  along 

the  back  of  the  lip  of  the  wall  frame.    Insert  the 
frame into the wall**.  It is extremely important the 
silicone completely fills the entire gap between wall 
and the frame.  Failure to do so will invalidate your 
guarantee and will null and void the manufacturer’s 

NOTE: 

*  If a Backbox is installed, please take into account the cables that are connected to the TV.  Give some 
space  to  let  the  cables  run  properly  without  any  damage.    Make  sure  that  the  cables  (power,  aerial, 
HDMI) are passed through the holes, before the box is fitted into the wall. 

**  It is the installer’s responsibility to ensure that the Videotree unit is installed and sealed correctly.  
Failure  to  do  so  will  invalidate  your  guarantee  and  will  null  and  void  the  manufacturer’s  12  month      
warranty from date of purchase. 

To  prevent  injury,  the  Videotree  unit  must  be  securely  attached  to  the  wall  in  accordance  with  the       
installation instructions. 

2.  Position the Backbox into the wall, it must fit against the wall edge.  Screw into 

position.  Fill in any gaps with grout, between the Backbox and wall, and leave to 
set before continuing. 

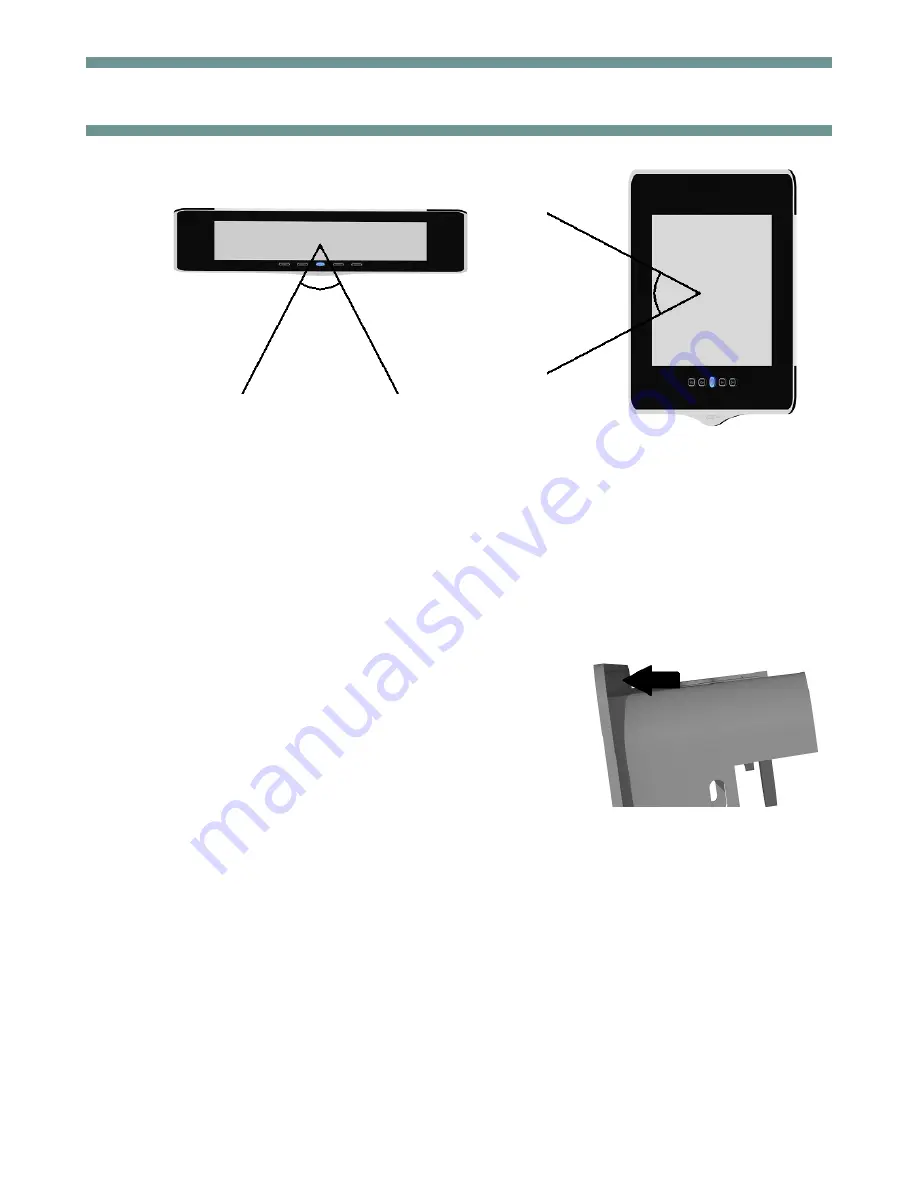
OPTIMAL VIEWING ANGLES


INSTALLATION


60° 

60° 

Содержание Videospa VSPA19LCD-AE1B

Страница 1: ...Widescreen Water Resistant Television Model No VSPA19LCD AE1B VSPA19LCD AE1M VSPA19LCD AE1W IMPORTANT Please read these instructions before installing and operating the unit Retain them for future ref...

Страница 2: ...The Box Installation Procedure Control Remotes Basic Connections Extended Connections Touch Control Settings TV Operation Technical Specifications Troubleshooting Appendix A RS232 Commands 2 CONTENTS...

Страница 3: ...age to the LCD Do not expose rear of the TV to water or moisture The TV is IP65 rated against water from the front only after it has been correctly installed See installation instructions for more inf...

Страница 4: ...aster Remote 1 x Wall Frame with Magnets 1 x Videospa TV 1 x Videospa Waterproof Remote 2 x AAA Batteries Master Remote Installation Backbox Battery inside the remote 1 x CR2332 Remove the safety tab...

Страница 5: ...Out L x 525mm D x 75mm H x 330mm INSTALLATION PROCEDURE Backbox Optional Cut Out L x 530mm D x 80mm H x 335mm Without Backbox With Backbox 5 The Backbox is essential for environments where the TV will...

Страница 6: ...ccount the cables that are connected to the TV Give some space to let the cables run properly without any damage Make sure that the cables power aerial HDMI are passed through the holes before the box...

Страница 7: ...available The frame must be fitted with at least one fixing hole in each corner Take care not to over tighten bend the frame Clean off the excess silicone sealant Leave to set before continuing instal...

Страница 8: ...LED Indicator Zoom N A 7 Red Green Yellow Blue Buttons Selection navigation and operation of various services Factory Reset Touch Beep POWER LED s Flashing control buttons the TV must be off STBY to c...

Страница 9: ...ERIAL SPEAKERS POWER R L HDMI SCART Aerial Input Output 9 BASIC CONNECTIONS CONNECTIONS RS232 POWER IN HDMI PC VGA SCART S VIDEO YPbPr COMPONENT AV AUDIO IN CI SLOT PC AUDIO HEADPHONE OUT AERIAL IN AV...

Страница 10: ...3 Rx 5 Ground RS232 Protocol Baud Rate 9600 bps Bits 8 Parity None Stop Bit 1 COMMAND SEQUENCE A0 F0 55 FF Code Check Sum Code Check Sum 100 Hex e g Turn On Code Checksum Complete Sequence E1 1F A0 F0...

Страница 11: ...All the LED s go off and after 2 seconds the standby LED s go on all red 1 2 3 4 5 6 7 Level 1 Touch control is disabled The touch will not respond to anything Level 2 Touch control is at its least s...

Страница 12: ...in standby Press the BLUE button on the MASTER remote 2 Scroll up or down with the arrow keys and save the changes with the OK button 3 All the LED s go off and after 2 seconds the standby LED s go o...

Страница 13: ...a channel select the channel scrolling up or down with the arrow keys Press the Red button twice 4 To Move a channel select the channel scrolling up or down with de arrow keys Press the Yellow button...

Страница 14: ...ll left or right until reaching the SOUND menu 3 Scroll with the arrow keys and save the changes with the OK button Some modes are predefined and cannot be modified 14 PICTURE SETTINGS TV OPERATION TI...

Страница 15: ...to be changed 15 TV OPERATION LOCK SETTINGS 1 Press LCD MENU button 2 Scroll left or right until reaching the LOCK menu 3 Scroll with the arrow keys and save the changes with the OK button 4 This menu...

Страница 16: ...Scroll with the arrow keys the move be tween channels and programmes 3 To retrieve information of a programme press the INFO button 4 To Schedule a programme scroll over the guide and press the Blue b...

Страница 17: ...RCA Yellow colour 1 PC RGB Format Up to 1360 768 60Hz 1920 1080 60Hz Colour 16bit 24bit 32bit Terminal Video VGA Sound PC Earphone input 1 HDMI Resolution 480i 480p 576i 576p 720p 1080i 1080p 1 SCART...

Страница 18: ...on Press the Mute button Volume is set too low Press the VOL button No Speaker is connected Check connection between TV and speaker No sound for PC input The audio cable is not connected correctly Ch...

Страница 19: ...2 EE 6 06 FA TTX 44 BC 7 07 F9 GUIDE 1C E4 8 08 F8 SUBTITLES 19 E7 9 09 F7 RED 16 EA 0 00 FF GREEN 17 E9 CH 1F E1 YELLOW 18 E8 CH 1E E2 BLUE 19 E7 VOL 58 A8 DISCREET ON E0 20 VOL 4B B5 DISCREET OFF E1...

Страница 20: ...856 382 Fax 44 0 1932 856 649 E mail sales videotree com ESC House South Road Weybridge Surrey KT13 9DZ Sales and Support Information com Please make a note of the model and serial numbers Model Numbe...

Отзывы: