


6
4. OSD Setup
All features and functions of this camera can be set or changed via its OSD
control. The OSD setup can be done via control buttons on the rear panel of
the camera, CP-01 (optional) remote control keypad or RS-232 remote
control facility from computer.
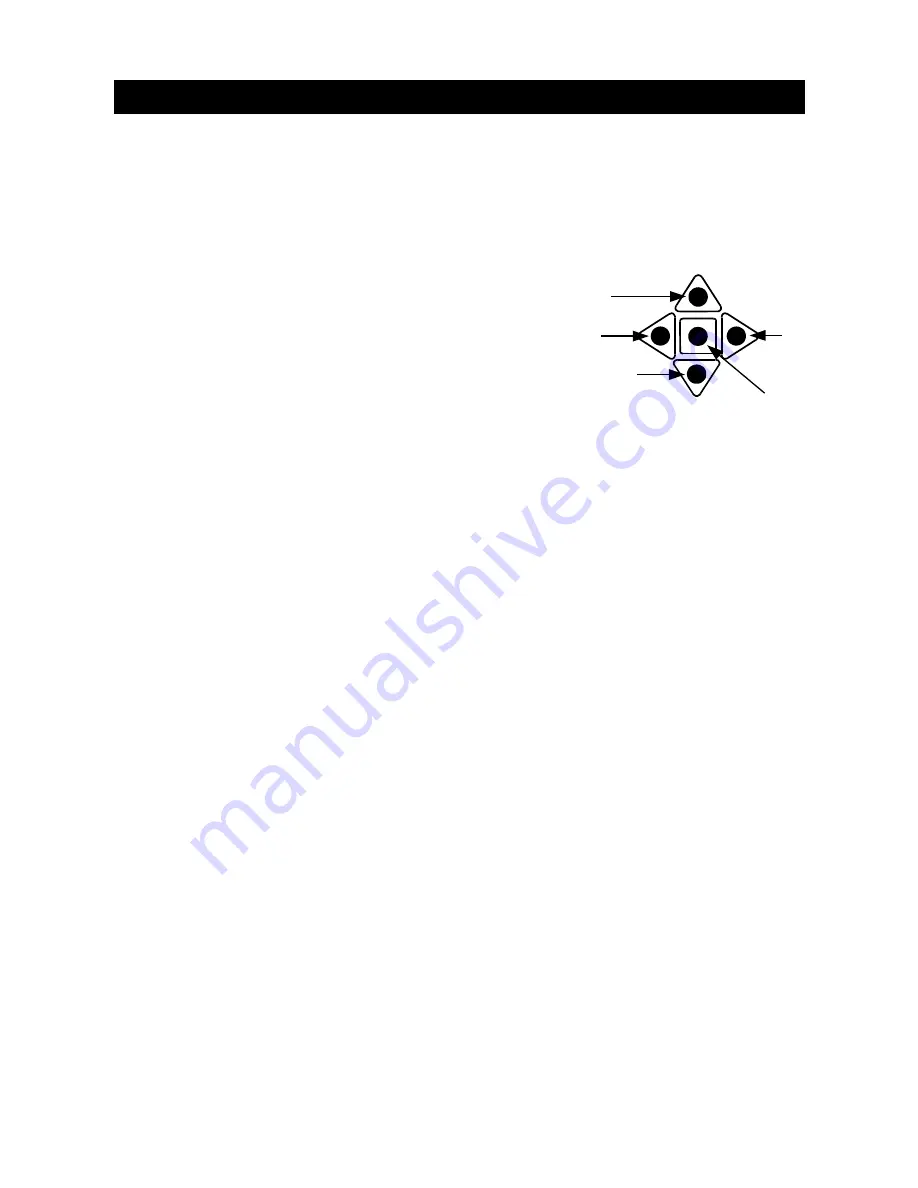
4.1 OSD Control Buttons
1.
UP
button
Press this button to move the cursor upward.
Use this button to select item.
2.
LEFT
button
Press this button to move the cursor left.
Use this button to change or adjust the
parameter of the selected item.
3.
RIGHT
button
Press this button to move the cursor right. Use this button to change or
adjust the parameter of the selected item.
4.
DOWN
button
Press this button to move the cursor downward. Use this button to select
item.
5.
ENTER
button
Press this button to access into OSD setup menu. If the selected item
has sub-menu, press this button to enter.
4.2 CP-01 Remote Controller
Connect the CP-01 OSD Remote Controller to the COM PORT of the camera,
All functions of this camera can be set via this remote controller. The
operation of CP-01 is same as the key buttons of camera.
4.3 RS-232 Computer connection
All functions of this camera can be remotely controlled by PC via RS-232
under Window 95/98.
1. Insert the attached disk into floppy and run OSD_0.EXE to extract all files
into hard disk.
2. Execute OSD_00.EXE. A virtue keypad icon will display on monitor.
3. Use the mouse to point the icons as like pressing the buttons.
For details of RS-232 connections, please enter the SETUP key on the
monitor.
OSD CONTROL
1
2
4
3
5
U
LER
D


