PIX-E5 & PIX-E5H
Quick Start Guide
6. Attach and Format Storage
PIX-E monitors can accept a SpeedDrive and a high-capacity SD memory card. Both PIX-E5 and PIX-E5H
write Apple ProRes video files to SpeedDrive media. The SpeedDrive and/or the SD card may be used
to save and load custom settings.
Note: The drive(s) must be formatted by the PIX-E5 or PIX-E5H before using with the monitor.
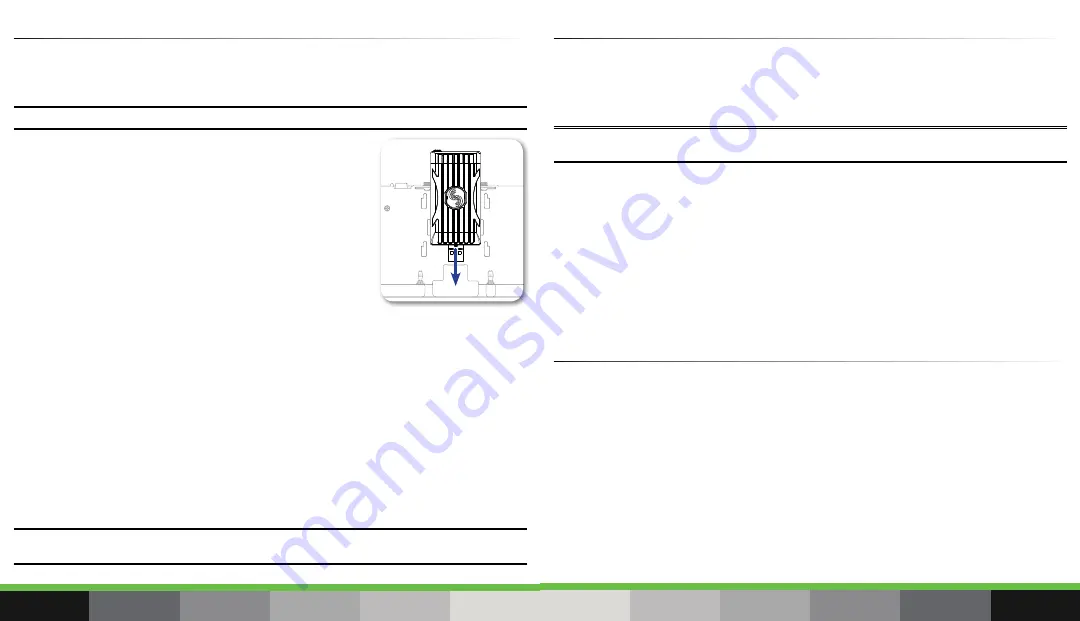
To attach a SpeedDrive:
1.
Position the SpeedDrive so that the USB plug lines up to the USB
connector on the back of the monitor.
2. Depress the spring-loaded retainer clip and slide the SpeedDrive
into the USB connector. The retainer clip will spring up with a click
to let you know when the SpeedDrive is secure.
To install an SD card:
▶
Slide the SD card into the SD Memory Card slot on the right panel
of the monitor.
To format a drive:
1.
Connect the drive to be formatted; ensure the SD card is inserted or the SpeedDrive is attached.
2.
Press the MENU button.
3.
Turn and press the Control knob to select Recorder & Drives > Erase/Re-format Drive.
4.
Turn and press the Control knob to select the sub-option associated with the drive you want to format.
Sub-options include: SpeedDrive, SD Card, or Both drives.
5.
A cautionary confirmation dialog will appear on screen asking if you want to continue.
Turn and press the Control knob to select Yes to continue. An on-screen keyboard appears.
6.
Either accept the default volume name (PIX-E) or use the keyboard to enter a new volume name.
7.
Select OK to continue.
Note: The SpeedDrive is an enclosure for non-proprietary mSATA SSDs, which may be purchased separately in sizes
from 128 GB to 1 TB. Visit www.videodevices.com/support/approved-media for a list of approved media.
7. Recording and Playback
PIX-E monitors record edit-ready Apple ProRes QuickTime (.mov) files to SpeedDrive mSATA SSD media.
To begin recording:
▶
Press the Record (REC) soft key button.
Note: If the transport controls (REC, STOP, PLAY) are not visible, press ALT to switch the soft keys to their alternative
functionality.
While recording, the REC soft key label appears red as does the timecode in the Information bar. Also,
the LED on the SpeedDrive illuminates amber while files are being written to the drive.
⚠
Do not remove the SpeedDrive while its LED is illuminated.
To play recorded video files:
1.
Press the Files soft key button and use the Control knob to select a file.
2. Press the Play soft key button. While playing, the Play soft key button switches to Pause. You can
also press the Stop soft key button to stop playback.
8. Using the Monitoring Tools
To activate a monitoring tool:
▶
Press the soft key button for the chosen monitoring tool, such as PEAK for peaking. Each soft key
label appears green when the monitoring tool is activated.
Each monitoring tool has settings associated with it, which may be viewed and adjusted via a menu
that appears superimposed over the image and covers only the lower portion of the screen.
To view or adjust a monitoring tool’s settings:
1.
Press and hold the soft key button associated with the monitoring tool.
2. Use the touch screen or Control knob to select and modify settings accordingly.
8
9


